This is Step 3 of 3 // Return to Step 1
Your Arrow, paired device, and application are all set up. To complete the setup:
- Mount Arrow in the receiver bracket
- Attach receiver bracket to range pole clamp
- Assemble the range pole
- Secure clamp on range pole
- Assemble and mount antenna/plate
- Connect Arrow & antenna
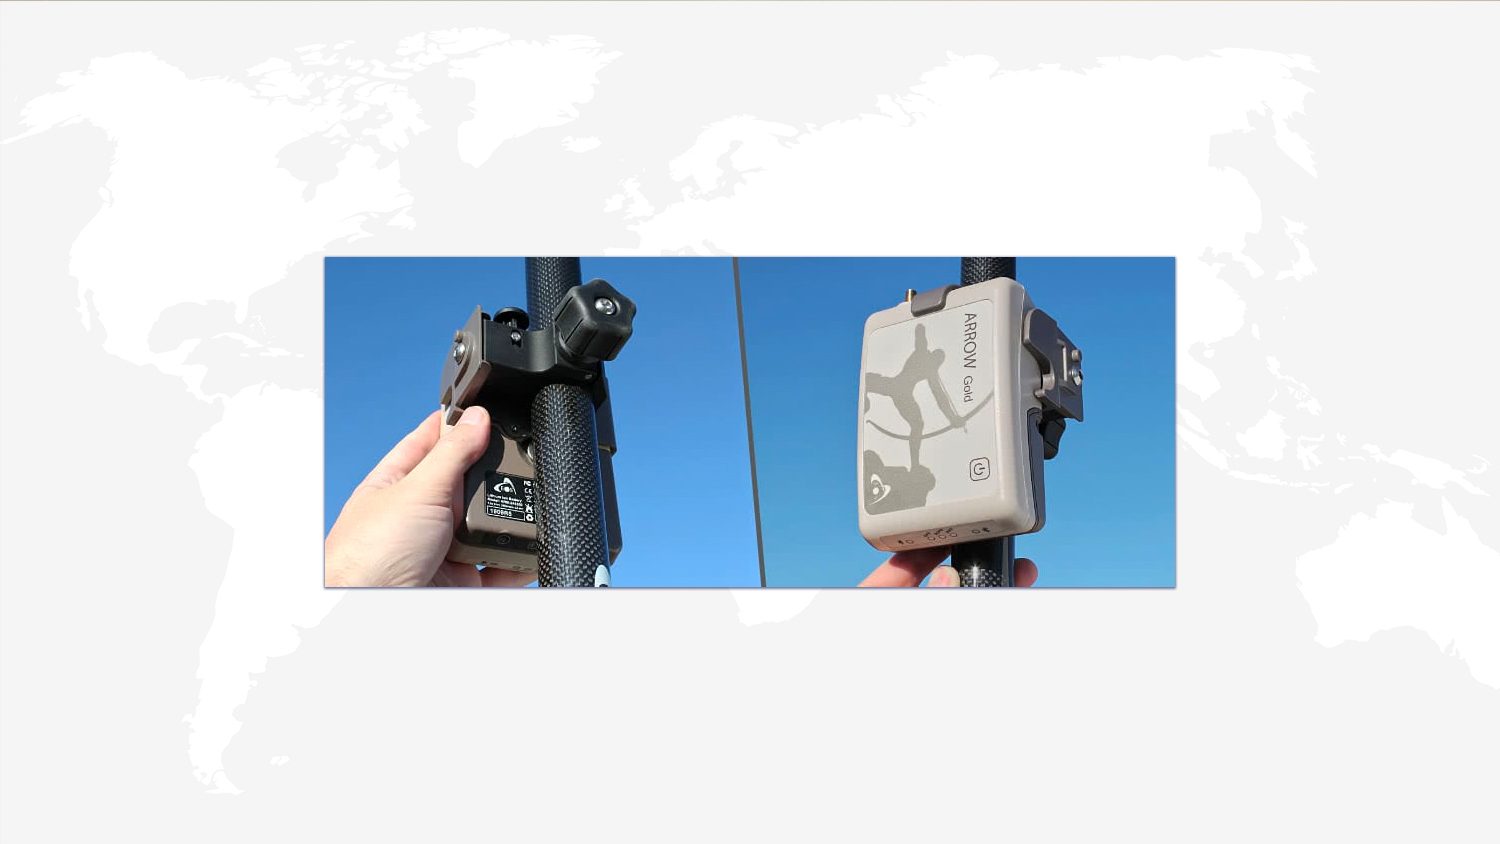
A. Mount Arrow in the Receiver Bracket
Grasp the receiver bracket, and make sure that the two small securing screws are backed out as far as they can go, while still being connected to the bracket. Hold the bracket facing you in once hand, with the curved clip designed to grasp the end of the receiver at the top.
![]()
Place the Arrow unit into the bracket, with the face toward you, and the end with the gold screw connector (antenna connector) sliding under the clip. When the Arrow is fully inserted, it should click into the bracket.
Next, flip the bracket over so that you can see the small mounting screws. Tighten the screws until snug.
B. Attach Receiver Bracket to Range Pole Clamp
Still holding the Arrow and bracket, pick up the range pole clamp, with the knurled knob facing you. Orient the clamp so that the end with the mounting peg hole is matched to the silver mounting peg.
![]()
Using a finger, press the large button next to the mounting peg hole, enabling it to receive the mounting peg. Finally, insert the bracket’s silver mounting peg fully into the clamp’s hole, and release the button to secure.
Your Arrow and mounting assembly are now ready for attaching to the range pole.
C. Assemble the Range Pole
Screw together the bungee-connected range pole sections. Make sure the pointy foot attachment is screwed onto the threaded end opposite the section with the Eos logo.
![]()
While standing, hold the range pole upright in front of you, with the foot securely on the ground.
D. Secure Clamp on Range Pole
Holding the range pole with one hand, slip the Arrow’s clamp down over the top of the pole. The threaded antenna mount end of the Arrow should be oriented toward the top of the pole.
![]()
Taking the hand from the range pole, tighten the knurled knob to snug the clamp so that the top of the Arrow unit is about 15 cm from the top of the pole.
E. Assemble and Mount Antenna/Plate
Take the antenna in your hand, mounting holes facing you, and the gold screw connector pointing toward your body. With the other hand, grasp the antenna plate similarly, with the flat side facing you, and the elongated end toward your body. Now bring the plate over, laying the flat face onto the antenna, looking to line up the holes on both items. With the hand holding the antenna, grasp the plate as well, to snug them together.
Using the 4 provided mounting screws, line up plate and antenna, and secure the screws so plate and antenna are snug.
![]()
Flip the antenna assembly over, and bring the central screw hole down onto the threaded top of the range pole, screwing the two together.
At this point, you may want to readjust the orientation of the Arrow unit so that the gold screw connector is more in line with the matching connector on the antenna.
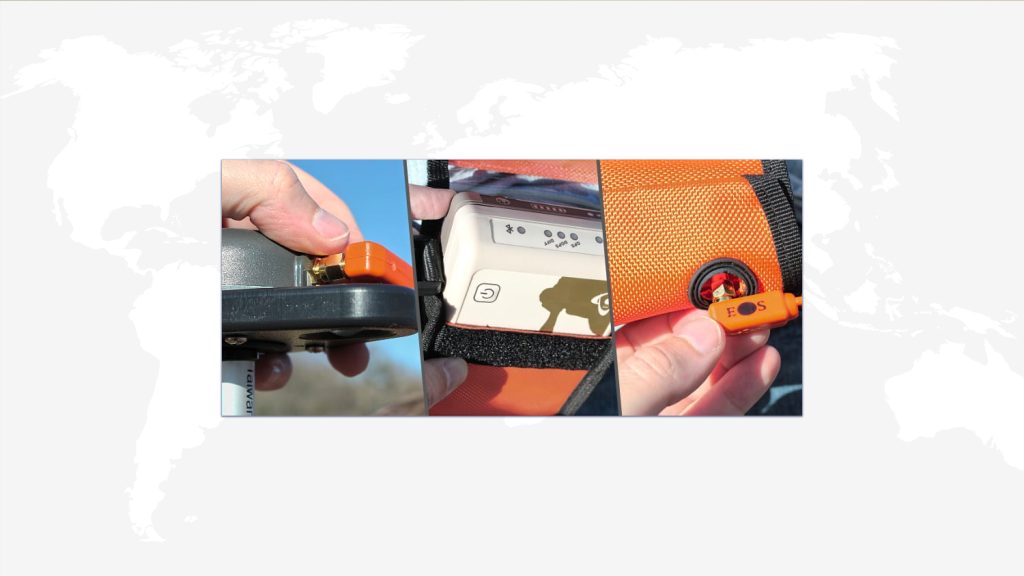
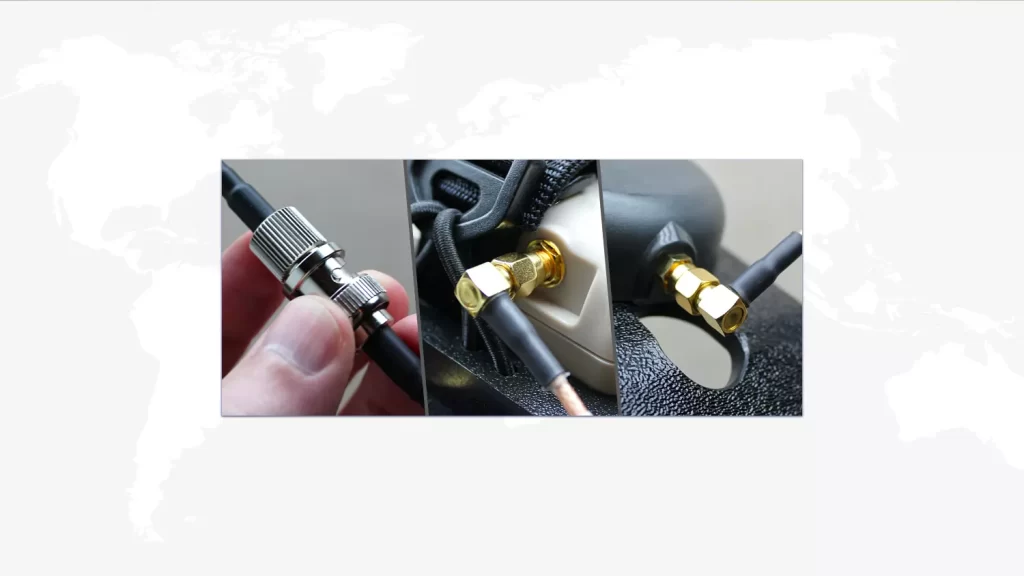
F. Connect Arrow & Antenna
Note the connectors on the ends of the two sections of antenna connection cable:
- Right-angle connectors for attaching to Arrow unit & antenna
- BNC connectors for connecting the two cable sections
Take the BNC (no right-angle) connectors in each hand, and note the small metal pins on either side of one, which match the slots on the other. Slip one into the other and screw down until it secures with a click.
![]()
Now slip one of the right angle connectors up next to the elongated end of the antenna plate, and screw it onto the antenna connector. Take the other right angle connector, and screw it onto the gold connector on the end of the Arrow unit.
The Arrow can now connect with the satellites, and you should now see submeter location data coming into your Eos Tools Pro app once you bring it back up.
IN ORDER TO COLLECT DATA, YOU MUST USE AND CONNECT WITH THIRD PARTY DATA COLLECTION SOFTWARE:
Install Data Collection Application
In almost all cases, Eos customers will also install a third-party application to handle field workflows, such as data collection or inspections. Eos partners with a variety of industry-leading companies (e.g., Esri) to recommend software products that already integrate with Arrow GNSS receivers and their location metadata. Explore our partner directory for apps we recommend. In addition, if you have a proprietary application and you would like it to be compatible with Arrow GNSS, simply contact our team for next steps.
Having trouble? Contact Technical Support >
Explore Related Knowledge Base Items
Mount & Antenna: Vest & Pole
This is step 3 of 3: How to mount your receiver & antenna with vest and pole. Recommended for submeter Arrow GNSS receivers (100, 100+, Lite).
Mount & Antenna: Hand Bracket
This is step 3 of 3: How to mount your receiver & antenna with hand bracket. Recommended for submeter Arrow GNSS receivers (100, 100+, Lite).