This is Step 3 of 3 // Return to Step 1
Your Arrow, paired device, and application are all set up. To complete the setup:
- Mount Arrow in the handheld bracket
- Connect Arrow & antenna
- Mount your device
A. Mount Arrow in the Handheld Bracket
Place your handheld bracket on a stable surface, and unfasten the hand strap by drawing back the velcro until it disconnects. Pull the inner portion of the hand strap out, to create a gap between it and the mounting strap underneath it.
Reach under the hand strap and unfasten the mounting strap by drawing back the velcro until it disconnects. Pull the inner portion of the mounting strap out so that you now have room to slip the Arrow unit underneath.
Place the Arrow unit into the mount under the straps, with the gold screw connector (antenna mount) toward the end where the antenna is. Once the Arrow is in place, cinch down and refasten the velcro end of the mounting strap snugly. The Arrow should be secure.
![]()
Next, flip the bracket over so that the antenna side is facing you. Grasp the bracket + Arrow with your hand, slipping your fingers under the hand strap, and cinch down and refasten the velcro end of the hand strap with your other hand.
Holding the bracket in this way points the directional antenna skyward, which is necessary to connect with the satellites. Note that you must also be outside to properly connect.
B. Connect Arrow & Antenna
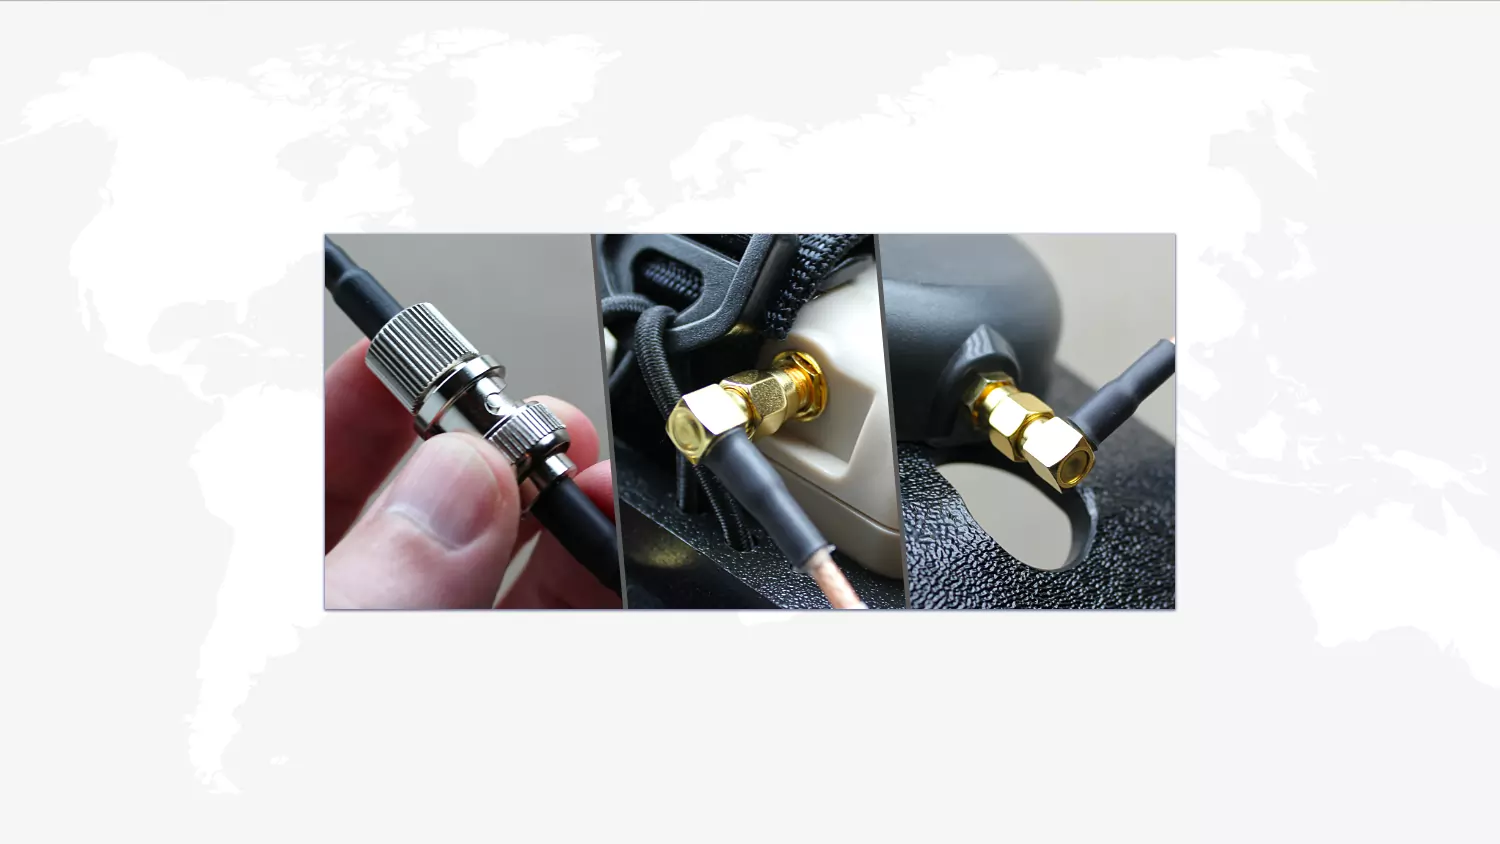
Note the connectors on the ends of the two sections of antenna connection cable:
- Right-angle connectors for attaching to Arrow unit & antenna
- BNC connectors for connecting the two cable sections
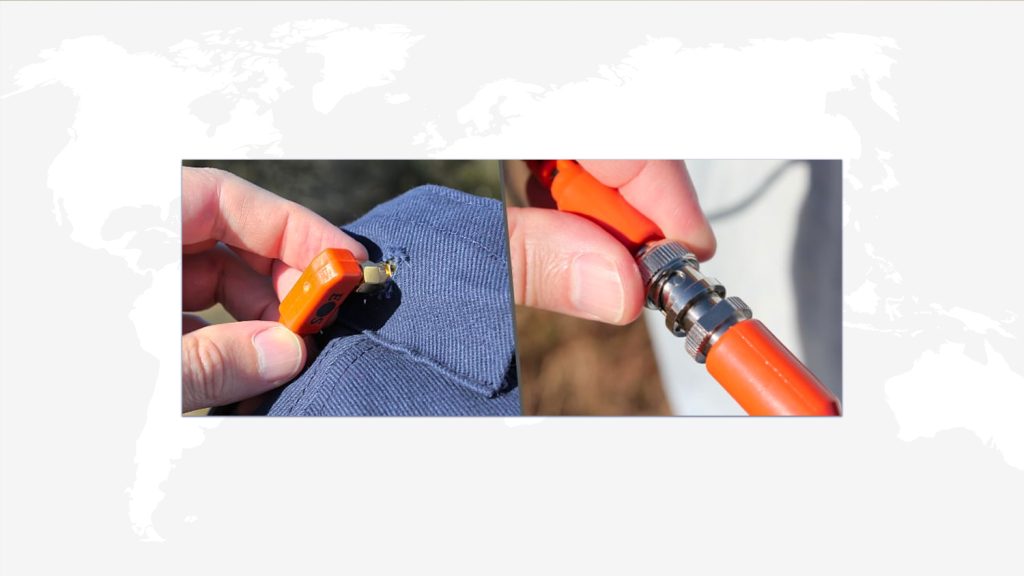
Take the BNC (no right-angle) connectors in each hand, and note the small metal pins on either side of one, which match the slots on the other. Slip one into the other and screw down until it secures with a click.
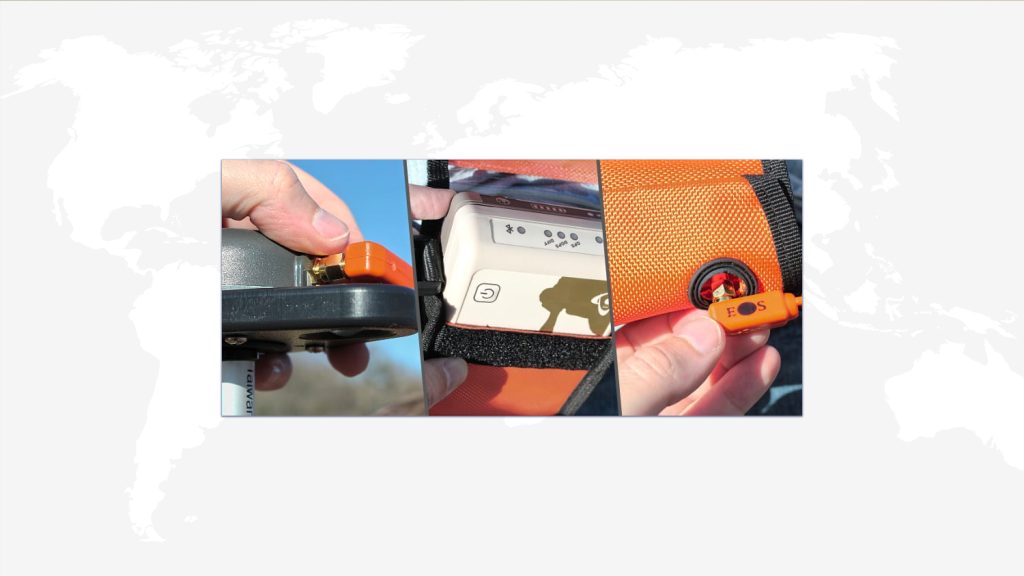
Now take one of the right angle connectors, and screw it onto the gold connector on the end of the Arrow unit. Attach the other end to the similar connector on the antenna.
![]()
The Arrow can now connect with the satellites, and you should now see submeter location data coming into your Eos Tools Pro app once you bring it back up.
C. Mount Your Device
Holding the entire assembly securely, insert your mobile device into the spring-loaded mount on the side now facing you. Push back on the top portion to expand, slip the device in, and let the spring action snug it into place.
This completes the initial steps of making sure that all of the foundational elements are in place, and the Arrow is delivering real-time data to your application.
IN ORDER TO COLLECT DATA, YOU MUST USE AND CONNECT WITH THIRD PARTY DATA COLLECTION SOFTWARE:
Install Data Collection Application
In almost all cases, Eos customers will also install a third-party application to handle field workflows, such as data collection or inspections. Eos partners with a variety of industry-leading companies (e.g., Esri) to recommend software products that already integrate with Arrow GNSS receivers and their location metadata. Explore our partner directory for apps we recommend. In addition, if you have a proprietary application and you would like it to be compatible with Arrow GNSS, simply contact our team for next steps.
Having trouble? Contact Technical Support >
Explore Related Knowledge Base Items
Mount & Antenna: Vest & Pole
This is step 3 of 3: How to mount your receiver & antenna with vest and pole. Recommended for submeter Arrow GNSS receivers (100, 100+, Lite).
Mount & Antenna: Antenna Hat
This is step 3 of 3: How to mount your receiver & antenna with antenna hat/pouch for use with submeter Arrow GNSS receivers (100, 100+, Lite).