When you install ArcGIS® Field Maps on your iOS® device and start the app, it will be using the integrated GPS receiver from the iOS device by default. The positioning accuracy from this integrated GPS is not acceptable for many GIS data collection applications. This article will demonstrate how to set your Eos GNSS receiver as the location provider in Field Maps. Follow these quick steps below to get started.
Please note this article was published in October 2023. These instructions refer to ArcGIS Field Maps app version 23.2.30 (build 1019) and the screenshot images are exclusively from this version. The steps are the same or similar in previous versions of Field Maps. If you have any trouble following these steps, please contact our technical support team. Additionally, the device shown in these screenshots is a 9th generation iPad® (iPadOS® 16.3.1).
Before proceeding, make sure you have Bluetooth® paired your Eos GNSS receiver with your iOS device.
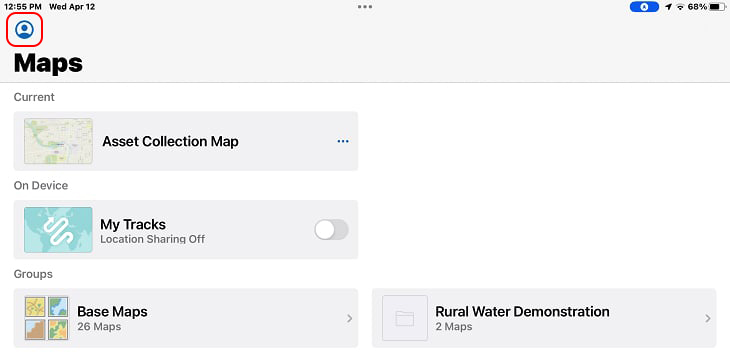
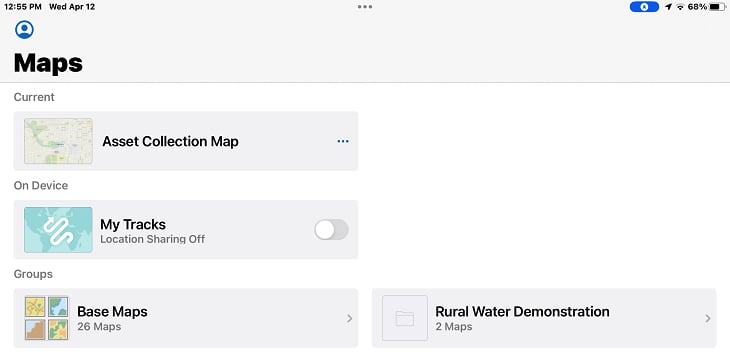
Open Field Maps on your iOS device and select the profile menu icon, located in the top left corner of the window:
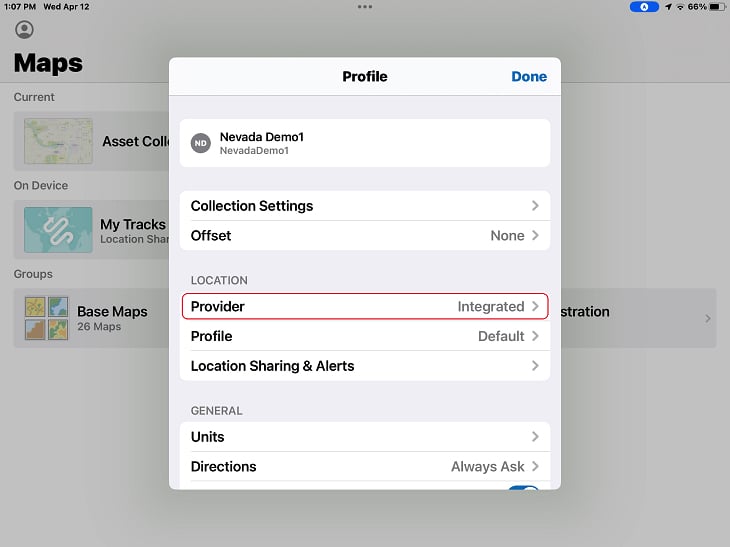
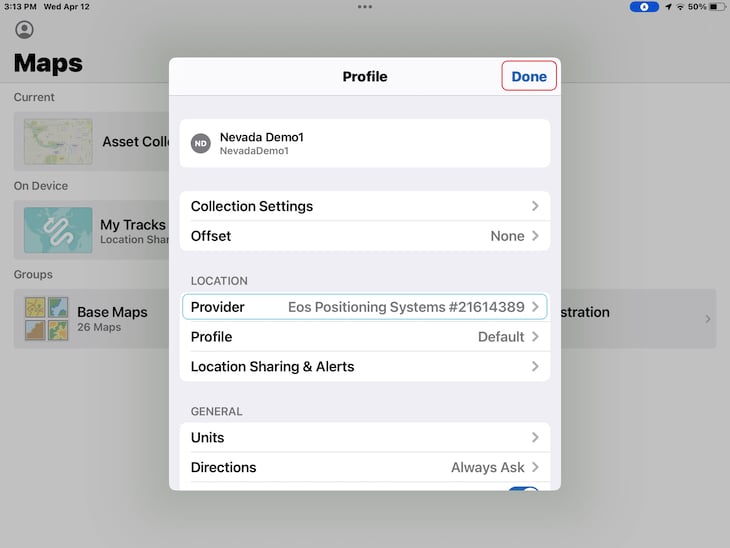
Under the “Location” section find the “Provider” section. Yours will probably default to an “Integrated” location provider, indicating the mobile device is using its own integrated GPS. We are going to change this to an Eos GNSS receiver in the next steps. Tap on “Provider” to proceed.
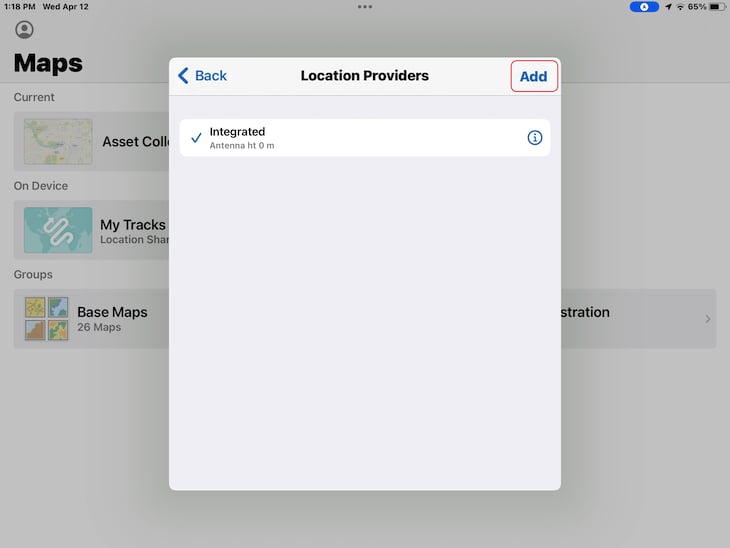
Next click the “Add” button to select a new location provider to the app.
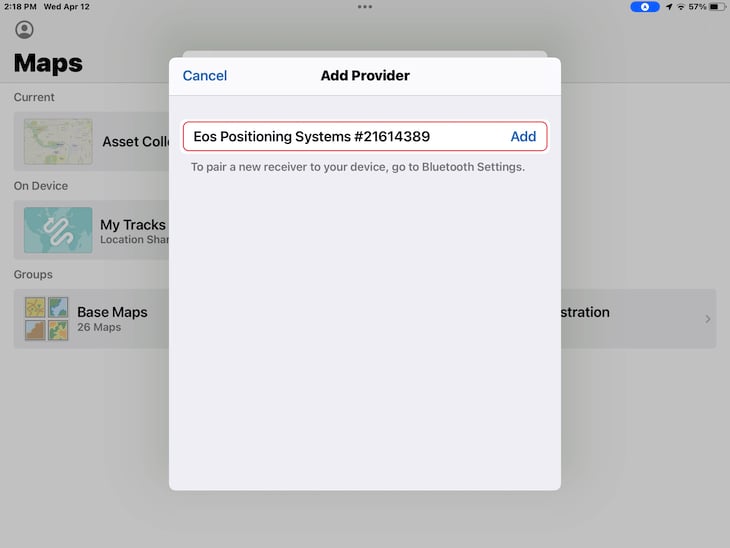
You will see the Eos GNSS receiver, referenced by the company name “Eos Positioning Systems” followed by the receiver’s unique eight-digit serial number. In our example, this looks like this: Eos Positioning Systems #21614389. If you do not see your Eos GNSS receiver listed, it is possible that your receiver is not currently Bluetooth paired to your mobile device. You’ll want to pair the receiver to your mobile device and return to these steps to continue. To do that, navigate to your iPad’s Bluetooth settings and pair the receiver; if the receiver does not show up in your list of Bluetooth devices, check that it is not already paired to another device.
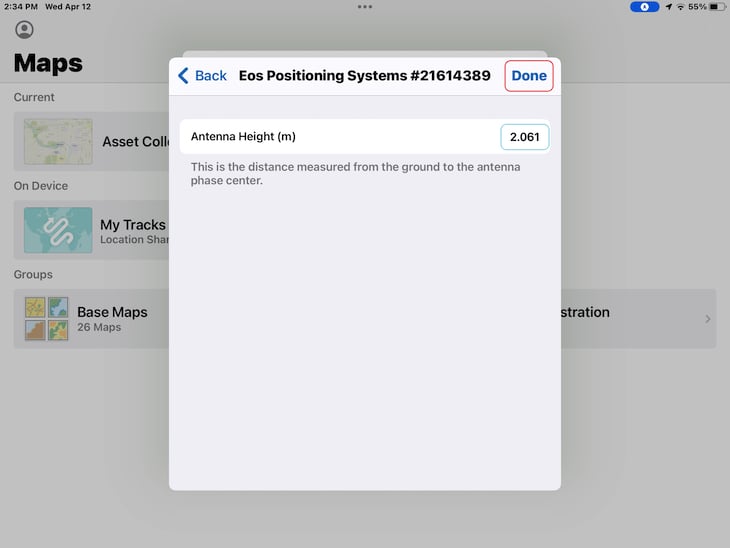
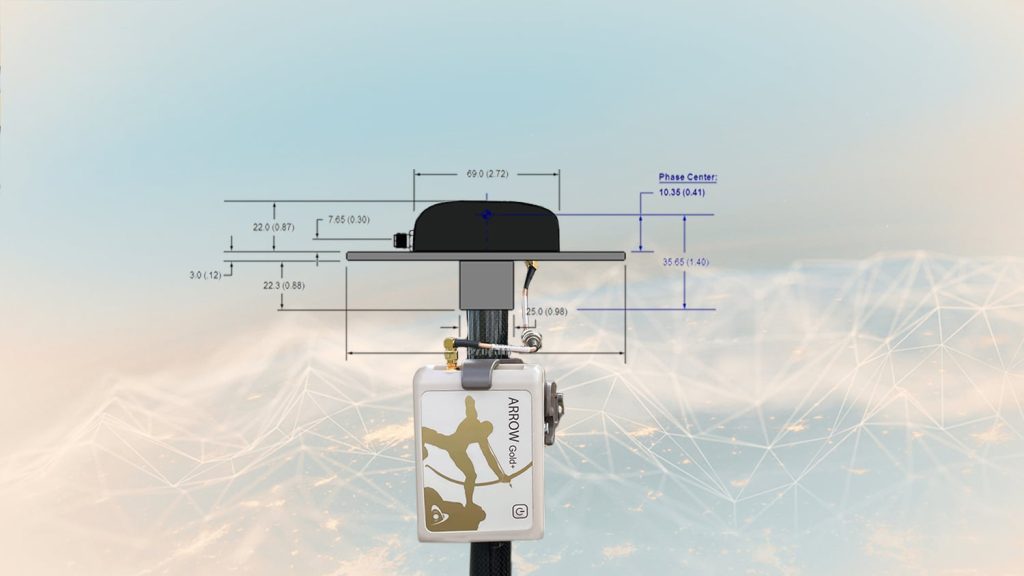
Next you will be asked to enter the antenna height in meters. This value represents the distance from the ground (usually the tip of your range pole) to the Eos GNSS antenna (more specifically, the antenna’s phase center). This value is important if you are using RTK corrections services and if elevations are important in your work. If this is not the case, then you can leave this field blank. (For instance, if your receiver and antenna are using a handheld, backpack, or vest configuration, you would leave antenna height as zero because the total antenna height can vary.) However, if you are using your receiver on a range pole with RTK corrections, then you will need to enter the appropriate antenna height. To calculate your total antenna height, follow the instructions in these articles:
Once you have entered the appropriate antenna height (or skipped this step if not relevant), select “Done” in the top right corner.
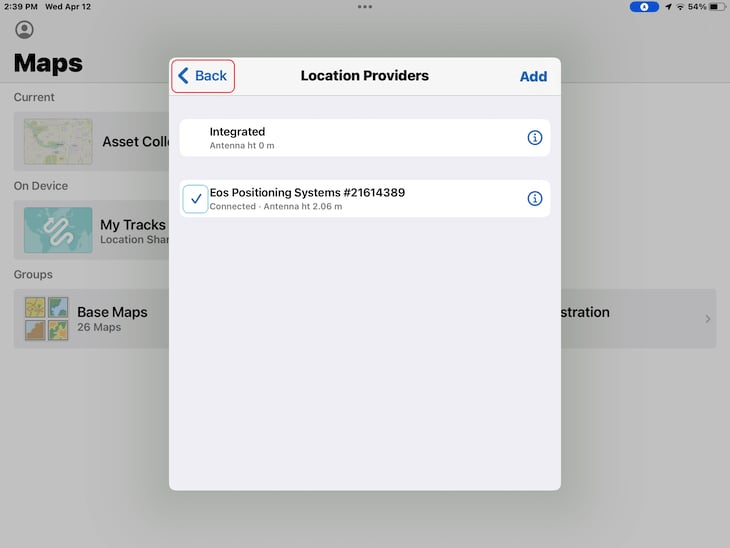
Now that you have successfully added your Eos GNSS receiver as a “Location Providers” option, you should be able to select it from the list of “Location Providers” in Field Maps. Make sure to select the new location provider before tapping “Back” in the top left corner. You’ll know that the Eos GNSS receiver is selected if a blue checkmark appears next to “Eos Positioning Systems #21614389” (or your unique serial number). If this is selected, press the “Back” button to return to the profile menu.
Still within Field Maps, your “Profile” menu should now indicate that your location provider has been successfully changed to the Eos GNSS receiver. Select “Done” to return to the “Maps” list.
As a last step, let’s open an existing map from the “Maps” list in Field Maps. This will allow us a final verification that Field Maps is receiving location information from the Eos GNSS receiver rather than the integrated iOS GPS.
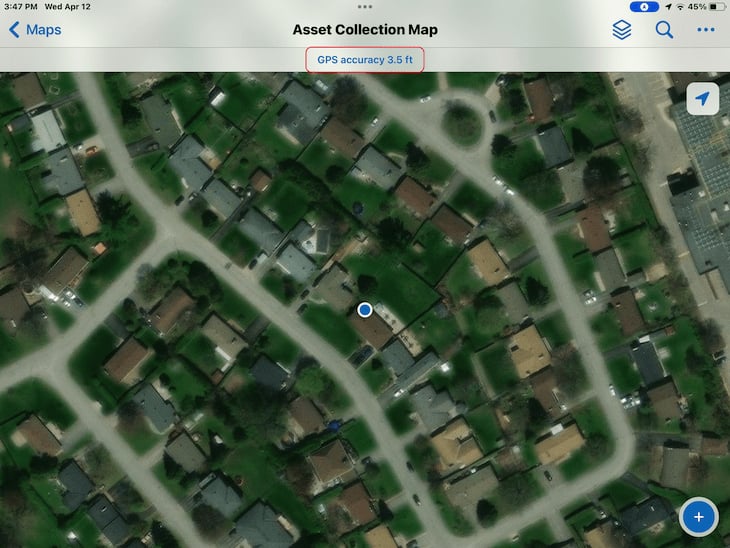
With the map of your choice launched, confirm that the Eos GNSS receiver is connected by tapping the GPS details. These should be visible at the center top of your map view. In our screenshot, you’ll see the GPS details as “GPS accuracy 3.5 ft.” Tap these details.
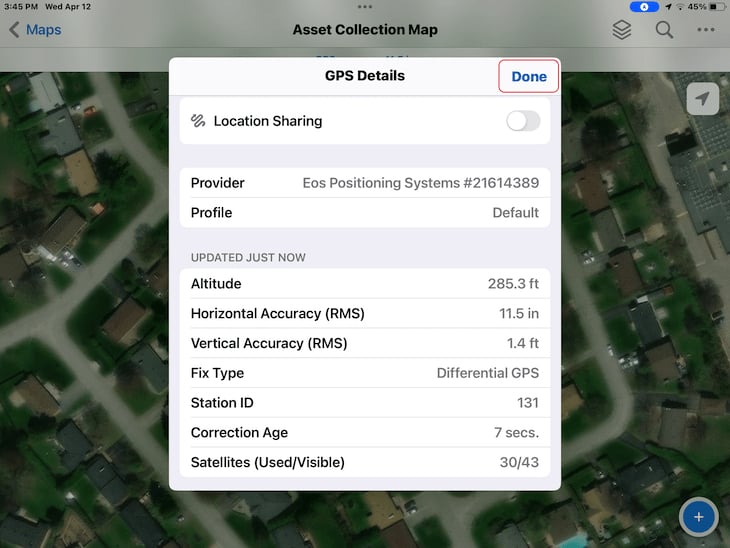
This will launch a “GPS Details” window that provides more information about the positioning data being consumed by Field Maps. In our case, because we have selected the Eos GNSS receiver as our location provider, we can see the GNSS metadata from the receiver. GNSS metadata includes our estimated horizontal accuracy as “Horizontal Accuracy (RMS),” our estimated vertical accuracy as “Vertical Accuracy (RMS),” the type of corrections service we are using as “Fix Type,” and many other valuable fields. This is great news. Having verified that Field Maps is using the Eos GNSS receiver as its location provider, select “Done” to exit the “GPS Details” pane.
Additional Useful Resources
For additional help on configuring an Eos GNSS receiver for high-accuracy data collection with ArcGIS Field Maps, we encourage you to check out the Eos Knowledge Base. A popular article for professionals who have set an Eos GNSS receiver as their location provider in field maps is Configuring Location Profiles in ArcGIS Field Maps for iOS. Location profiles will allow you to configure on- the-fly datum transformations; this is important as datum transformations will serve to convert your location information from the datum of your corrections service (e.g., RTK, SBAS) into the datum used by your Esri maps. Our knowledge base is full of written and video tutorials that explain how to use our GNSS products and related partner technologies.


