Introduction:
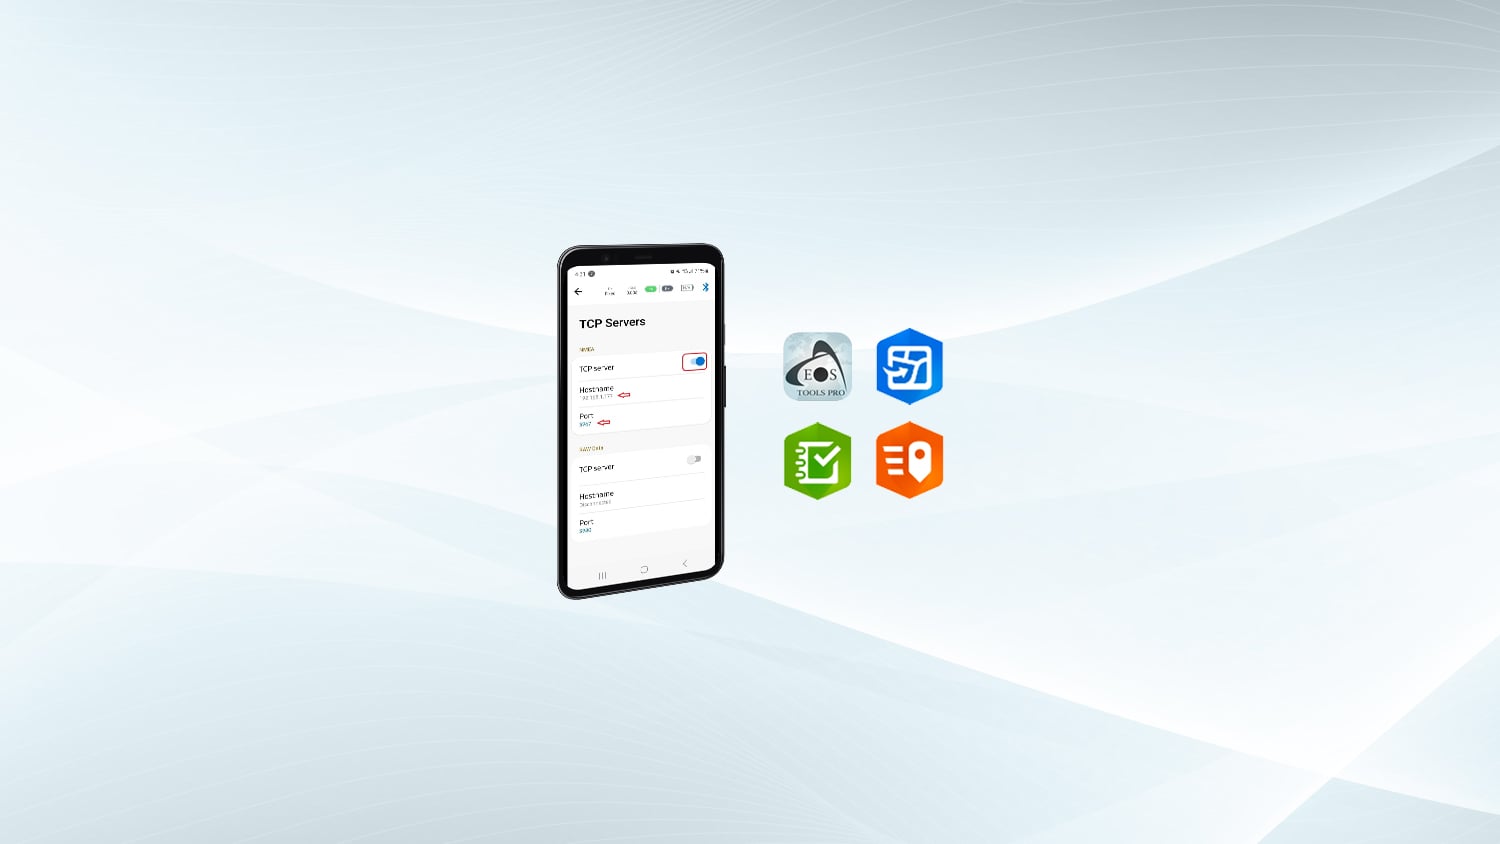
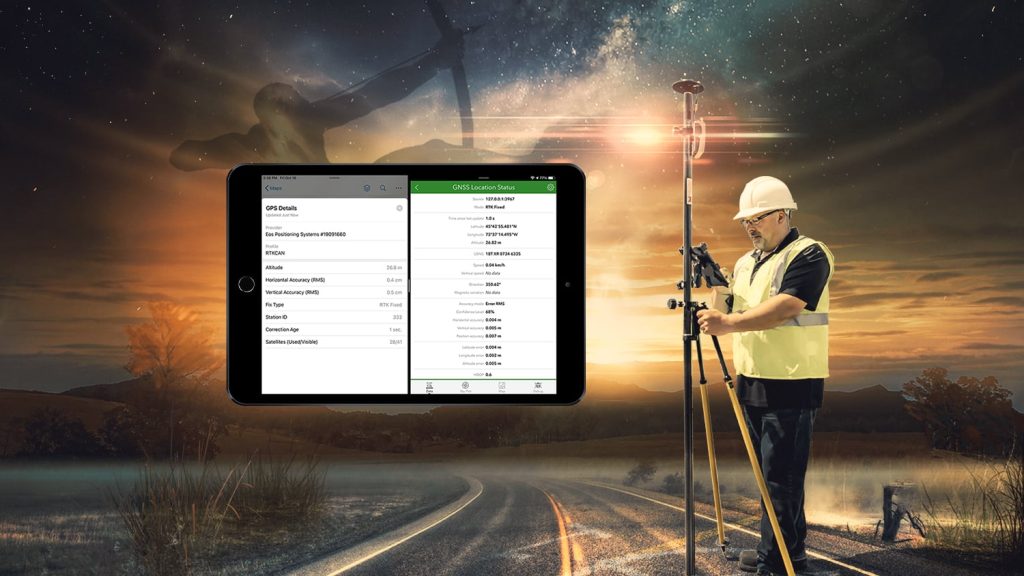
In this article, you will learn how to consume the location data of your Arrow Series® GNSS receiver concurrently with multiple Esri ArcGIS mobile apps, on any Android device. This is achieved by using the new built-in TCP server feature of Eos Tools Pro. With this feature, Esri mobile data-collection apps (e.g., ArcGIS Field Maps, along with ArcGIS Survey123 and ArcGIS QuickCapture) can operate at the same time, on the same device, using location data from the same single Arrow GNSS receiver. You will also be guided through setting up and utilizing “Mock Location” on your Android device.
To perform the steps outlined in this guide to set up concurrent app usage, you must have Eos Tools Pro running on your Android tablet or phone.
Minimum technology requirements
You will need the following hardware devices:
- Eos GNSS Receiver (any model)
- Android smartphone or tablet
You will need the latest Android versions of the following apps:
- Eos Tools Pro – Download Eos Tools Pro from Google Play
- ArcGIS Survey123 – Download Survey123 from Google Play
- ArcGIS QuickCapture – Download QuickCapture from Google Play
- ArcGIS Field Maps – Download Field Maps from Google Play
Final note: The screenshots in this guide were taken on a Samsung Galaxy S20 FE 5G smartphone. The same steps will apply to all other Android devices.
There are a couple key concepts we would like to discuss before beginning the setup …
Important Concepts Before Beginning
Concept #1: Location Provider in Esri Mobile Apps
First, please make a note about the Location Provider differences with various Esri mobile apps. For instance: Survey123 and QuickCapture both feature a TCP client option within their Location Provider settings. However, Field Maps does not currently offer this option. Therefore, in the procedure described below, we will have Survey123 and/or QuickCapture utilize the TCP Server feature of Eos Tools Pro, while Field Maps reads your Arrow GNSS metadata from the Mock Location (managed by Eos Tools Pro). Here is a summary of the correct Location Provider sources for each Esri mobile app used in this guide for concurrent usage:
-
- ArcGIS Field Maps: Use Location Provider from “Integrated” (receiver)
- ArcGIS Survey123: Use Location Provider from (TCP) “Network”
- ArcGIS QuickCapture: Use Location Provider from (TCP) “Network”
Concept #2: Mock Location in Android
Another important note is that if you are using any Android mobile device, you will need to ensure that Field Maps reads the “Integrated location” of your Android device. You will complete this step after you have properly configured “Mock Location” on Android. If you have not already configured Mock Location on Android, please refer to this document on how to configure Mock Location properly. You may then continue on with the steps in this guide.
Concept #3: Orthometric Heights
Please note: Any orthometric heights and/or datum shifts that you apply will be reflected in the data supplied to all four Esri apps via both the Mock Location and the TCP Server output of Eos Tools Pro.
Concept #4: Esri Mobile App Combinations that can Concurrently Consume Arrow Location Data
Here are all combinations of Esri mobile data-collection apps that can concurrently consume Arrow GNSS location data:
- ArcGIS Field Maps + ArcGIS Survey123
- ArcGIS Field Maps + QuickCapture
- ArcGIS Field Maps + ArcGIS Survey123 + QuickCapture
Field Maps features a “Location Profile” setting. Within this setting you will find the important ability to define an on-the-fly datum transformation. Using this datum transformation setting, you can tell the Esri app to transform your Arrow GNSS coordinates to those of your ArcGIS Online published map.
Tip: This is important to set up before beginning data collection, if desired.
Note that Survey123 and QuickCapture do not offer this feature. For data collected with Survey123 and QuickCapture, a datum transformation must be applied in ArcGIS, after the data is captured, if needed.
Step 1: Configure Eos Tools Pro
The first step is to install Eos Tools Pro on your mobile device and configure its TCP Server feature.
If you have not done so already, please download Eos Tools Pro here:
Download Eos Tools Pro on Android
With Eos Tools Pro downloaded, follow these steps:
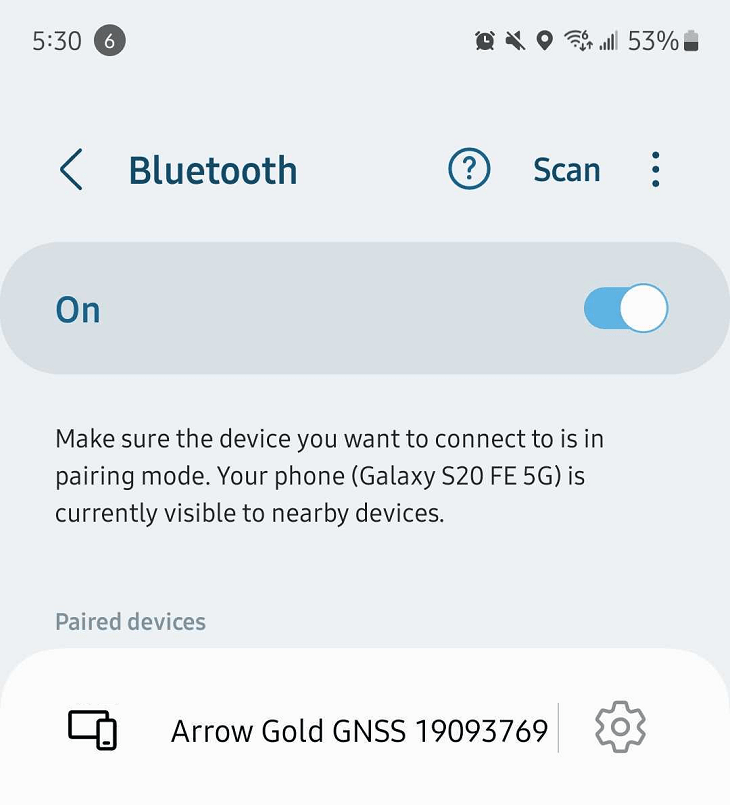
1. In your device’s Bluetooth settings, Bluetooth-pair your device with your Arrow GNSS receiver
2. Check your Eos Tools Pro “TCP Server localhost” address and port number:
Launch Eos tools Pro.
Go to the “Settings” menu, select “TCP server,” and activate the TCP Server switch. Make a note of the default TCP Port that will be displayed. In this example the TCP Server localhost is “192.168.1.177” and the Port is “3967.”
Tip 1: By default, the TCP Server localhost address is “127.0.0.1”. You can find the port number by opening Eos Tools Pro and navigating to the settings menu.
Tip 2: Eos Tools Pro’s TCP Server is always listening to incoming TCP-client connections at this combination of IP address and port number.
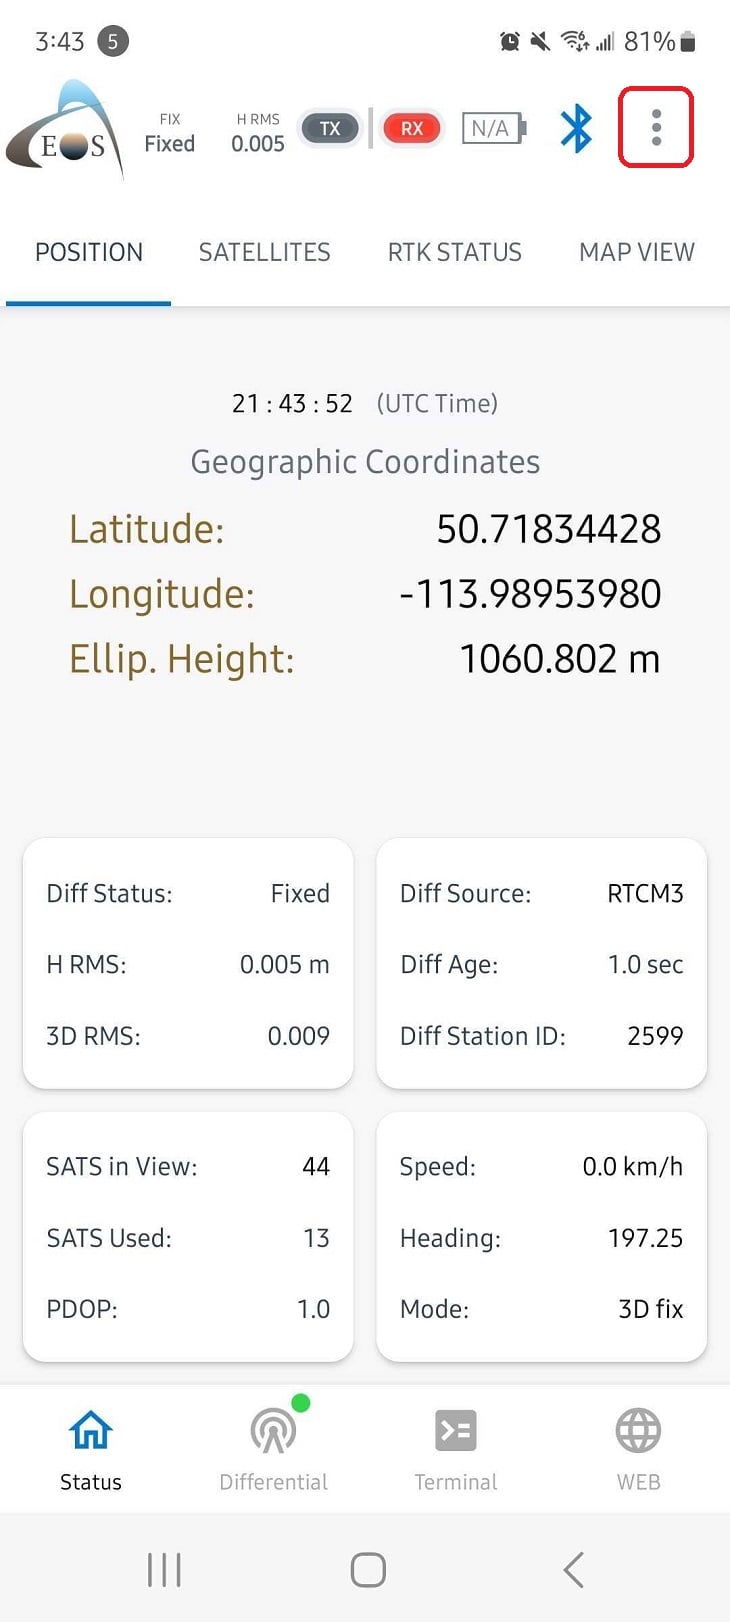
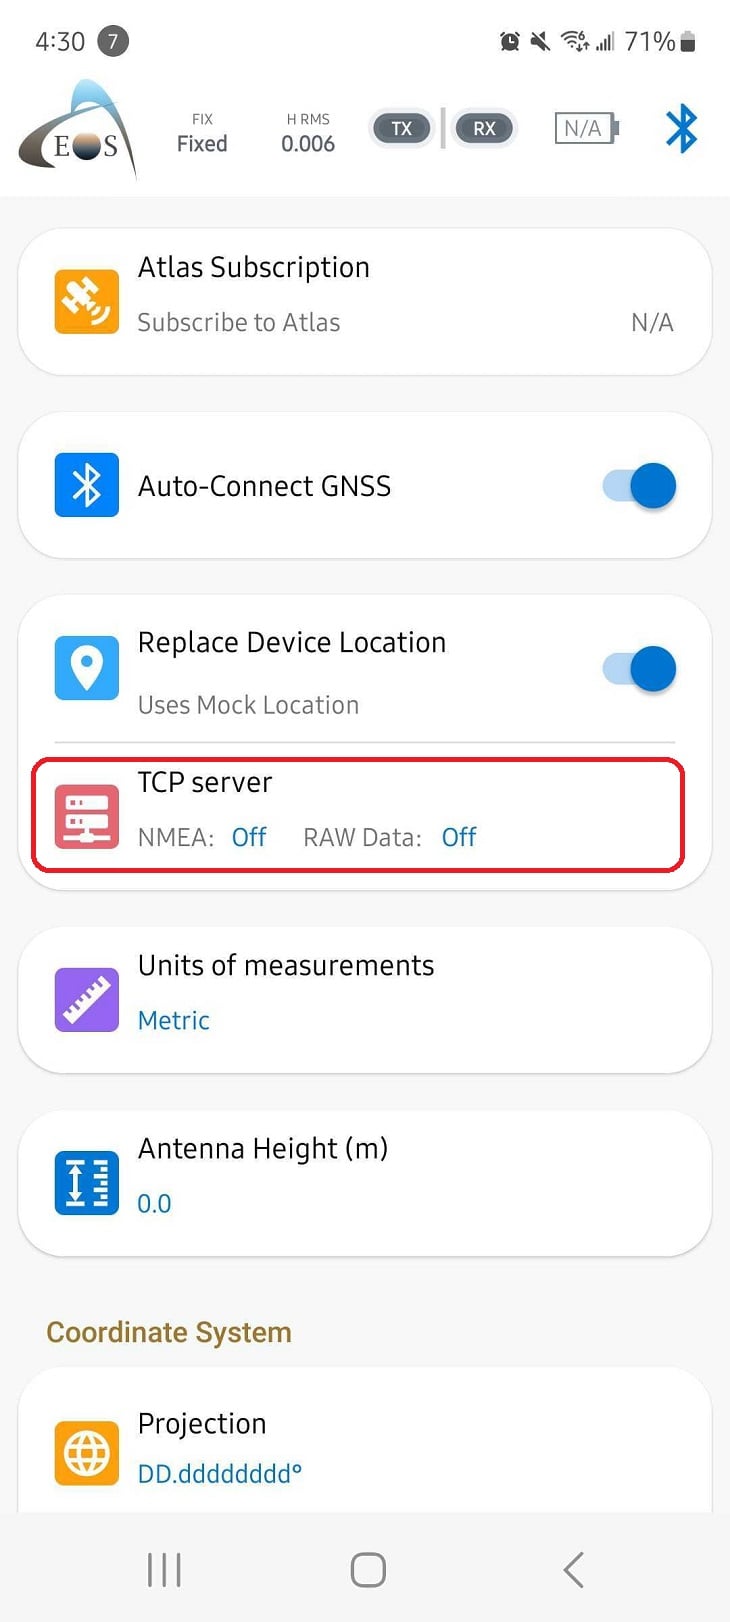
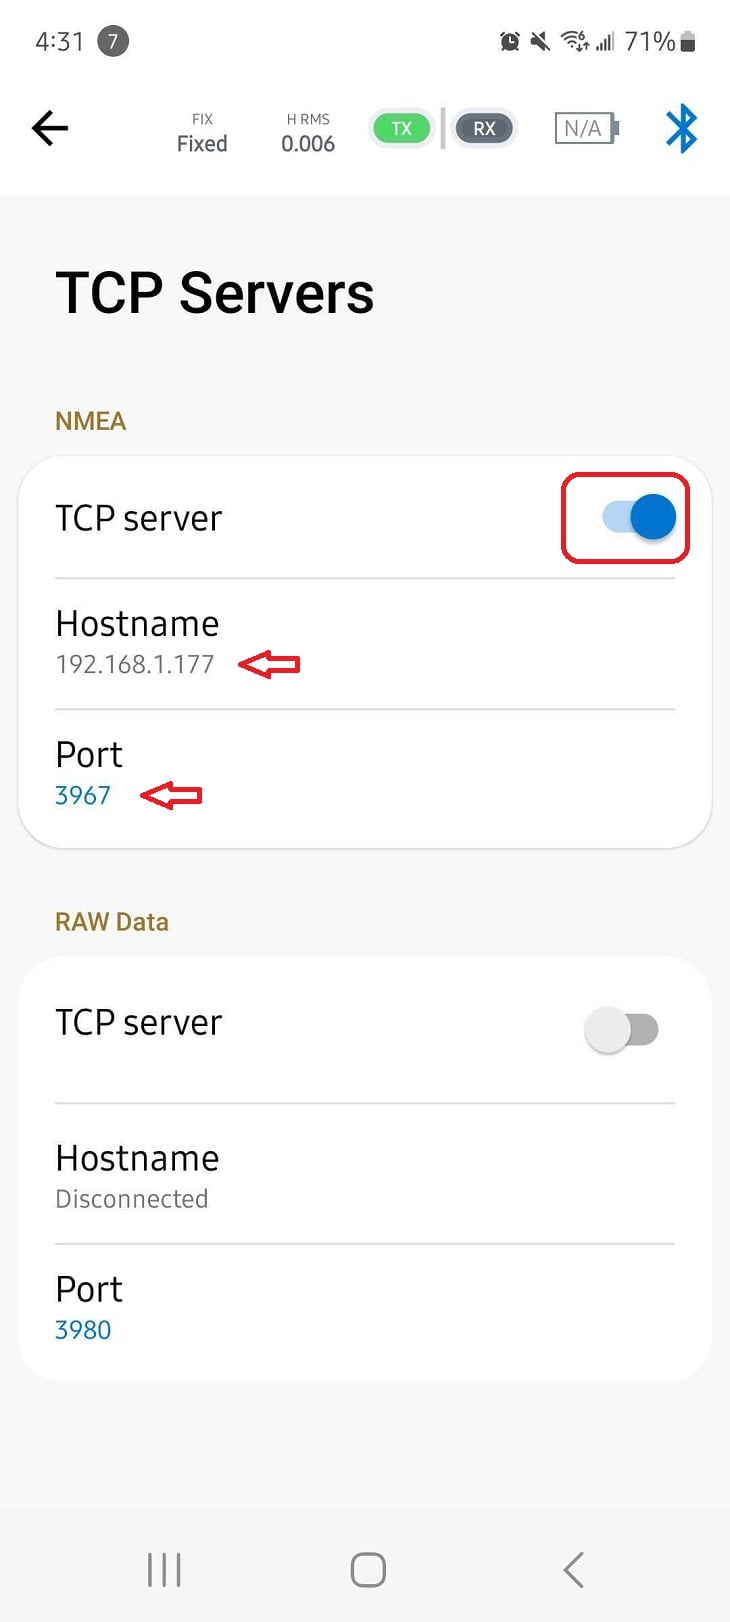
Important note: If you change the TCP port number, you will have to close and restart Eos Tools Pro for the change to take effect.
You are now ready to configure your first Esri mobile app’s Location Provider.
Step 2: Configure Location Provider in Esri Mobile Apps
ArcGIS Field Maps must be configured to read the location information from the Mock Location managed by Eos Tools Pro. This configuration takes place within the “Location Provider” settings of Field Maps.
To configure Location Provider withinField Maps, follow these steps:
1. Download Field Maps
Download and install Field Maps from the Google Play Store.
2. Launch app
Open Field Maps. Log in with your Esri ArcGIS Online account credentials.
3. Change the Esri app’s “Location Providers” setting
Navigate to the app’s “Settings” and then go to “Location Providers.” The default should be “Integrated,” indicating the app is reading your smartphone or tablet’s integrated GPS location. This is the desired setting since Eos Tools Pro uses the Bluetooth port to communicate with your Arrow, and then overrides the device’s location with the Arrow coordinates and metadata.

You have now successfully configured Field Maps to read location data from your Arrow GNSS receiver via the Mock Location. You may optionally complete any other settings you may need for your field work.
4. Verify Field Maps is reading location from the Eos GNSS receiver
Within Field Maps, navigate to your desired ArcGIS Online web map, and open the map. You should see the “GPS accuracy” measurement displayed in sky-blue font at the top of the mobile screen.
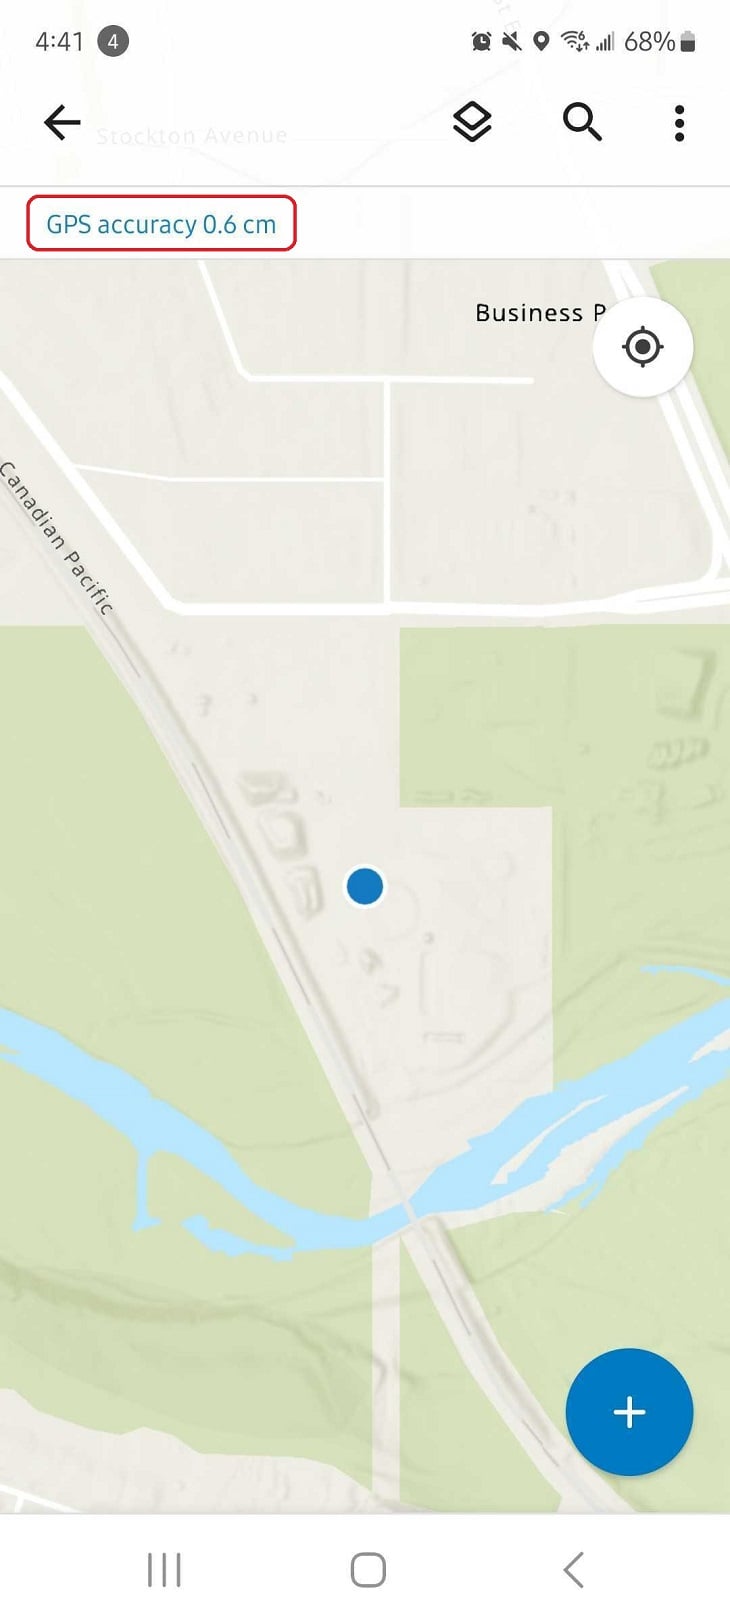
If you tap on this estimated location accuracy, you will trigger a popup of GNSS location metadata from the Arrow GNSS receiver. If this step is successful, then you have properly configured the Field Maps mobile app to read locations from the Arrow GNSS receiver via the Mock Location.
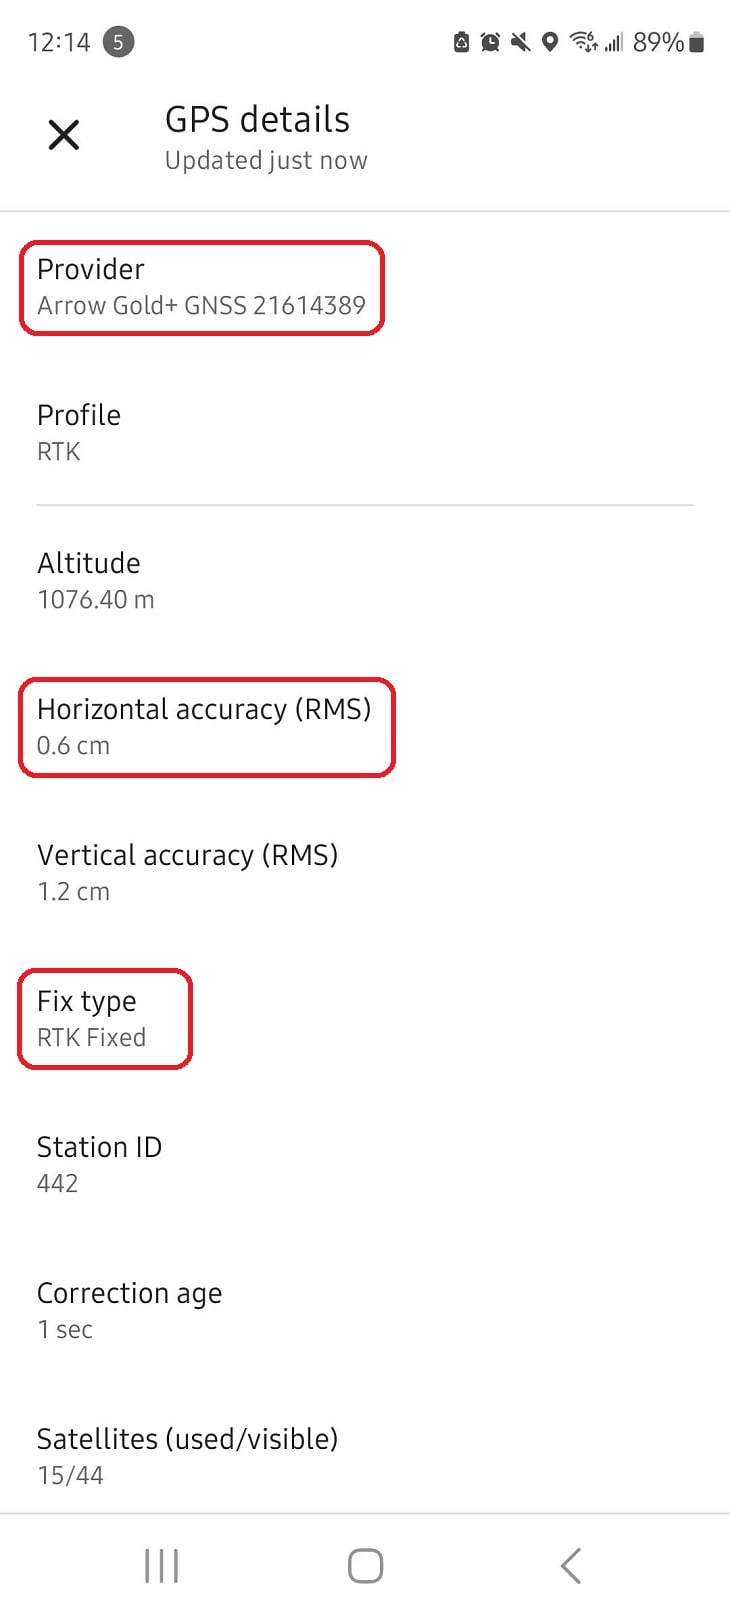
Once done, it is now time to configure your other Esri mobile apps (Survey123/QuickCapture) to read location data from your Arrow GNSS receiver using the “TCP Server” feature of Eos Tools Pro …
Step 3: Setting Location Provider as “Network” in ArcGIS Survey123
When Survey123 is used concurrently with Field Maps — and when high-accuracy GNSS locations are required in both apps at the same time — you must set the Survey123 “Location Provider” settings to “Network,” so that the app reads the TCP Server port from Eos Tools Pro.
Please note: When reading the location data from the TCP server of Eos Tools Pro, all GNSS metadata will be available, except for the Arrow model and serial number.
To configure TCP Server as the Location Provider within Survey123, follow these steps:
1. Download Survey123
2. Open Survey123
Open Survey123. Log in with your Esri ArcGIS Online account credentials.
3. Navigate to Location Providers → Network
Navigate to the Survey123 “Settings” menu, and then to “Location Providers”. You will see the “Integrated Provider” as a default.
Next, tap on “Add location provider” in the bottom left corner. Select “Network” within the list provided.
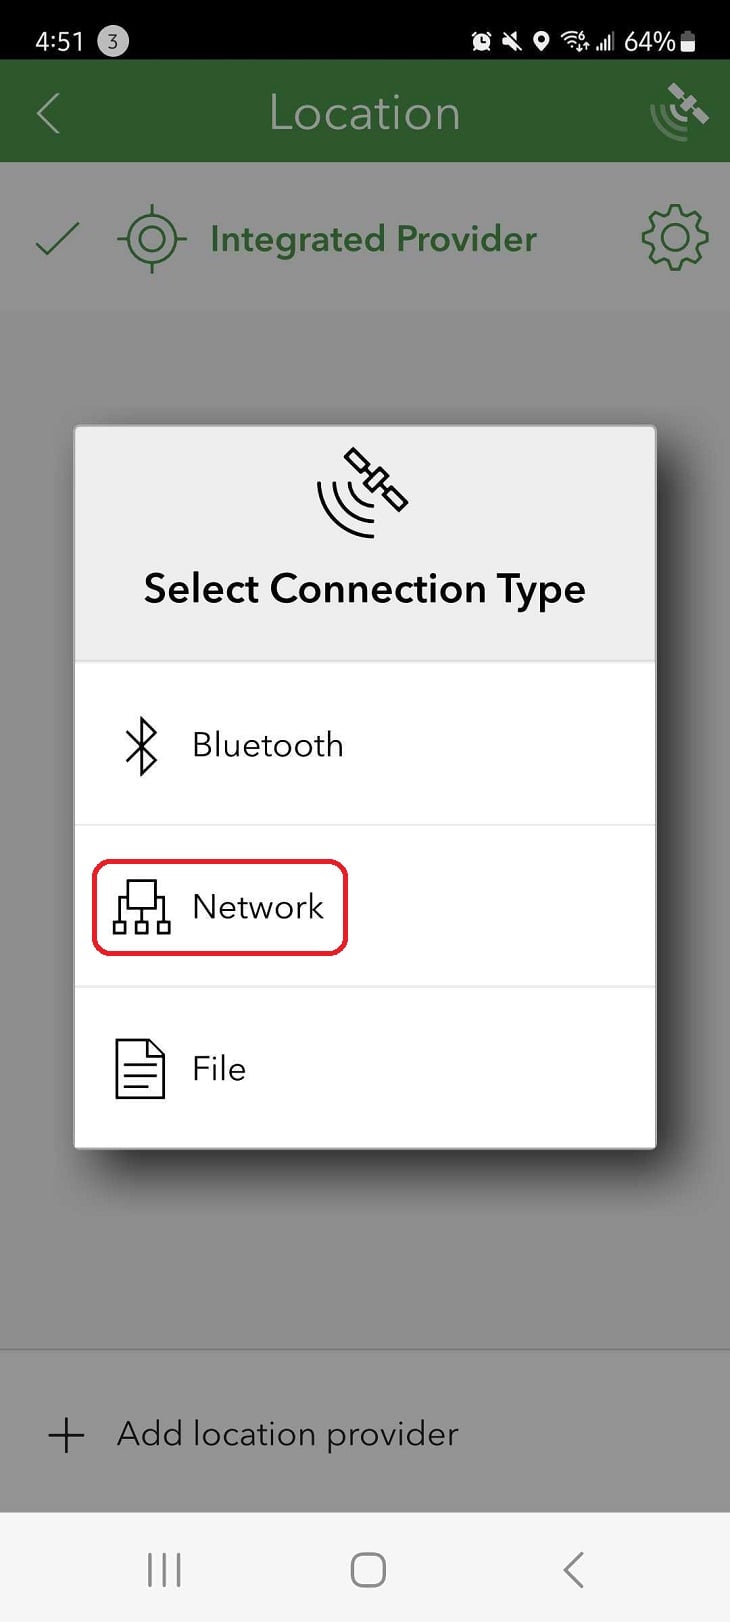
4. Enter Eos Tools Pro TCP Server information
You now need to enter the TCP Server localhost address and port number from Eos Tools Pro.
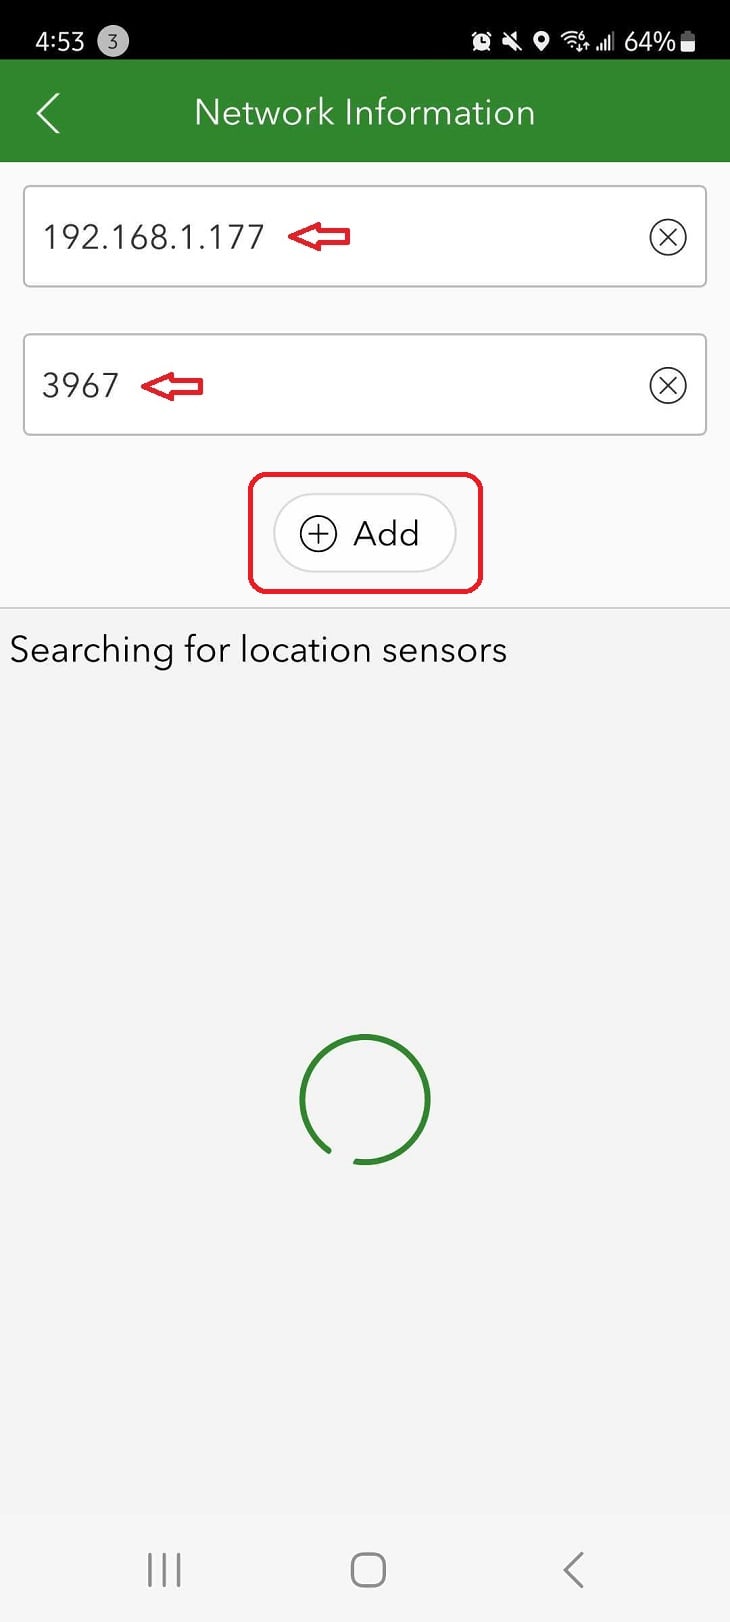
Under “Network Information” first enter your Eos Tools Pro TCP Server localhost address (this is most likely “127.0.0.1”) in the Hostname field.
Now, enter the port number. On your Android device, you can find the port number by opening Eos Tools Pro and navigating to the settings menu.
Click the “Add” button within the Survey123 popup.
Congratulations! You have now set the Survey123 location provider to read from the TCP Server of Eos Tools Pro. At this point, you can complete any other relevant settings within Survey123.
5. Verify Settings
As soon as Survey123 is connected to Eos Tools Pro’s TCP Server, a satellite icon will appear on the top right corner of Survey123. Tap this satellite icon, and the Arrow GNSS receiver information will be displayed. If your screen looks similar to the one below, this confirms that Survey123 is now communicating properly with the Arrow’s TCP port.
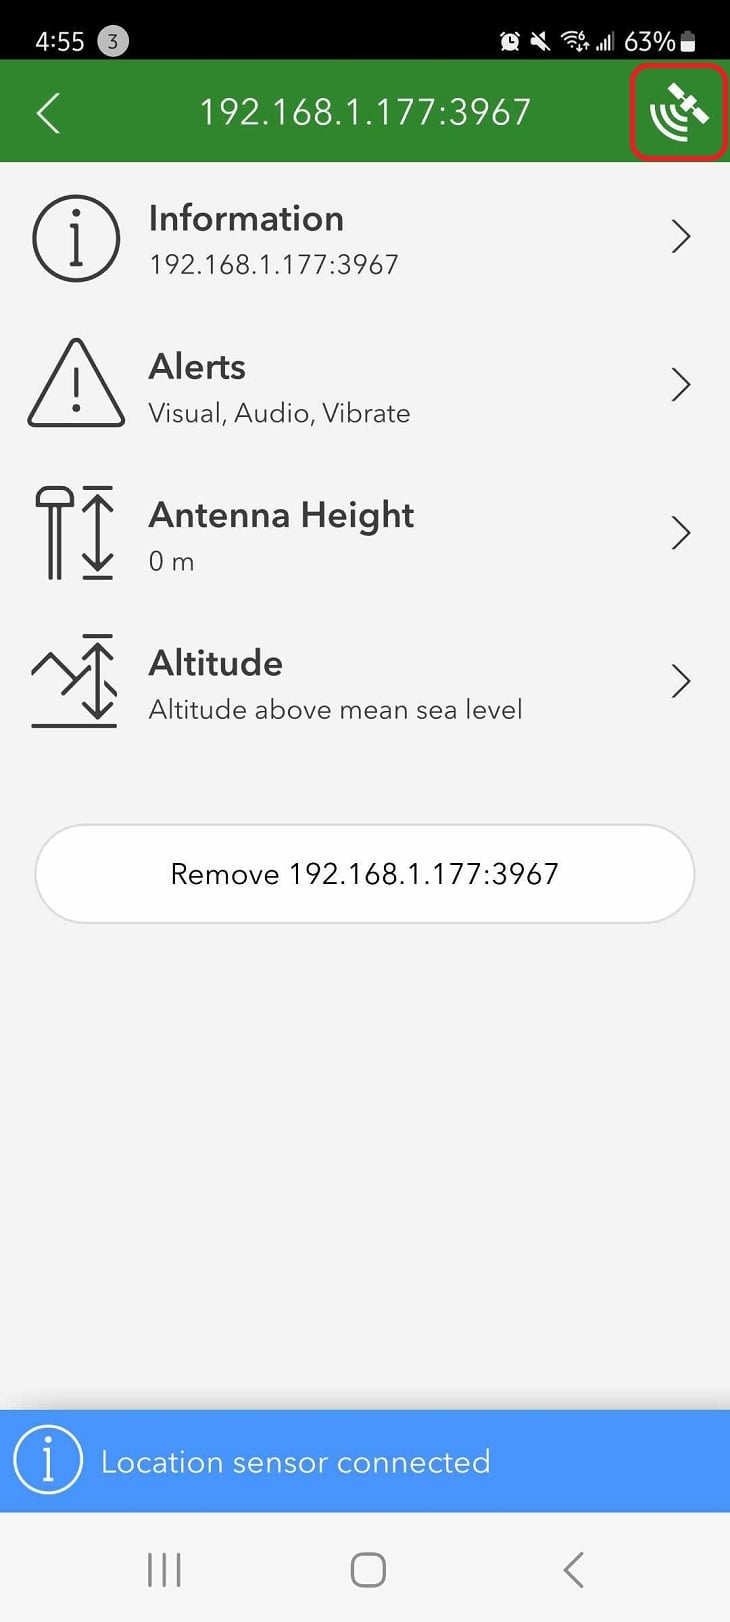

Step 4: Setting Location Provider as “Network” in ArcGIS QuickCapture
Tip: Multiple apps that feature a network TCP client can concurrently use a TCP port. This is why both ArcGIS Survey123 and ArcGIS QuickCapture can simultaneously access the same Arrow GNSS location and metadata.
This section assumes you are using QuickCapture concurrently with either ArcGIS Field Maps for high-accuracy data collection. In this case, QuickCapture settings must have “Location Provider” set to read the Eos Tools Pro TCP Server. Once again, as mentioned previously, the only GNSS attribute metadata that will be missing is the Arrow model and serial number.
Please note: On Android, when Eos Tools Pro is not needed for NTrip corrections, QuickCapture can connect directly to the Arrow via Bluetooth. When Eos Tools Pro is needed for fetching differential corrections, then QuickCapture can read the TCP server port of Eos Tools Pro
Here are the steps for configuring the TCP Server location provider to read Arrow GNSS location data in QuickCapture.
1. Download ArcGIS QuickCapture
2. Open QuickCapture
Open QuickCapture. Log in with your Esri ArcGIS Online account credentials.
3. Navigate to Settings → Location Provider → Network
Navigate to QuickCapture’s Settings and then Location. You will see the “Integrated Provider” as a default. Tap on “Add location provider”. Select “Via Network” within the list.

4. Enter Eos Tools Pro TCP Server information
You now need to enter the TCP Server localhost address and port number from Eos Tools Pro.
Under “Network Information” first enter your Eos Tools Pro TCP Server localhost address (this is most likely “127.0.0.1”) in the Hostname field.
Now, enter the port number. On your Android device, you can find the port number by opening Eos Tools Pro and navigating to the settings menu.

Click the “Add” button within the popup.
Congratulations! You have now set the QuickCapture location provider to read from the TCP Server of Eos Tools Pro. At this point, you can complete any other relevant settings to your data-collection workflow within QuickCapture.
5. Verify your Settings
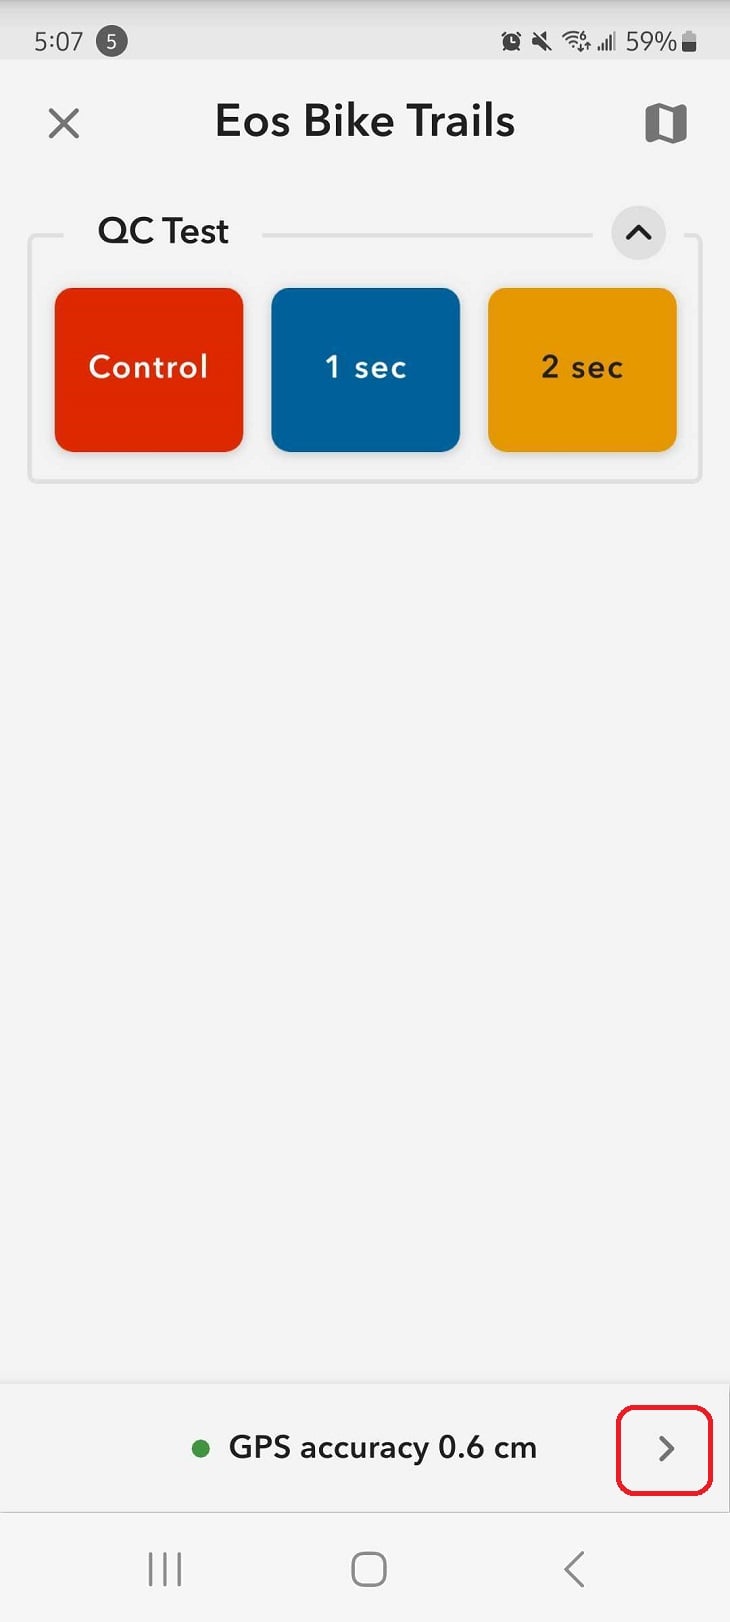
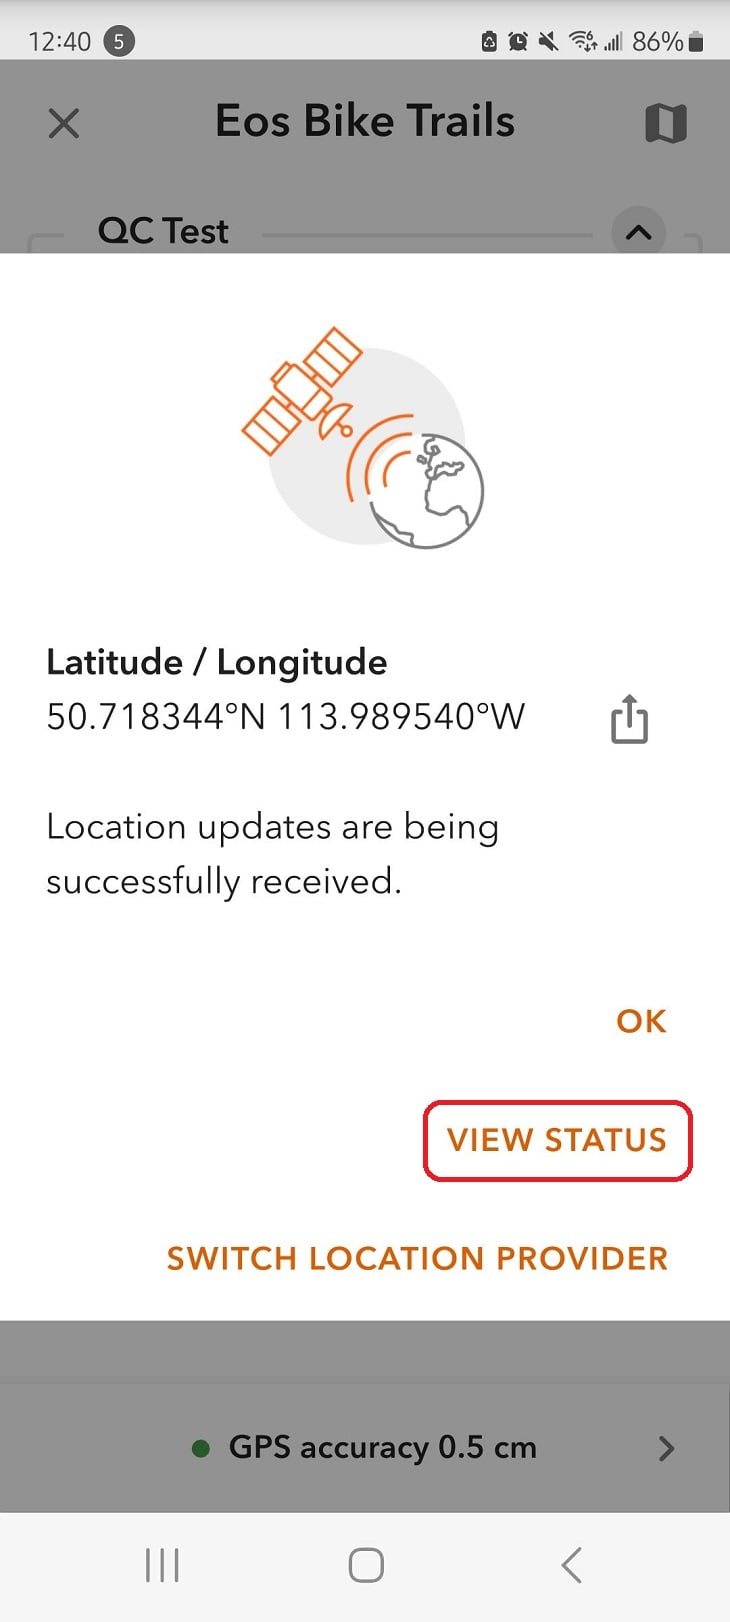
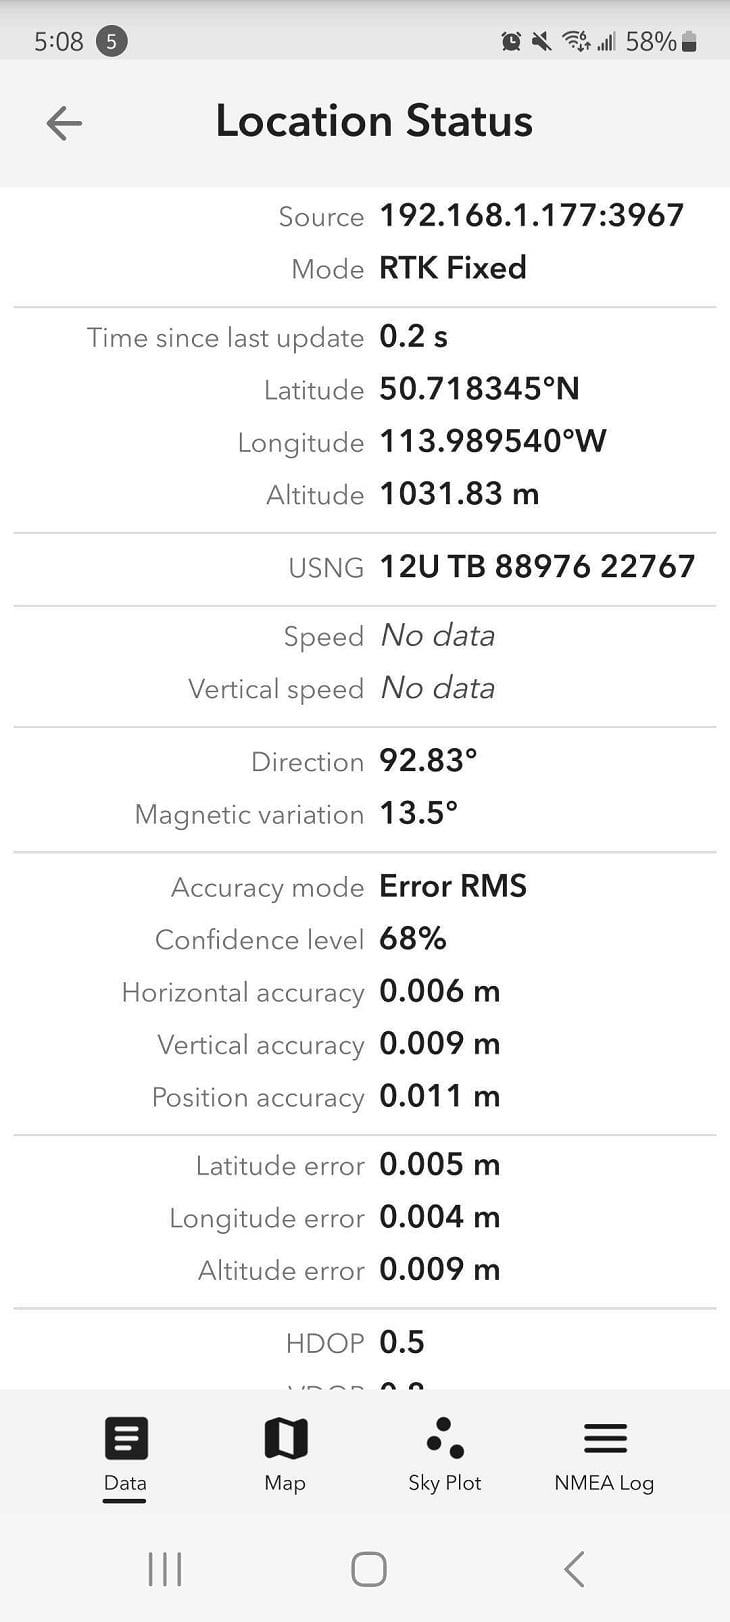
Open your QuickCapture project, and you will see the GPS accuracy displayed at the bottom of the page. Tap on the little arrow, then tap on “View Status”. The Arrow GNSS Receiver information will be displayed — thus confirming that QuickCapture is properly receiving location data from your Arrow GNSS receiver.
Conclusion
With these settings configured, you are now able to collect high-accuracy data in multiple Esri mobile apps while they concurrently access high-accuracy location data from a single Arrow Series® GNSS receiver.

