How to Configure AmigoCloud with the Arrow Series® Receiver
Synopsis
Are you ready to collect high-accuracy data in the field with AmigoCloud? This video — “How to Configure AmigoCloud with the Arrow Series® Receiver” — walks you through how to use your Arrow Series™ receiver with the AmigoCloud data collection app. To get started, follow along with this video tutorial. You’ll need your Arrow receiver, any smartphone or tablet, and the AmigoCloud app.

Transcript
Eos Positioning Systems® here. Today, we’re going to show you how to connect our brand of Arrow receivers to the mobile GIS app for iOS® called AmigoCloud.
And you can see today we’re using an Arrow 200 receiving RTK Corrections, and our horizontal accuracy is about one and a half centimeters.
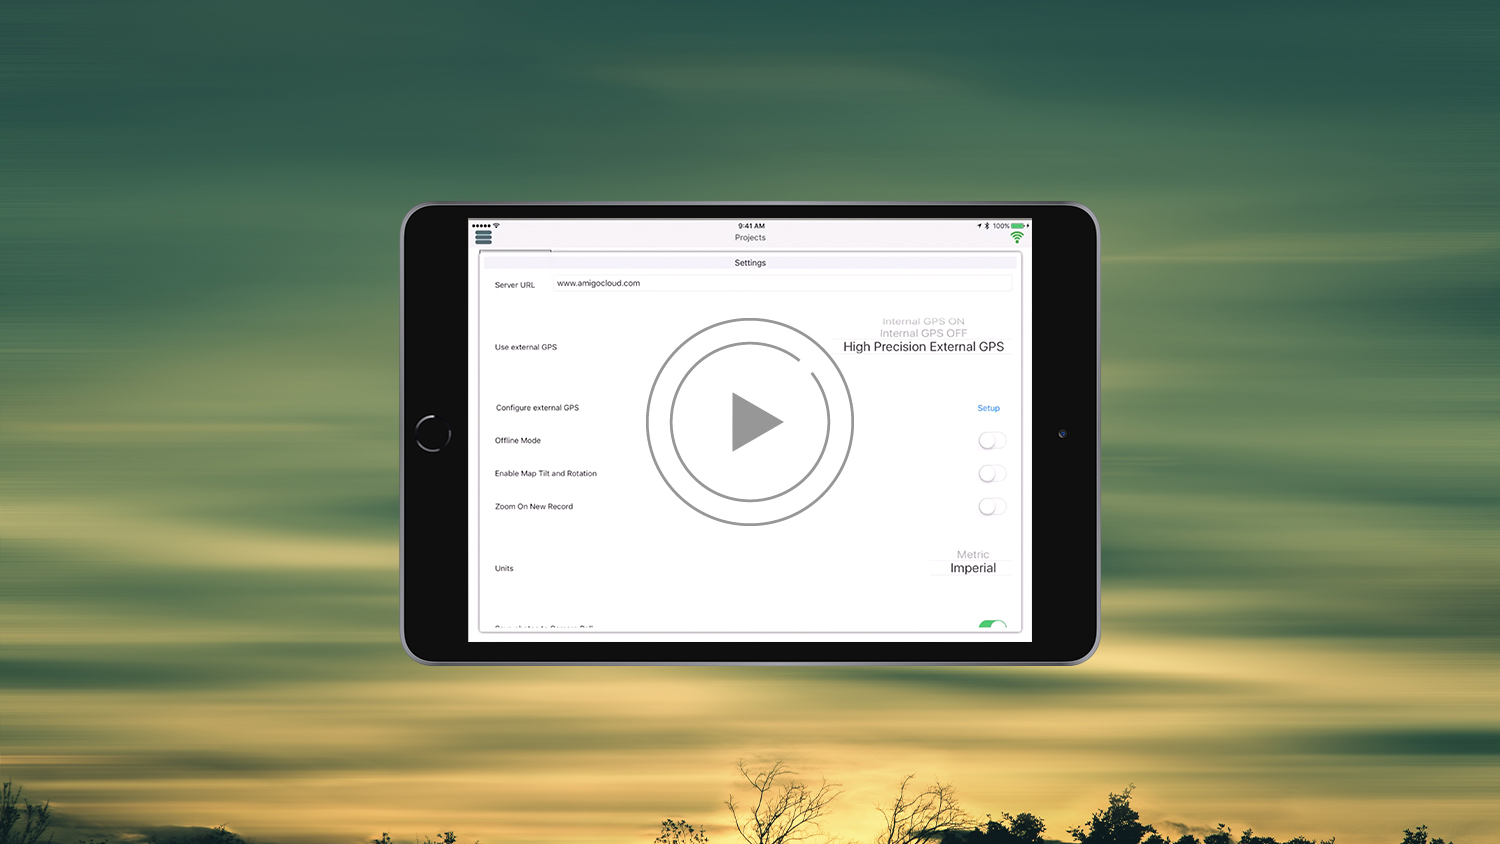
So, we’re going to open AmigoCloud. Now, to set the connection with our Arrow brand receivers in the upper left, we’ve got three lines. There, we go ahead and tap, that that takes us into our menu. And you can see we can choose “Settings.” Now, in “Settings,” this uses external GPS. When you first open this, it’ll be selected on “Internal GPS ON.” And we don’t want that because that’s just using the internal tablet (or phone’s) GPS.
So we want to choose “High Precision External GPS” right there. And then what we want to do is configure external GPS setup. We want to tap on the “setup” button, and we can see we’ve got three options. What we need to choose is the bottom option “positioning source.” This is going to tell the metadata to get pulled into AmigoCloud. And then we would tap the “connect” button here in the lower left, and then it’ll switch to showing now, which says connected to the positioning source. So let’s close this.
Then, other options you could change in here as units — you could change it between metric and imperial, depending on which you prefer. And then we’re going to go ahead and just tap off of this guy here to get rid of it. And we’re going to open a sample project so we can take a look at how it interfaces inside the app while you’re actually out collecting data.
So all I did was tap in the upper right there next to the “North” button, the cursor location button to zoom in where we’re at. And you can see in the bottom left, if we want to see the live metadata coming in from our Arrow receiver, we can tap the information button. And you can see, without having to leave the app, we can see the lat, soon longitude, our altitude, and our accuracy — which is, again, is about one to one and a half centimeters.
And that is how you interface an Arrow brand receiver with the mobile GIS app AmigoCloud.
If you have any questions please contact us and visit our website for information about our Arrow branded receivers. Thank you.


