Introduction:
Some days, your field crews will work in an area where they will not have access to Internet connection. In this case, they can work offline with Collector in a defined offline area. Here are the steps to follow to work with ArcGIS Collector offline.
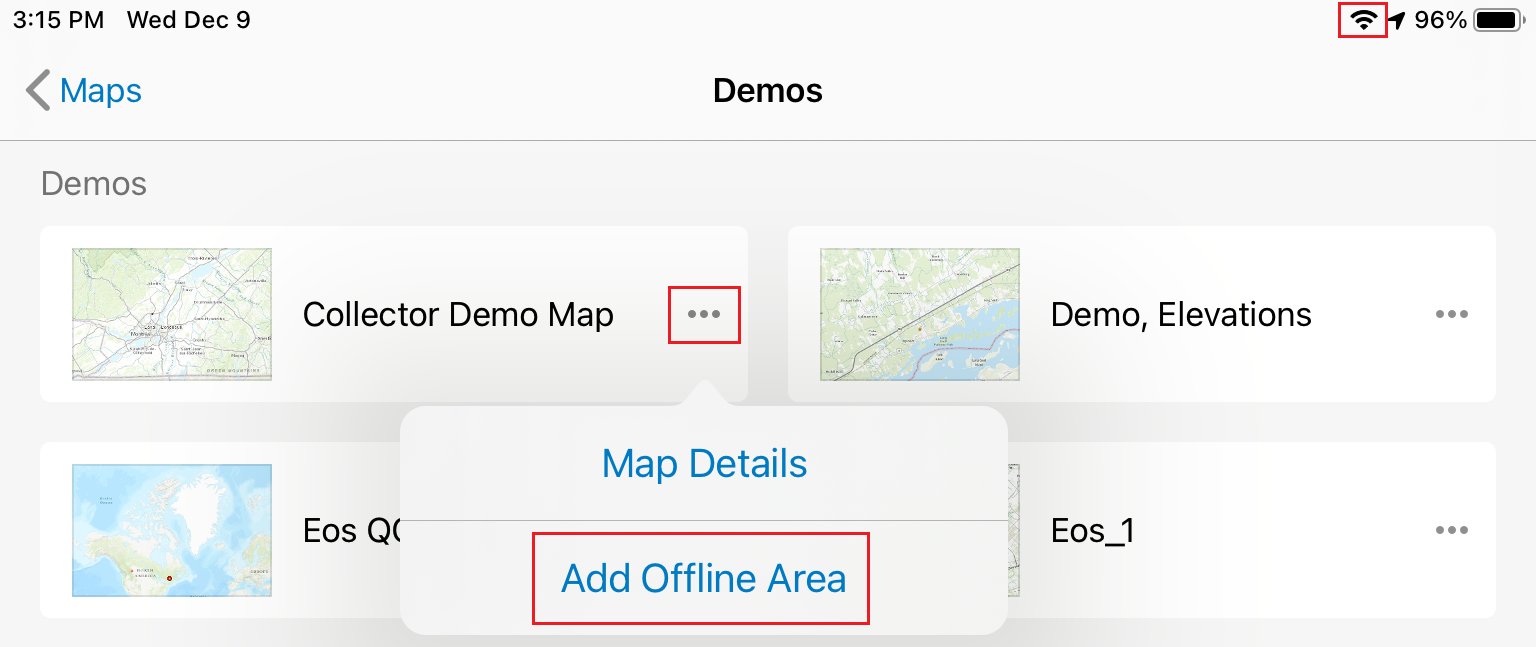
1. Open Collector and click on the 3 dots next to your map and click on “Add Offline Area”
You will want to do step 1 while you still have Internet connection.
2. Add Your Offline Area
Collector will prompt you to pan and zoom to define your offline area. This is your work site, where you wish to collect data.
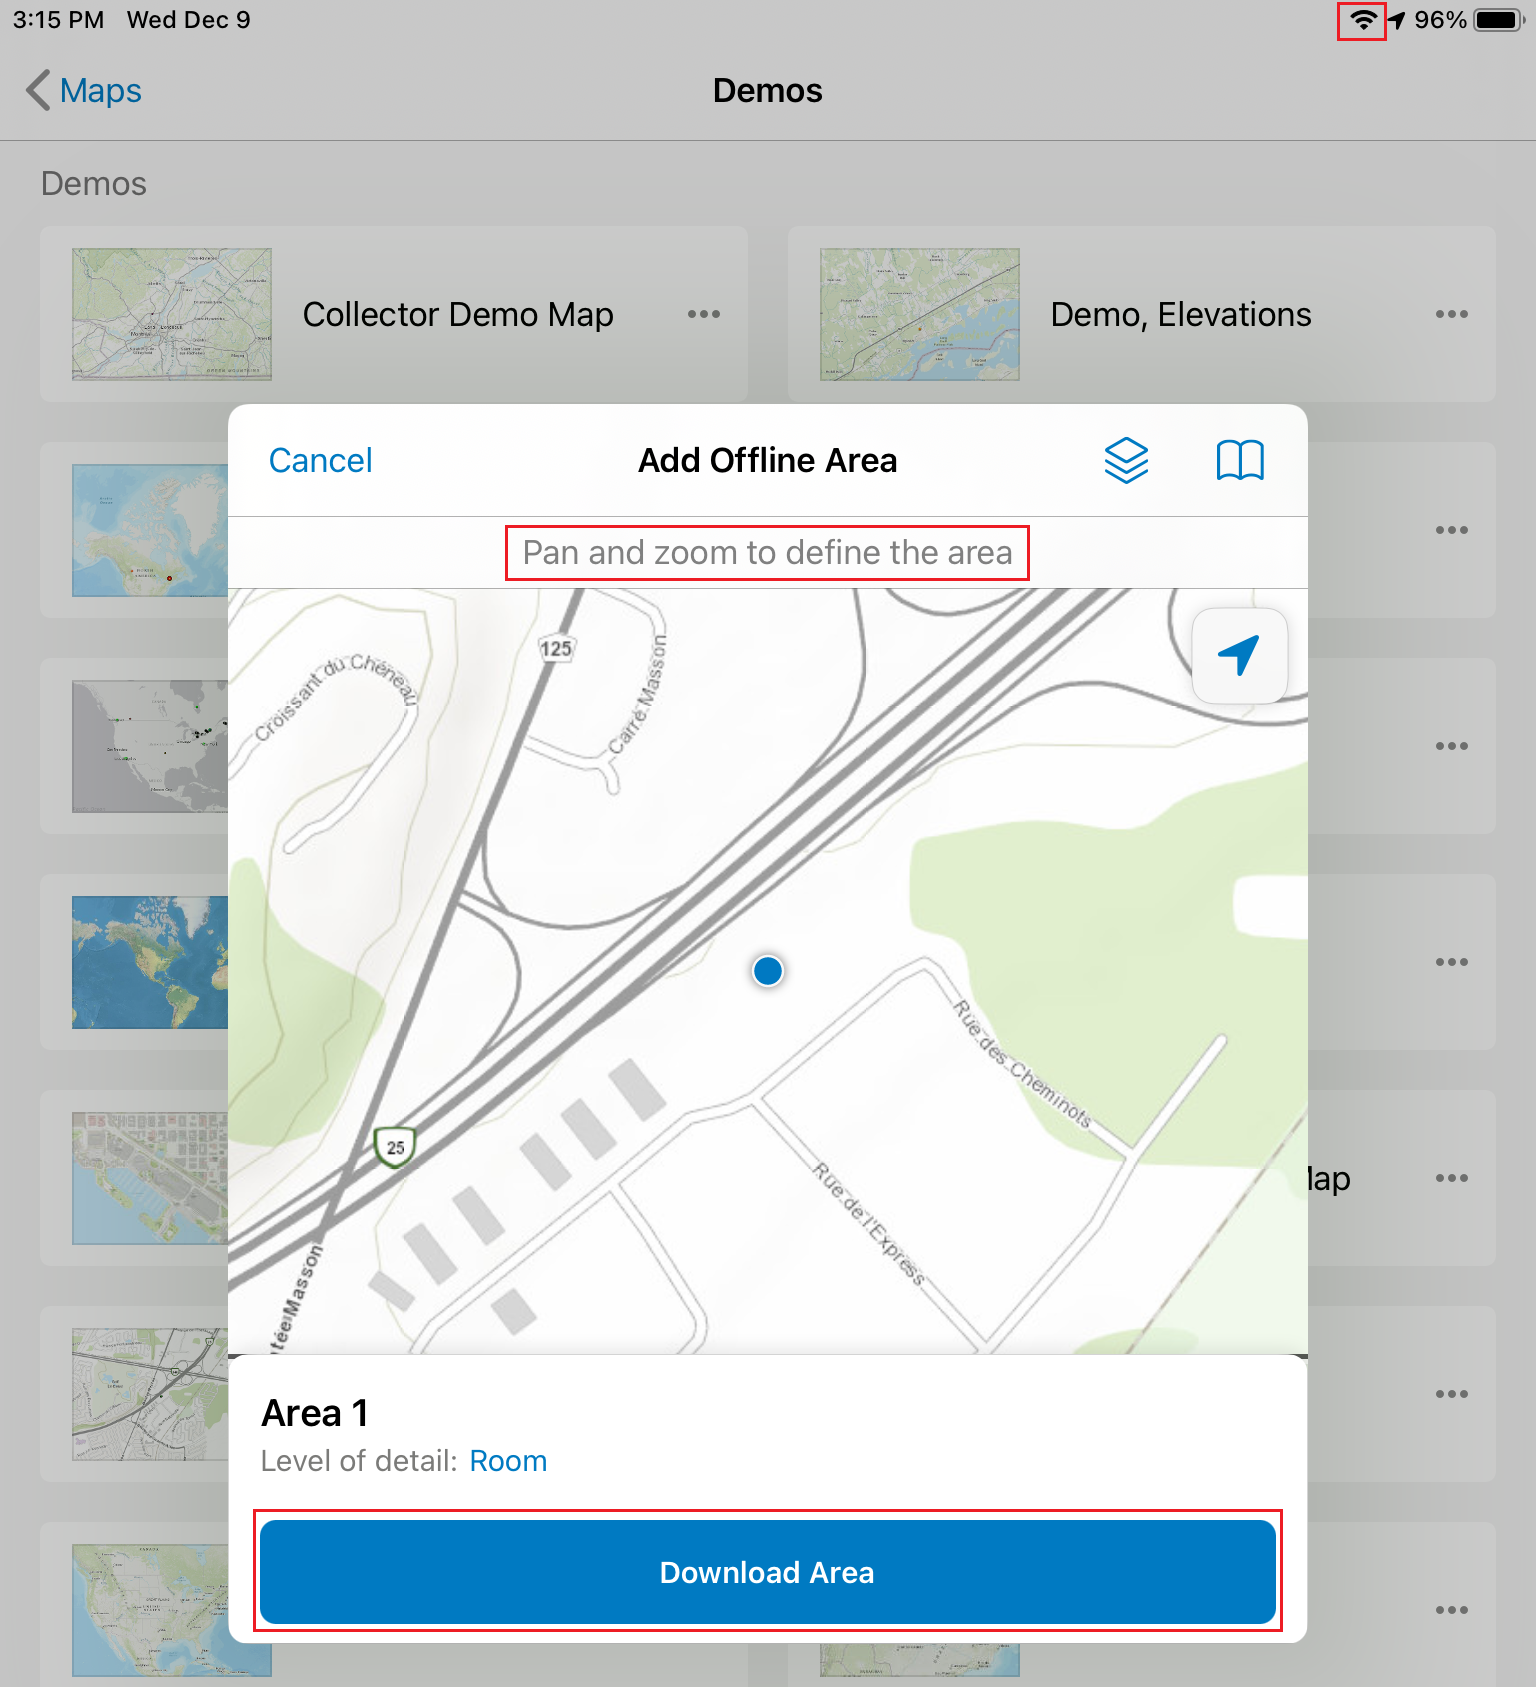
The offline area will download to your device:

At this point, with your offline area defined and downloaded, you can work offline. You are ready to collect points and lines with Collector inside your “Offline Area.”

3. Collect your data (perform mobile work) with ArcGIS Collector offline. Check your GPS accuracy
As you collect or edit data in your offline area, you will continue to use the Arrow GNSS receiver for high accuracy despite not having internet connection. You can see your GPS accuracy in the blue “GPS accuracy” text on the top of your Collector map:
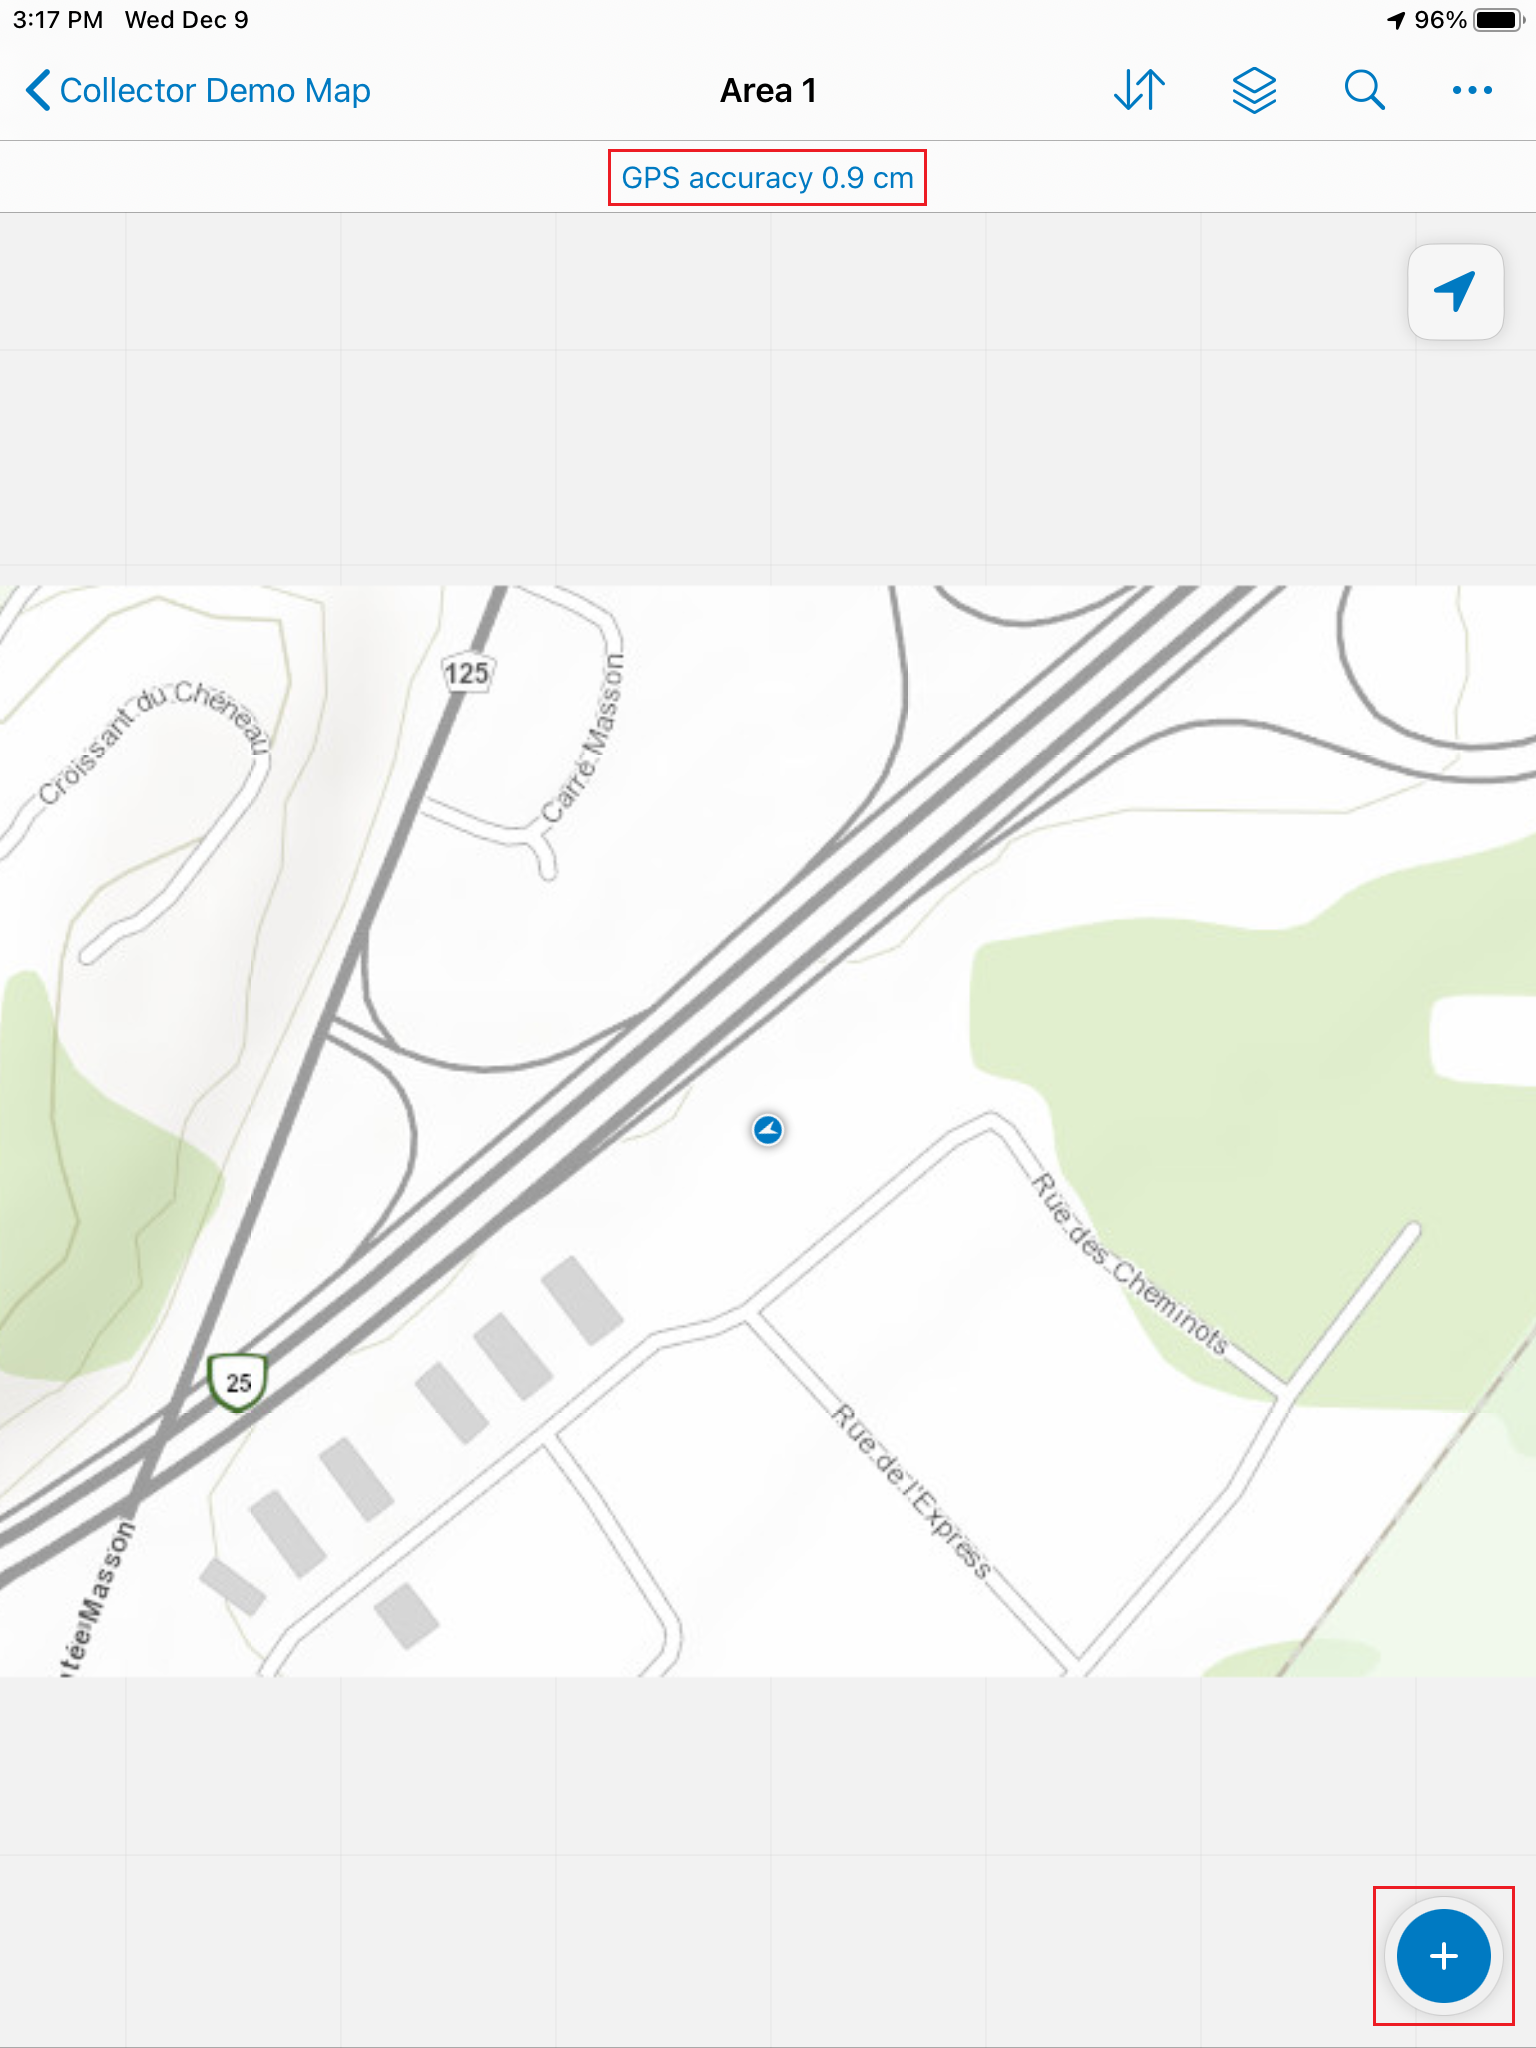
Next, you will perform your field work. You may then manually sync your data once you have returned to Internet coverage.
4. Sync your data
Once you will go back into cellular coverage, Collector will submit the data to ArcGIS Online. It can do this automatically at regular intervals, or you can manually push a sync.
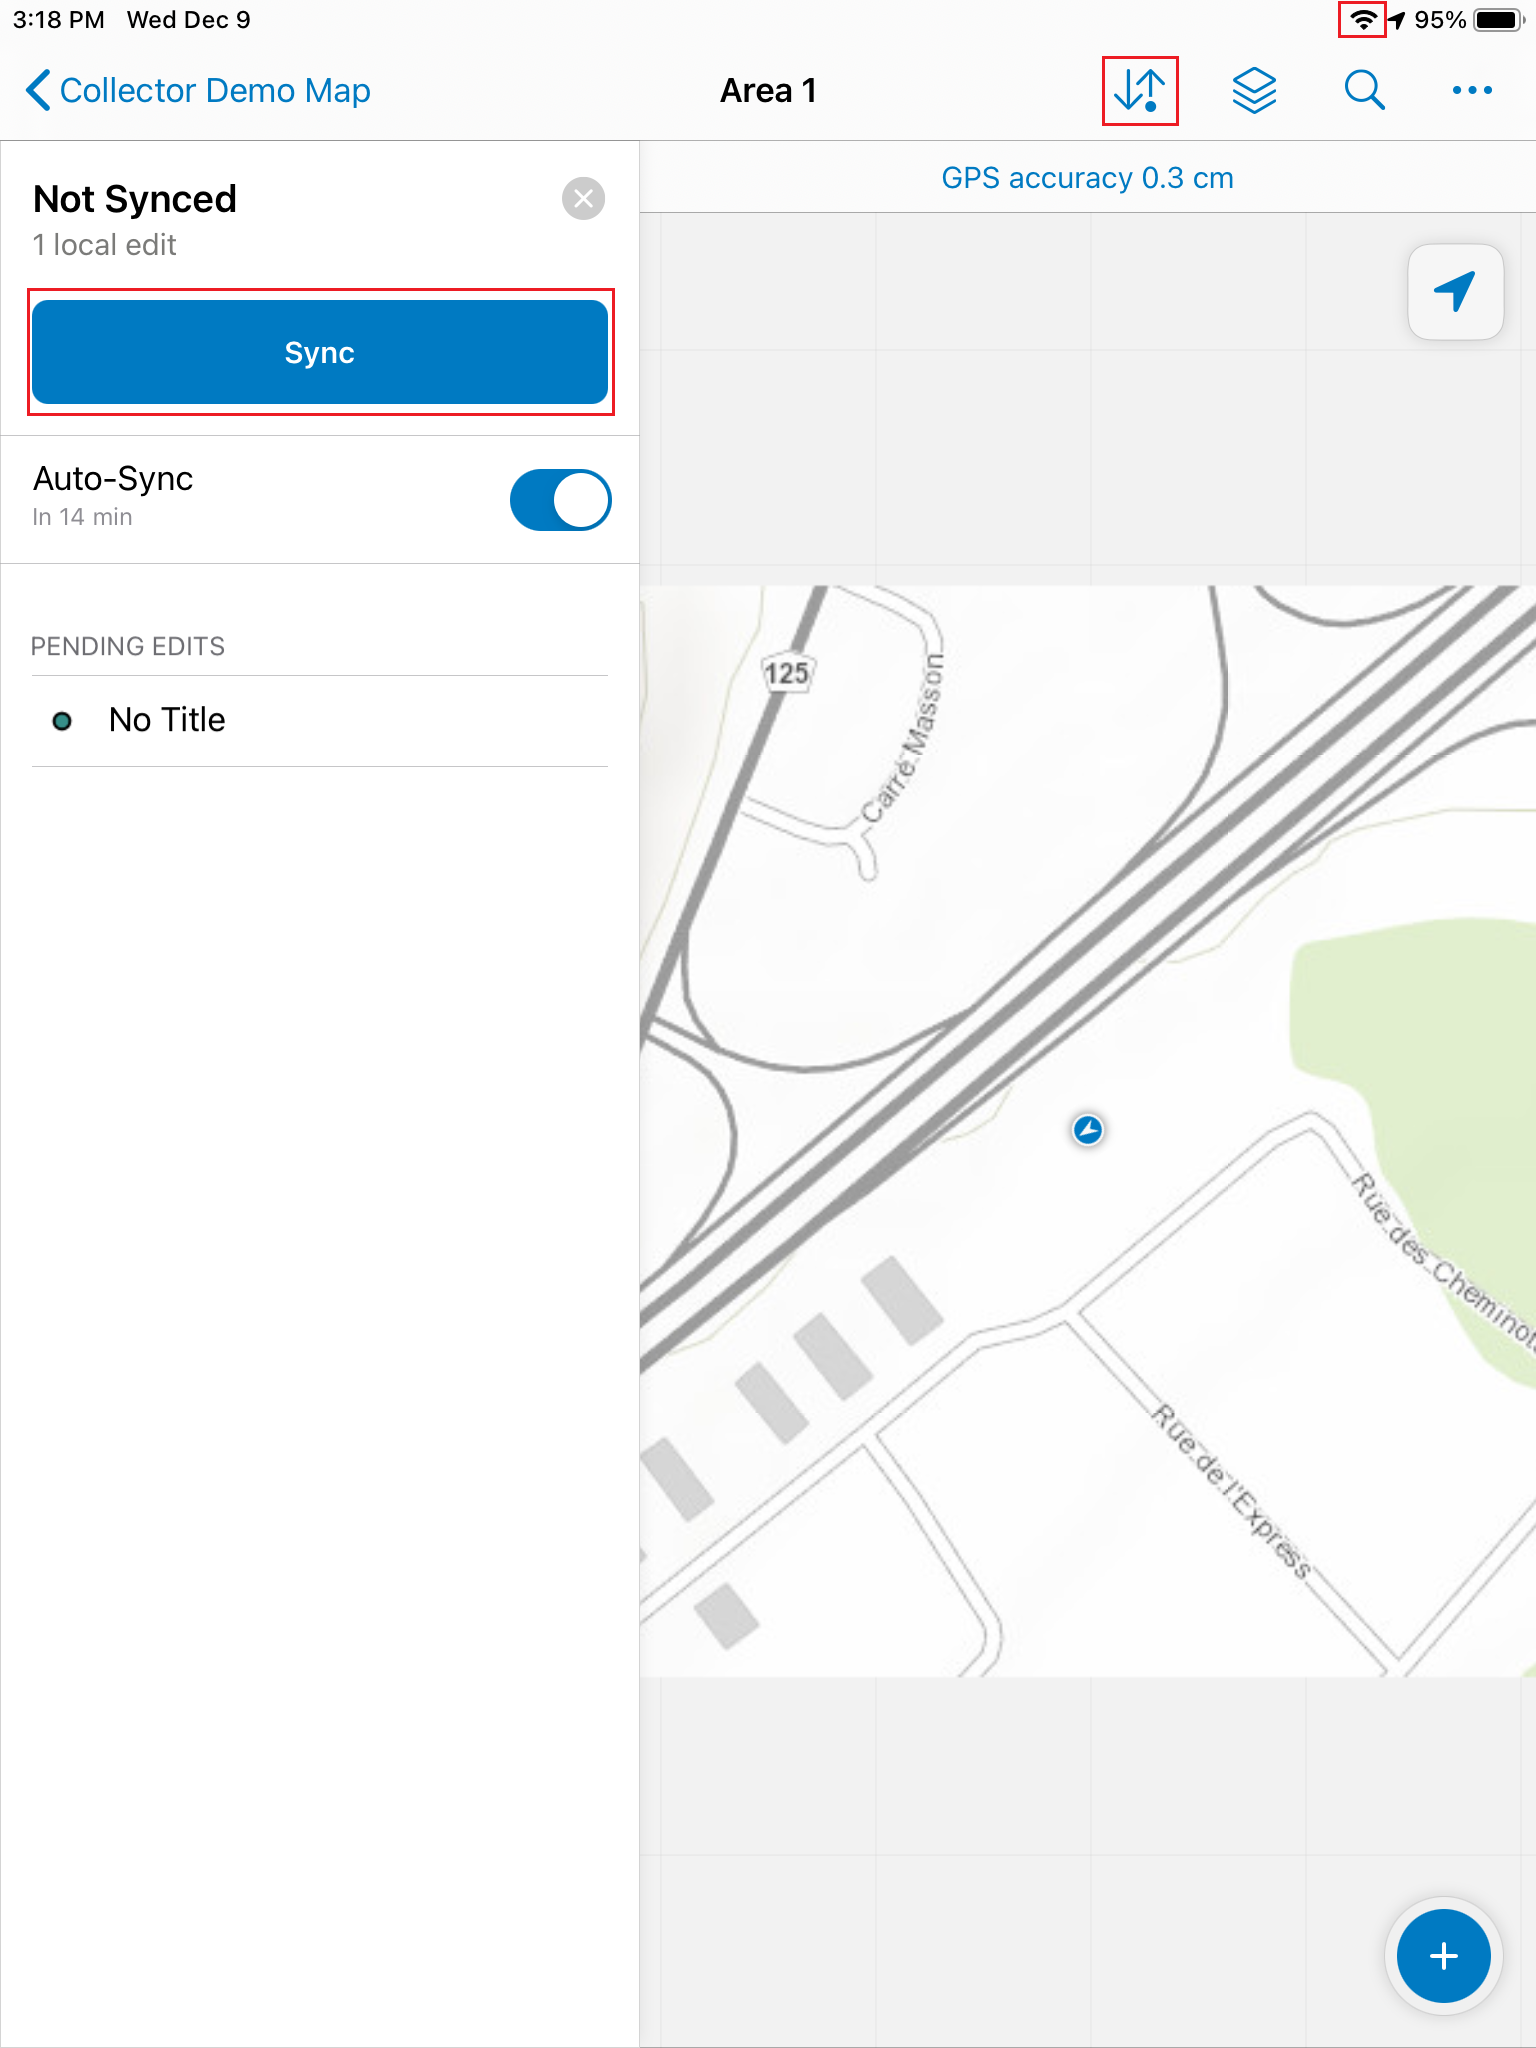
To manually push a data sync, navigate to the blue up/down icon in the top right toolbar of Collector. Collector will launch a sidebar prompting you to sync. Click the blue “Sync” button to manually sync your data.
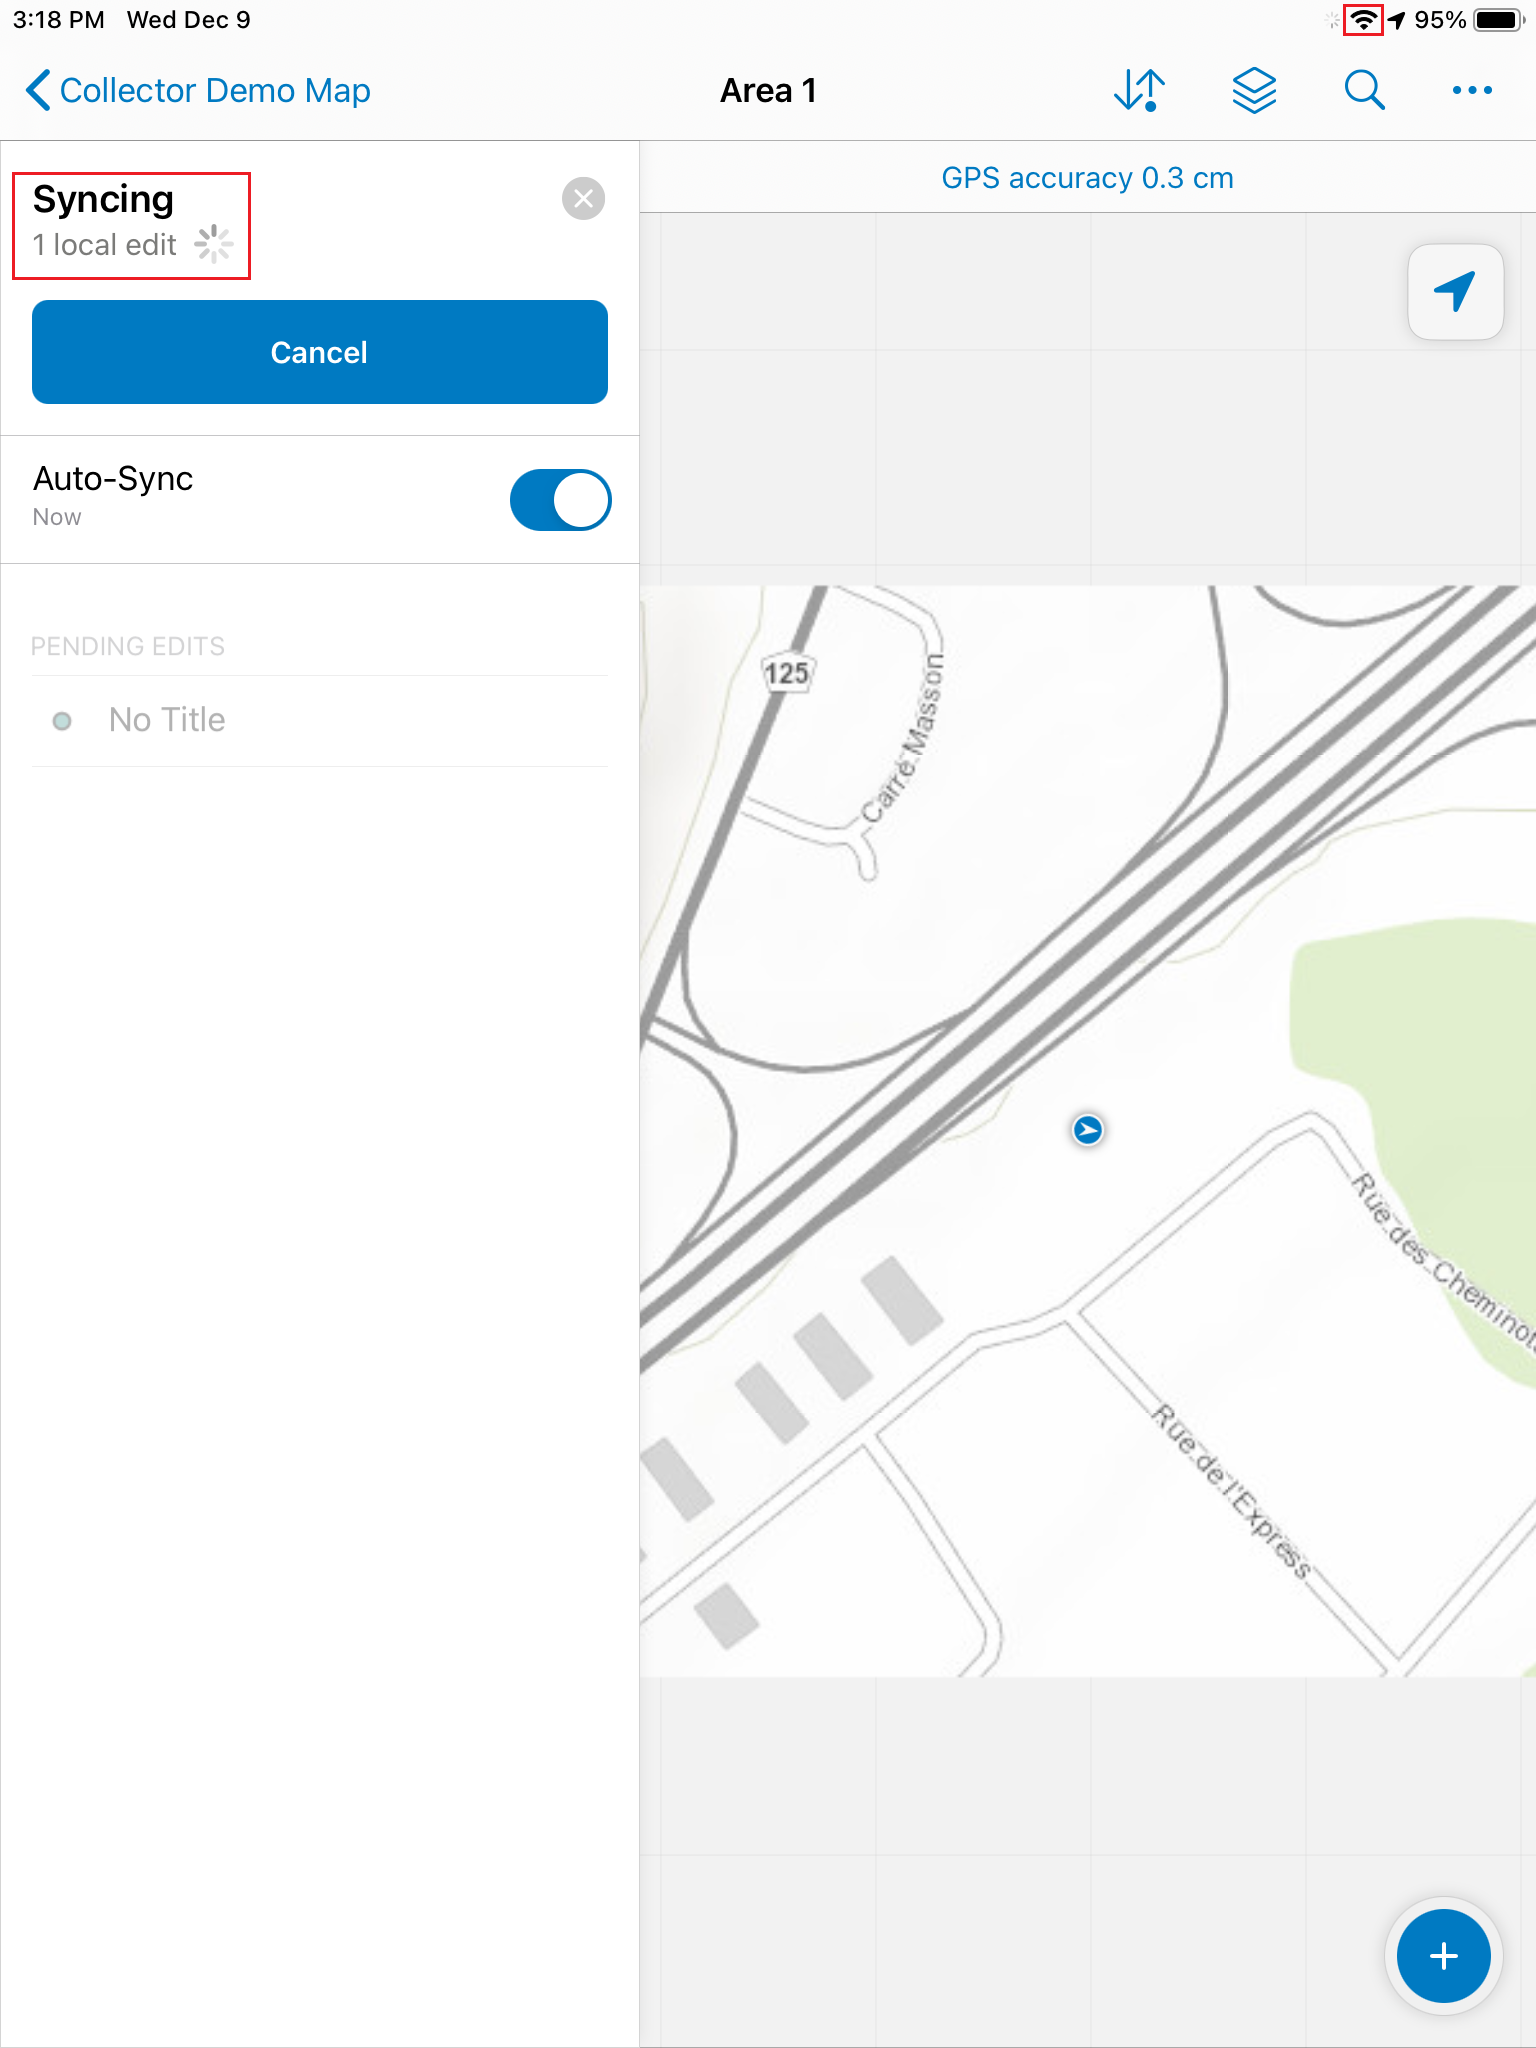
Stand by while your data syncs:
Congratulations! Your offline job is complete.

