Charging your Skadi Series™ GNSS receiver is a simple process, and there are two ways to do it. Below, we outline both methods to ensure your device remains powered for optimal performance.
Method 1: Charging with the Battery Inside
The easiest way to charge your Skadi GNSS receiver is to leave the battery inside the receiver or handle (either Skadi Standard Handle™ or Skadi Smart Handle™) and use the included USB-C cable. Follow these steps:
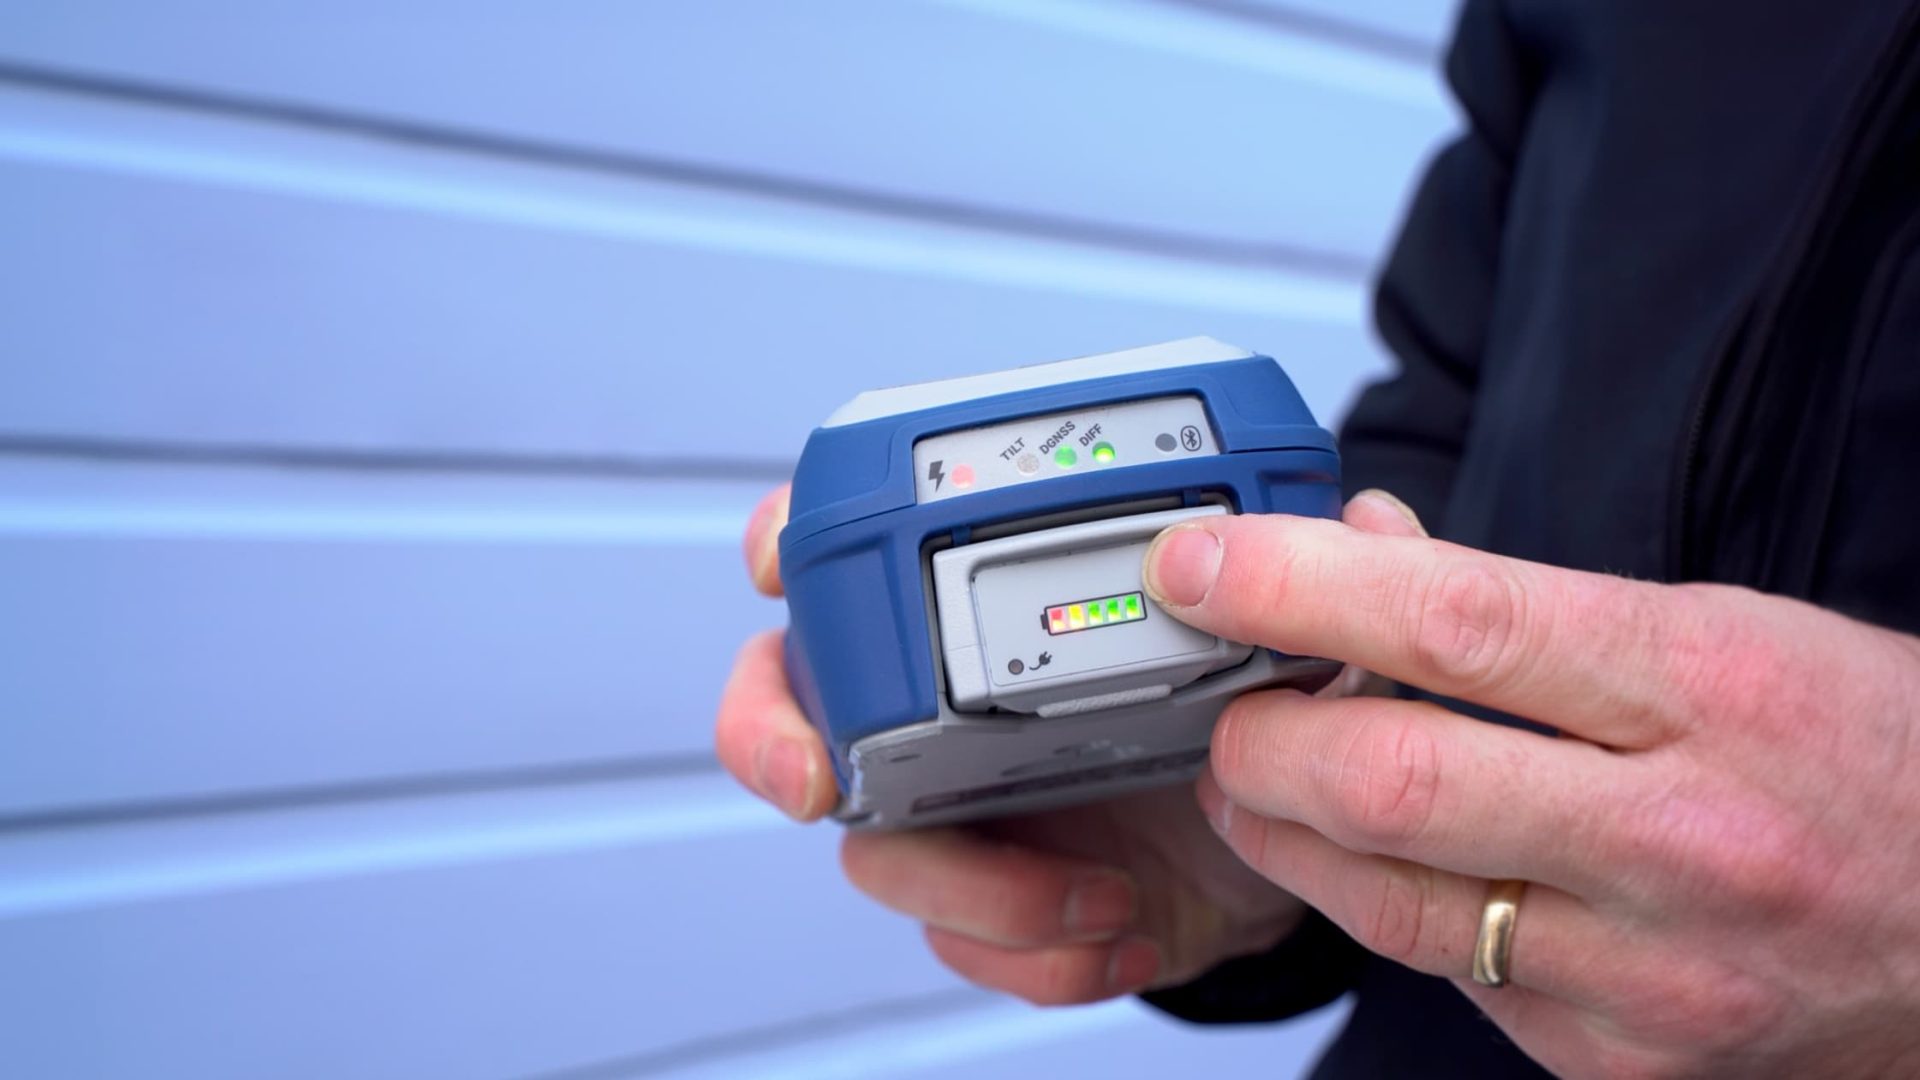
1. Connect the included USB-C charging cable to the USB-C port. Your battery may be installed in either the receiver (left) or the Skadi handle (right).


2. The LEDs on the battery pack (i.e., the fuel gauge) will blink while charging. Once the fuel gauge turns solid and stops blinking, the battery is fully charged (about two to four hours).

To determine the expected battery life on a full charge, consult the Skadi GNSS receiver comparison chart.
Method 2: Charging with an External Charger
If you have purchased the supplementary external battery power supply charger, you can charge the battery separately. Follow these steps:
1. Remove the battery from the receiver or smart handle by pushing the two release flaps while pulling the battery out.


2. Plug the battery into the external charger.

3. The battery pack fuel gauge will blink while charging. Once the fuel gauge turns solid and stops blinking, the battery is fully charged (about two to four hours).
To purchase the supplementary external battery charger for your Skadi receiver, contact your reseller or our team. If you have an Arrow Series® GNSS receiver, you received this charger with your Arrow purchase.
As with the first method, you may consult the Skadi GNSS receiver comparison chart to determine the expected battery life on a full charge.
Charge Regularly
For optimal battery maintenance, we recommend fully charging the battery once every 3–6 months. This helps protect the life of your battery.
Resetting the Battery Fuel Gauge
If you press the battery fuel gauge button to see your charge level of the Skadi battery pack, and the fuel gauge doesn’t display the proper charge level, simply insert the battery in the Skadi receiver and power on the Skadi. This will reset the fuel gauge.

Key Takeaway
By following these steps, you can ensure your Skadi GNSS receiver remains powered and efficient every time it’s needed in the field.
Explore Related Items

Skadi Tilt Compensation™: User Manual
This manual guides you through the steps to enable, initialize, and begin using Skadi Tilt Compensation™. Requires a Skadi Tilt Compensation activation.

What is Required to Use Skadi Tilt Compensation™? [Video]
In this video, learn what is necessary to get started with Skadi Tilt Compensation™, including hardware and software requirements!