Are you ready to configure Collector for ArcGIS with Arrow receivers on Android? This screenshot-heavy guide provides you with a step-by-step workflow for easily setting up Collector and Arrow
Before the first step, make sure that you have initially paired your Arrow with your Android device. If not, we suggest you to download our Quick Setup guide from our website.
Click here for the direct link to the Arrow Quick Setup guide (see section 2.1.2):
https://eos-gnss.com/wp-content/uploads/2021/09/Arrow-Series-Quick-Start-Guide_Rev1.1.pdf
You will also need to configure Mock Provider on your Android device before installing Eos Tools Pro:
https://eos-gnss.com/pdf/Setup%20Notes%20for%20Eos%20Tools%20Pro%20and%20Android.pdf
If you are planning to use your Arrow receiver with real-time corrections from an Internet base station or if you require audible alarms, you will need our Eos Tools Pro installed on your device. You can download the app directly from the Google Play Store or you can click on the link below:
https://play.google.com/store/apps/details?id=com.eos_gnss.eostoolspro
There are 2 types of configurations with Collector and your Arrow receivers:
1. Configuration for direct connection via Bluetooth for SBAS and Atlas (L-Band) operations
2. Configuration for receiving differential corrections from an RTK network with Eos Tools Pro
Please follow the steps below for the proper configuration that you application requires.
1. Configuration for direct connection via Bluetooth for SBAS and Atlas (L-Band) operations
1 – Adding your Arrow receiver
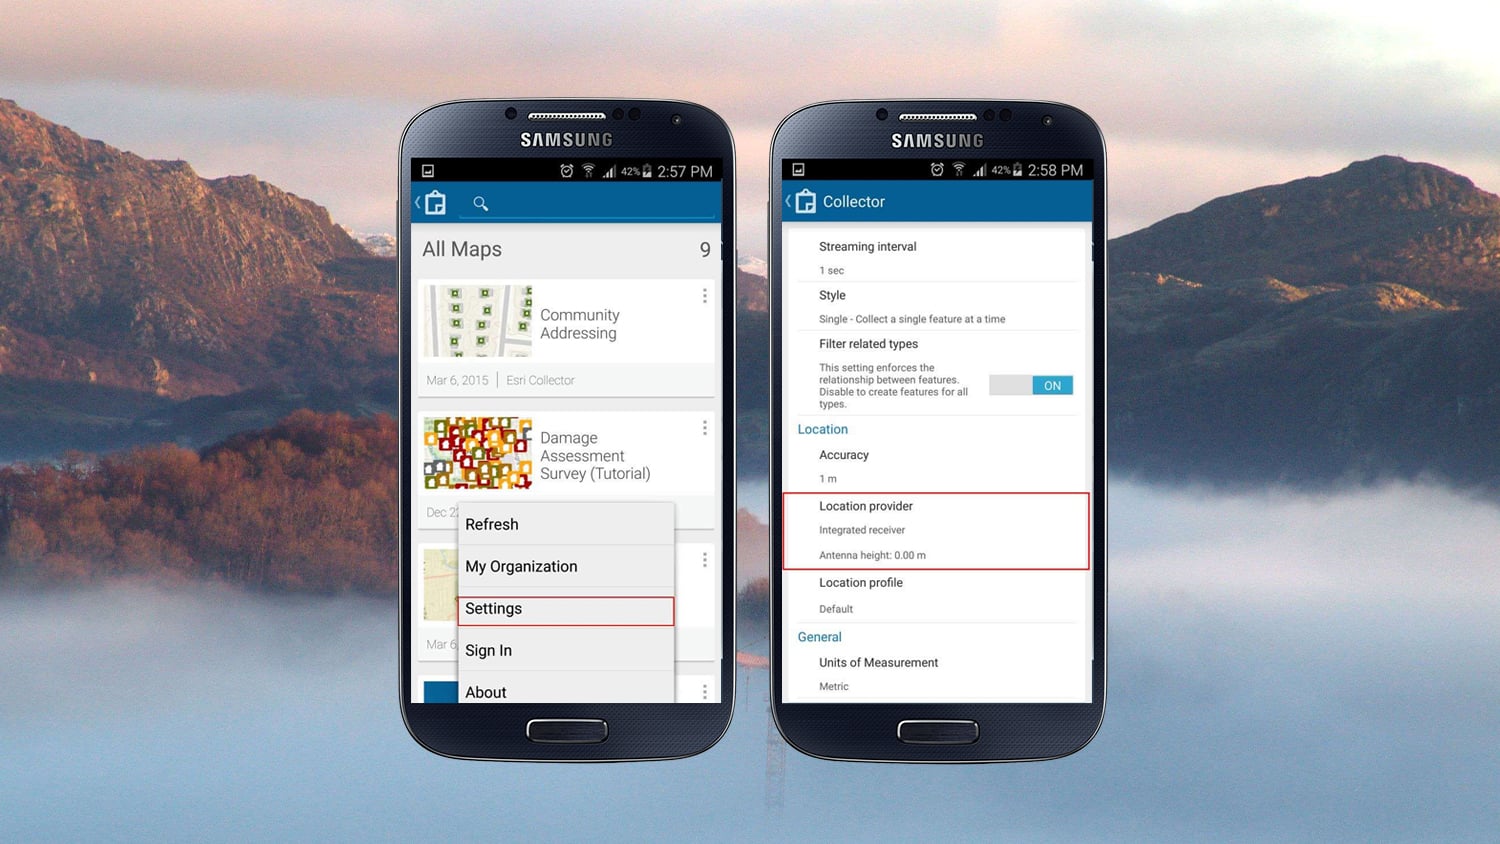
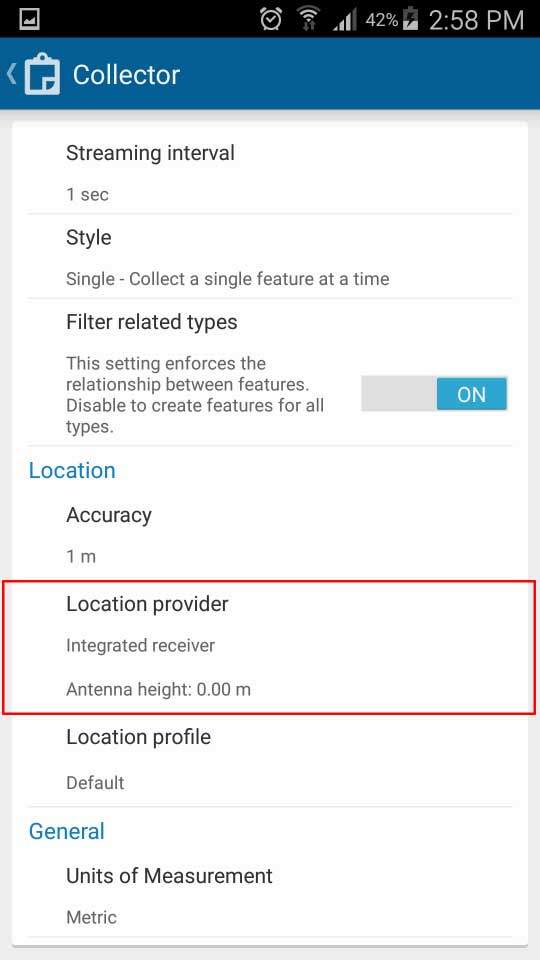
Open Collector 10.4 and click on the Menu button of your Android device and then select Settings.
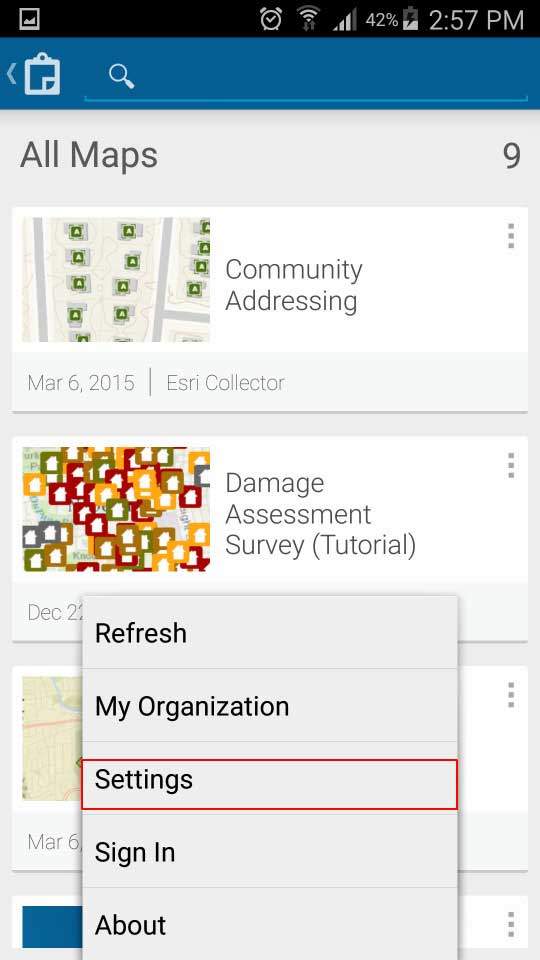
From the Settings window, click on Location Provider.
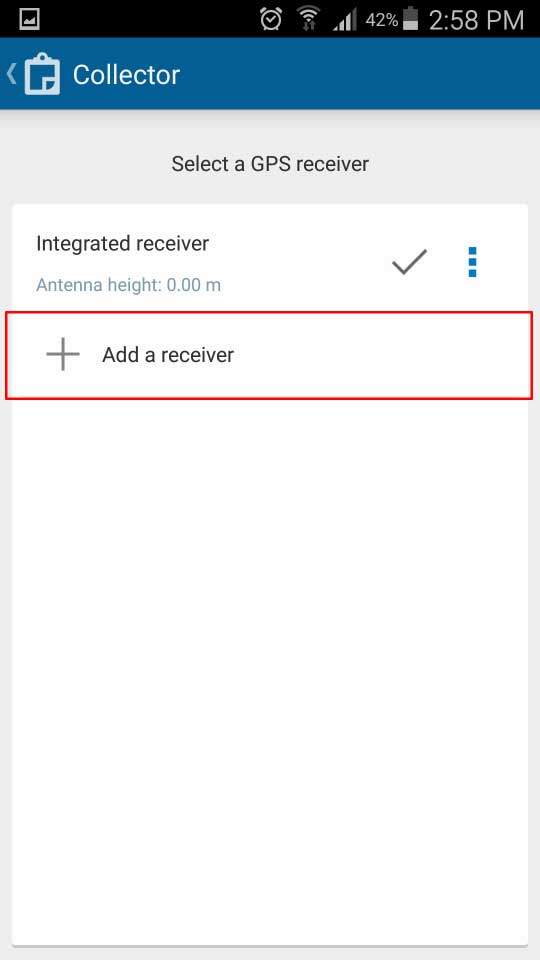
Click on the ‘’+’’ to add a receiver.
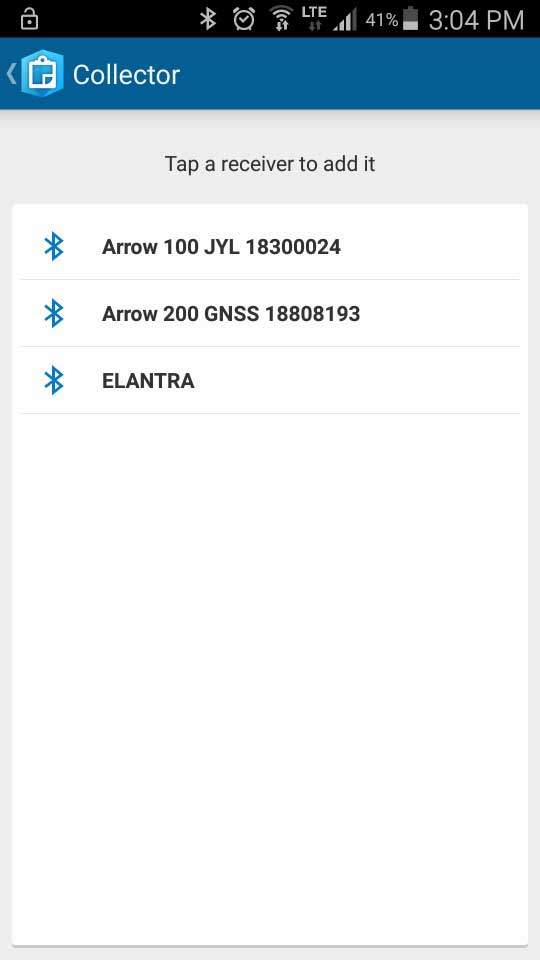
Select your Arrow receiver from the list.
Enter your Antenna height and click on OK.
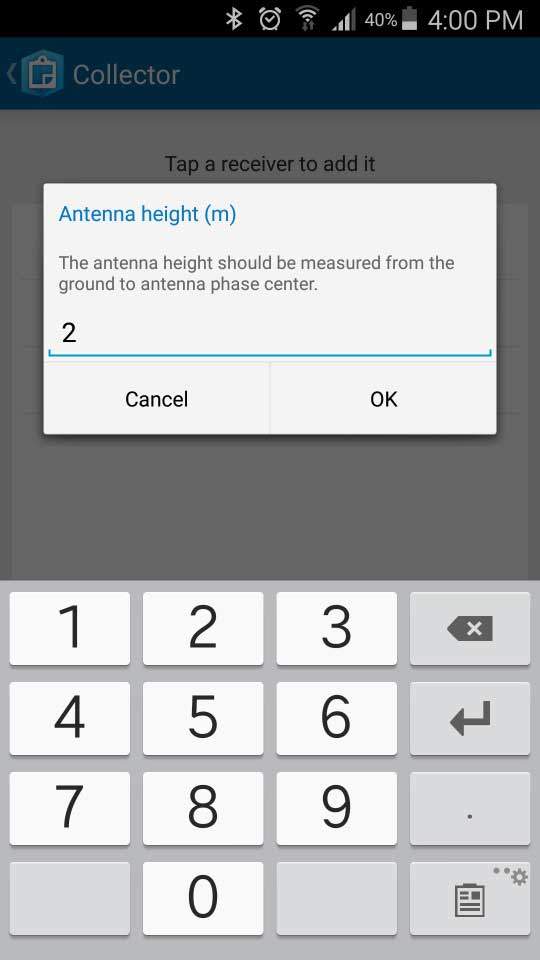
Note: If the elevation is irrelevant for your job, you can leave this blank. If you are doing RTK data collection, and your application requires elevation measurements, then enter an antenna height, taking into account the pole height, the antenna mounting plate and the antenna phase center offset.
Collector should now be using your Arrow receiver’s position instead of the Location Service (Internal Location) of your Android device. Make sure there is a grey check mark next to your Arrow receiver listing as shown below.

2- Configuring your Location Profile (Coordinate system and datum transformation)
Location Profile allows you to setup on-the-fly datum transformations. While in the Settings window, click on Location Profile.
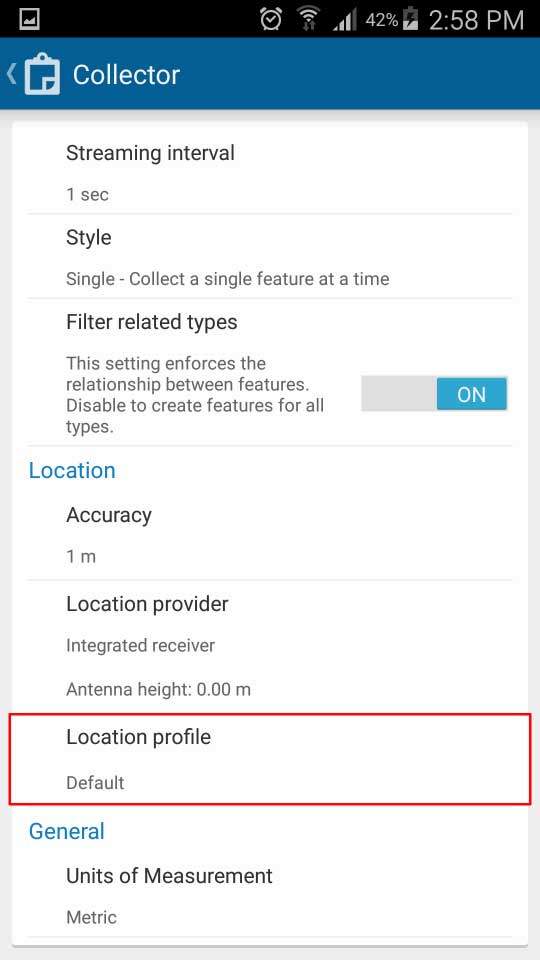
Note: The default coordinate system for the receiver is set to WGS 1984.
Click on the ‘’+’’ button to add a new profile.
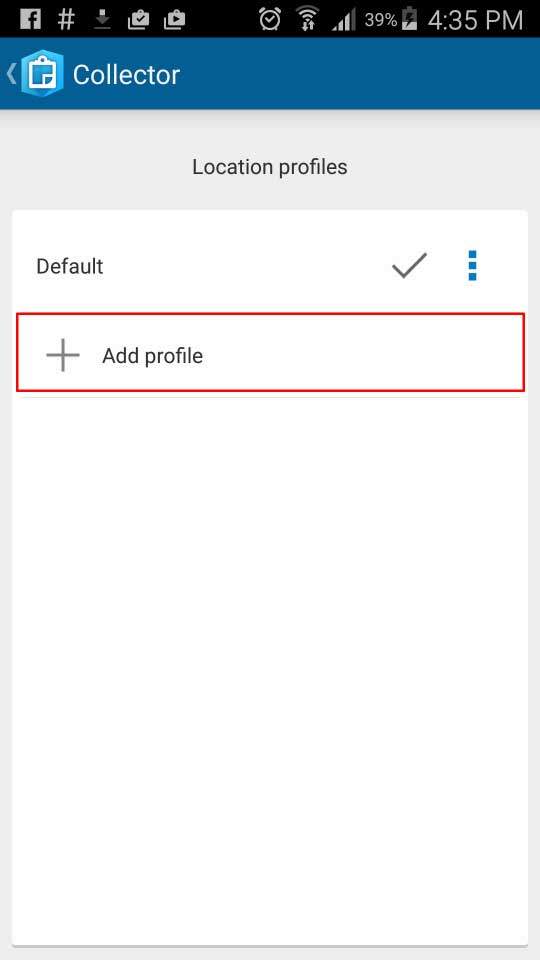
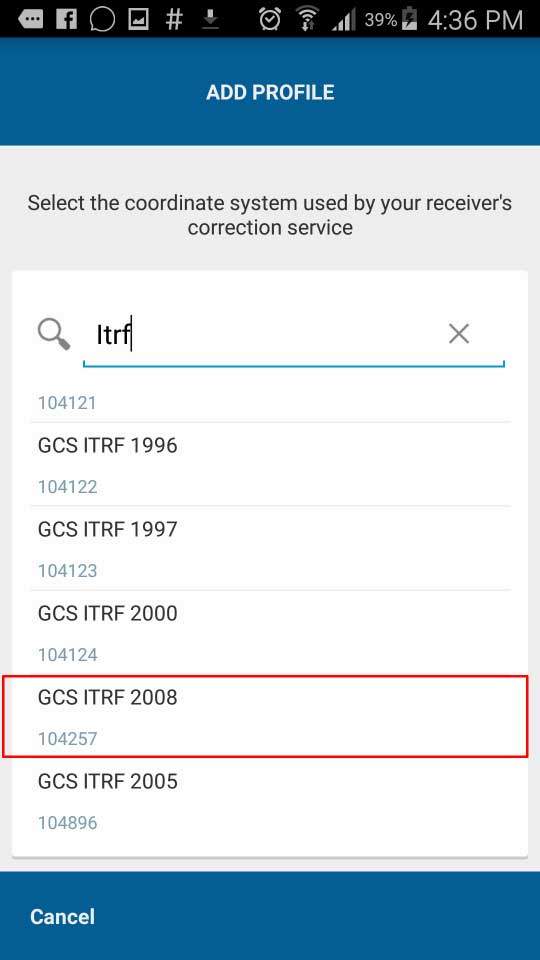
Since you will be using SBAS (WAAS, EGNOS, MSAS, and GAGAN) or Atlas as your source of differential correction, make sure you choose ITRF 2008 as the coordinate system used by the Arrow.
Next, select the coordinate system of the map that you will be using,
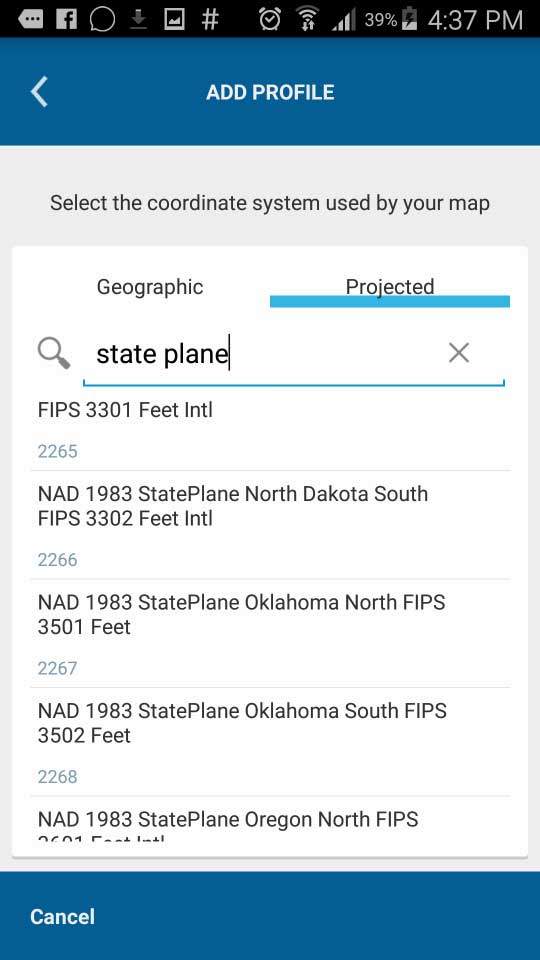
Followed by the datum that your published map is using.
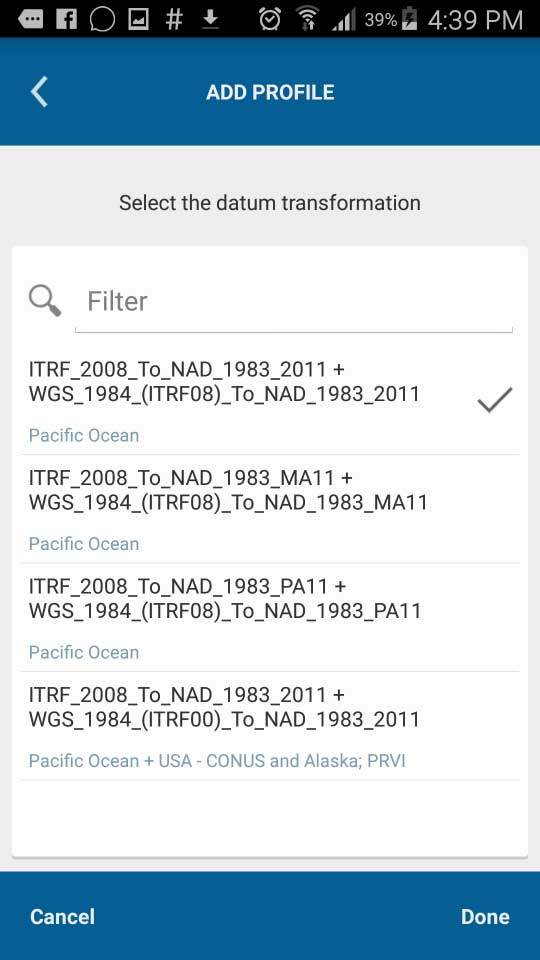
Below you can see the typical U.S. configuration when using SBAS corrections.
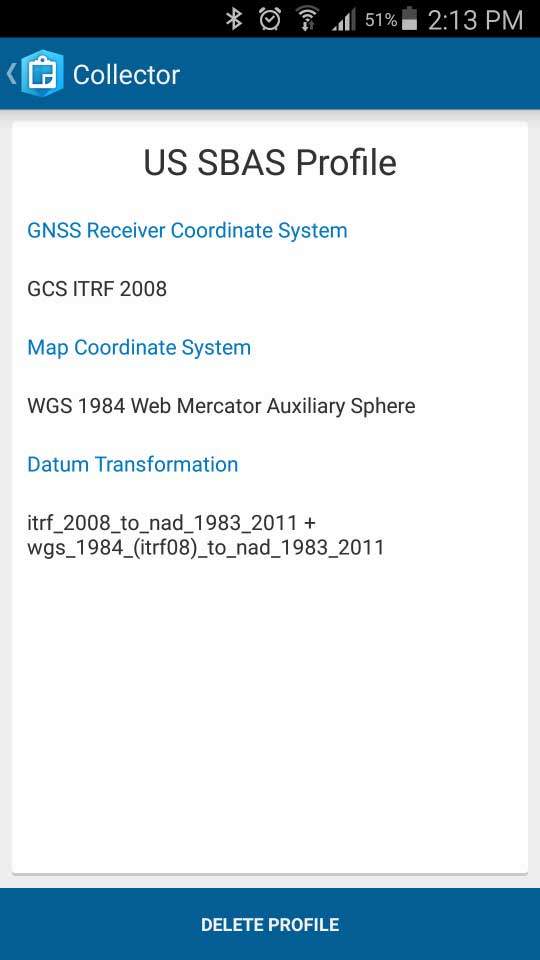
Note: Please confirm your published map coordinate system/datum with your GIS department.
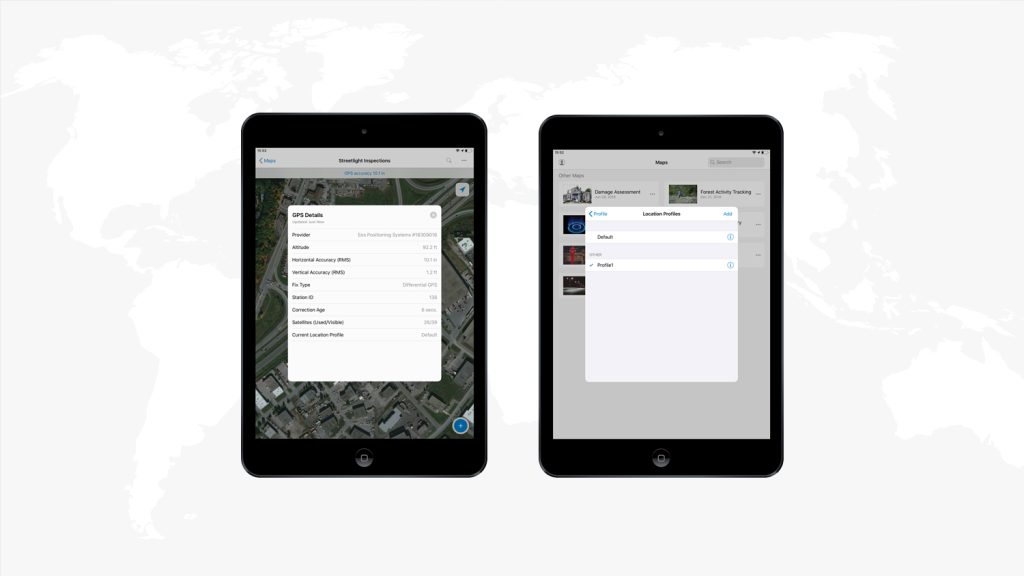
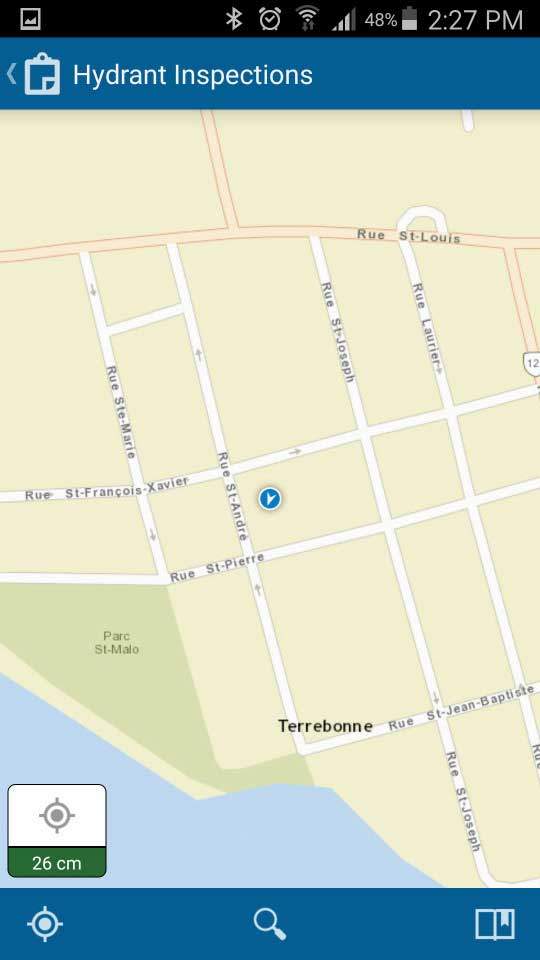
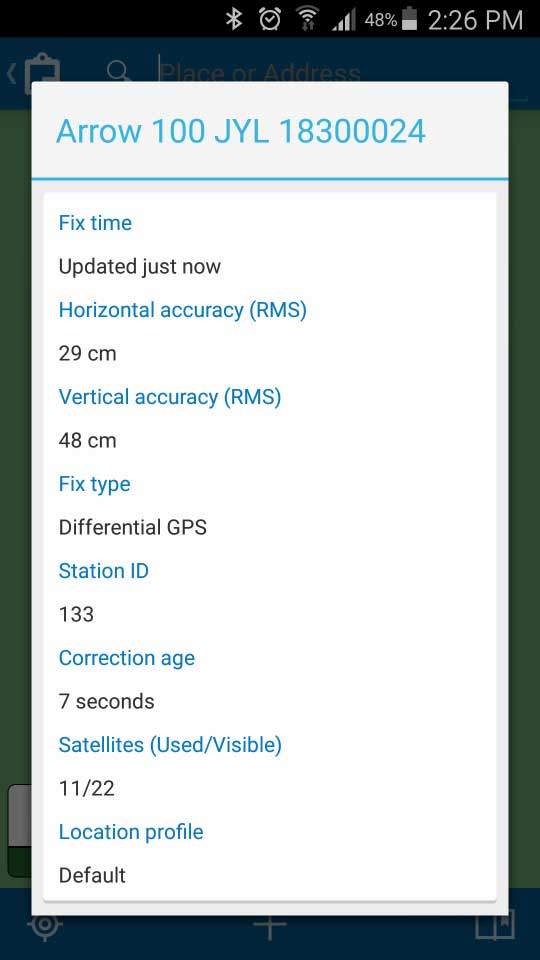
As a final step, go back to the map view and confirm that you are connected to your Arrow receiver. By clicking on the Location icon (bottom left of the screen) you will see valuable metadata from the Arrow (HRMS, VRMS, Fix Type, Sats used/visible, etc…) as shown below.
2. Configuration for receiving differential corrections from an RTK network with Eos Tools Pro
First, you need to activate the Mock Locations in the Developer Options from your Android’s settings. You can follow the procedures from this document:
https://eos-gnss.com/pdf/Setup%20Notes%20for%20Eos%20Tools%20Pro%20and%20Android.pdf
Note: The Mock Locations option can differ depending of your Android OS version.
This will allow location-aware apps to have access to the more accurate position of the Arrow.
Esri has implemented support for Eos’ GNSS metadata protocol. The Arrow’s metadata are passed on as extras to the Location Service. Please contact Eos for more information.
1- Using Eos Tools Pro (version 1.40) to connect to an RTK network
Eos Tools Pro must be installed on your device before using Collector 10.4. Eos Tools Pro features an NTRIP client to receive corrections from an RTK network/Internet base station and feed these corrections to your Arrow receiver via Bluetooth.
Eos Tools Pro will also take care of populating the Android Location Service with the Arrow’s more accurate position (replacing the device’s internal position with the Arrow’s position).
If you need to download Eos Tools Pro, please refer to the first page of this document.
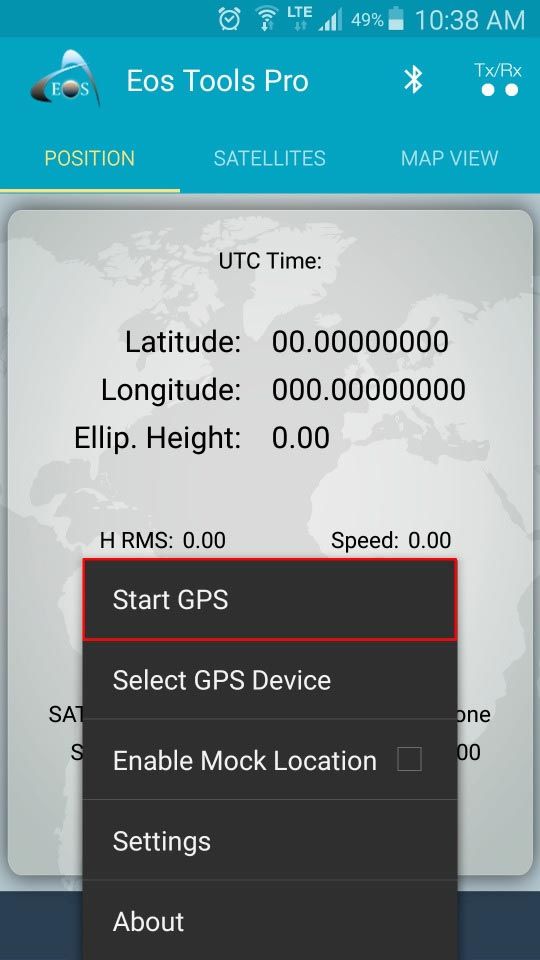
Open Eos Tools Pro and go to the Main Menu. Check the ‘’Enable Mock Location’’ box and select GPS Device.
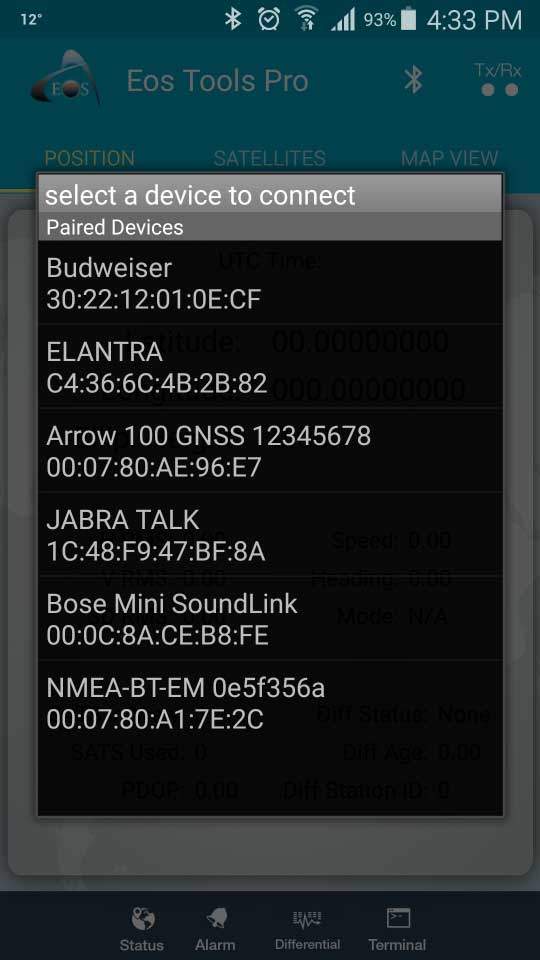
Select your Arrow receiver from the list.
Go back in the Main Menu and now click on Start GPS.
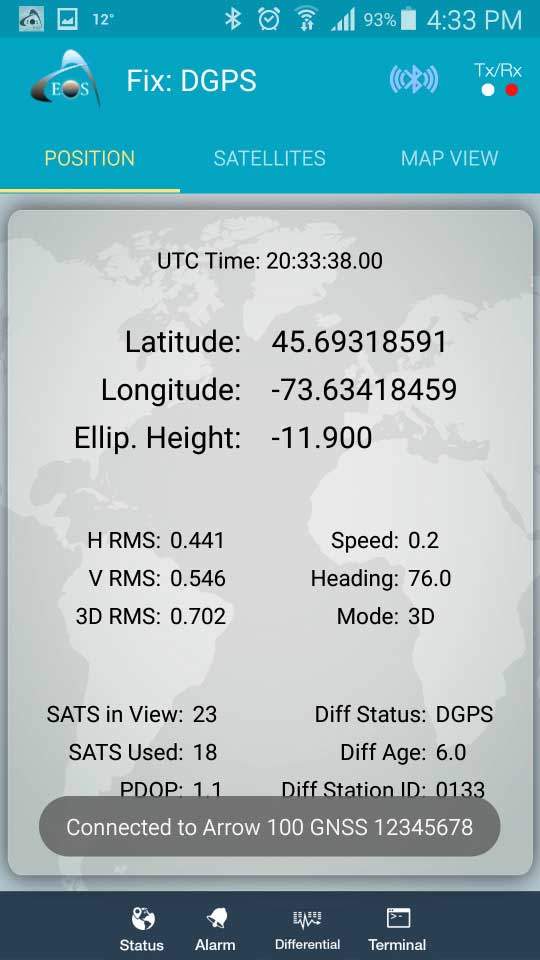
A pop up message will show that you are connected to your Arrow receiver. The Bluetooth LED (blue) of your Arrow should stop blinking and will be illuminated, meaning that there is an established Bluetooth connection between your receiver and your Android device.

Note: If your antenna is in clear view of the sky, and the Arrow is tracking satellites, you should see GNSS information populating the Position window.
Click on the Differential icon and enter your credentials for your RTK Network (IP, port, username and password) supplied by your RTK network provider.
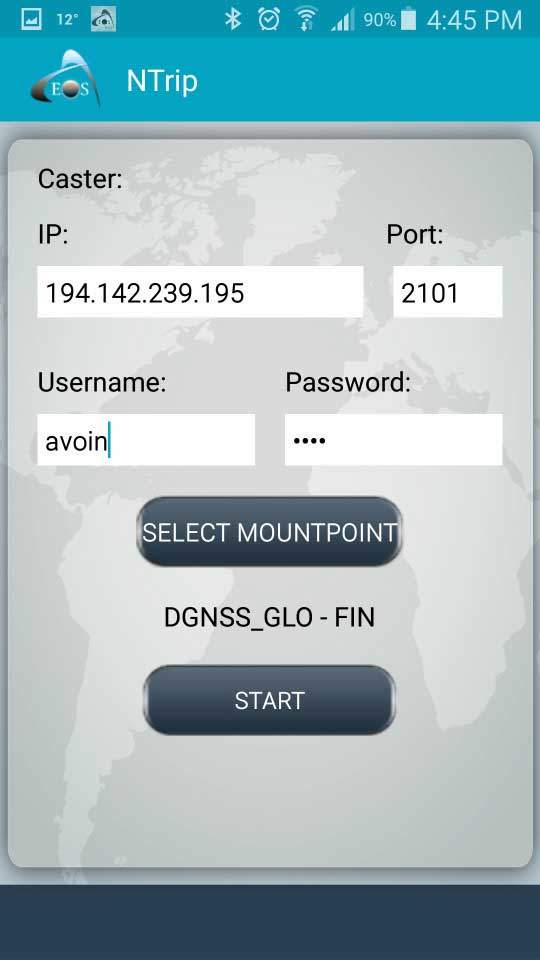
Click on SELECT MOUNTPOINT and select the mountpoint that you will be using.
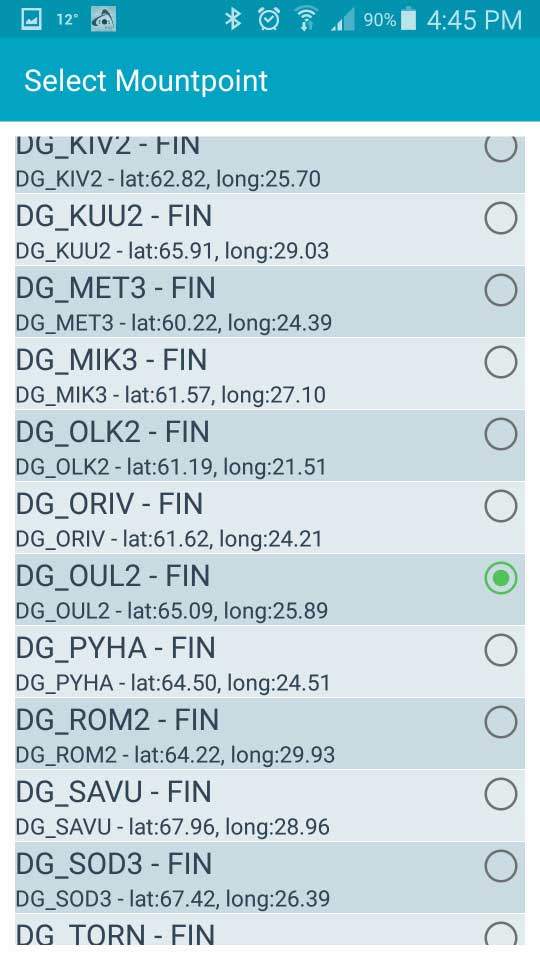
Go back one step (Escape from the mountpoint selection window) and select START to establish the connection to the RTK network. The receiver must be tracking a valid position for most networks to send corrections. If there’s a good connection to the RTK network, the Tx (Green LED at the top right corner of the app) would blink every second.
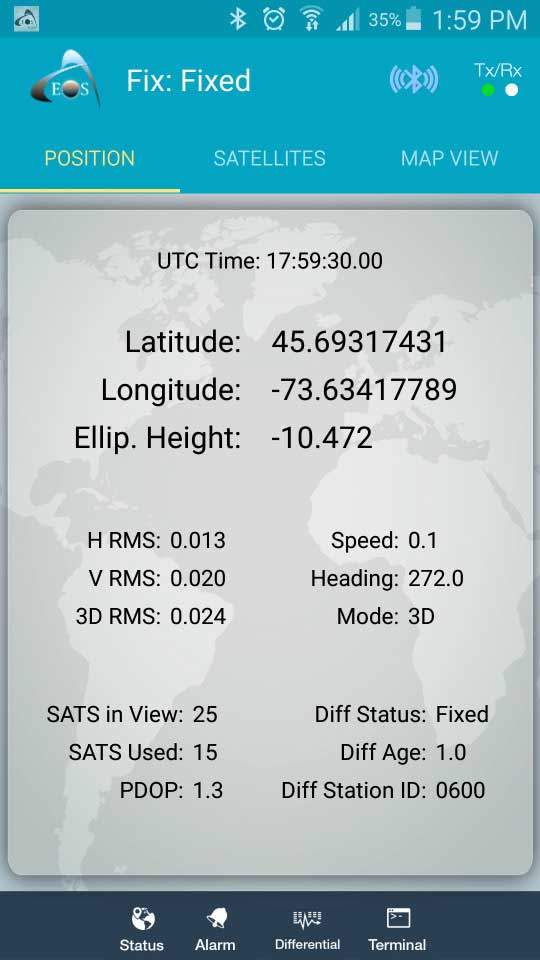
You will also notice that the Diff Status in the Position window has changed to Float or Fixed.
2- Alarms
Eos Tools Pro will be running in the background of Collector and Audible alarms can be set in the app. You may use the preset suggested alarm values or enter your own.

3- Configuring the Antenna Height
For RTK operation, entering the antenna Height is necessary if accurate elevation is needed.
From the Main menu of Eos Tools Pro, select Settings.
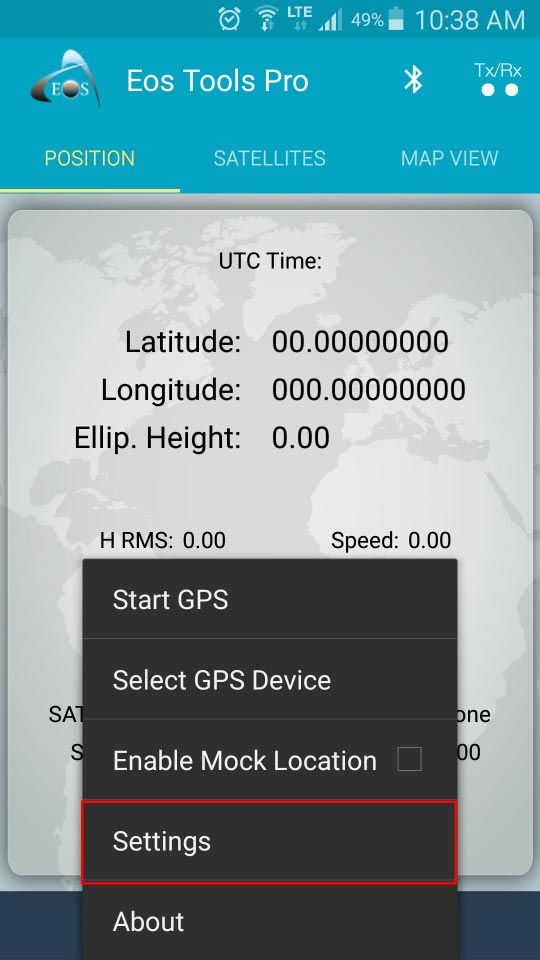
If using a 2 meters pole, you can enter 2.095 meters for an Arrow 200. This includes the pole height, the phase center of the antenna and the mounting plate height.
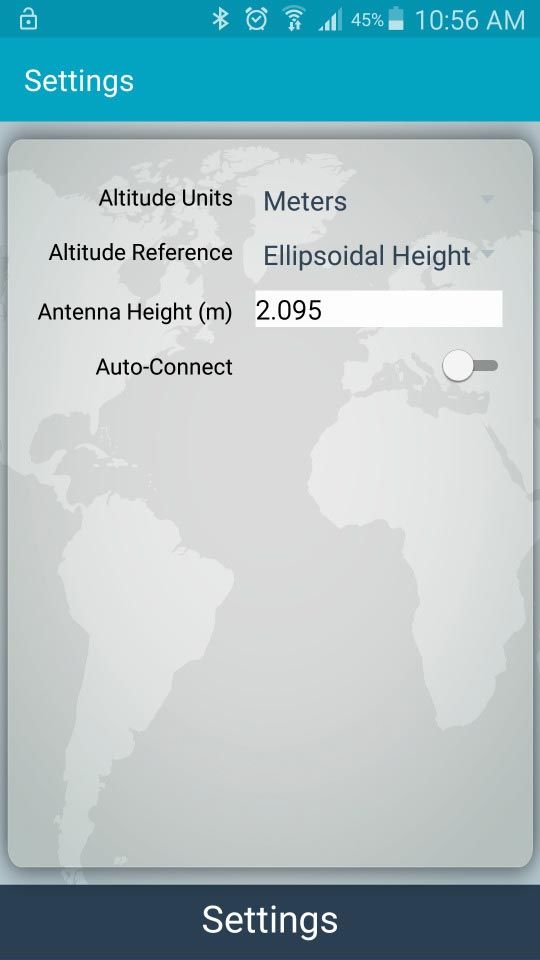
Warning: Do not enter the antenna height both in Eos Tools Pro and Collector. It is preferable to leave this field blank in Eos Tools and enter the antenna height in Collector.
Once you are done, click on the Escape button to go to the main menu and then the Home button of your Android device to put Eos Tools Pro in background mode.
4- Configuring Collector to read the Internal Location (populated by Eos Tools Pro via the Mock Provider feature)
Open Collector and go to the Settings menu. In the Location Provider option, Select “Integrated receiver” (do not select your Arrow receiver’s Bluetooth name).
In the Location profile, make sure to enter the coordinate system used by your RTK base station, your map coordinate system and datum.
For more details about the Location profile configuration, please refer to pages 5 to 7 of this document. The receiver’s datum will be in the same datum as your RTK network. Below you can see the typical Location profile for RTK users in the US.
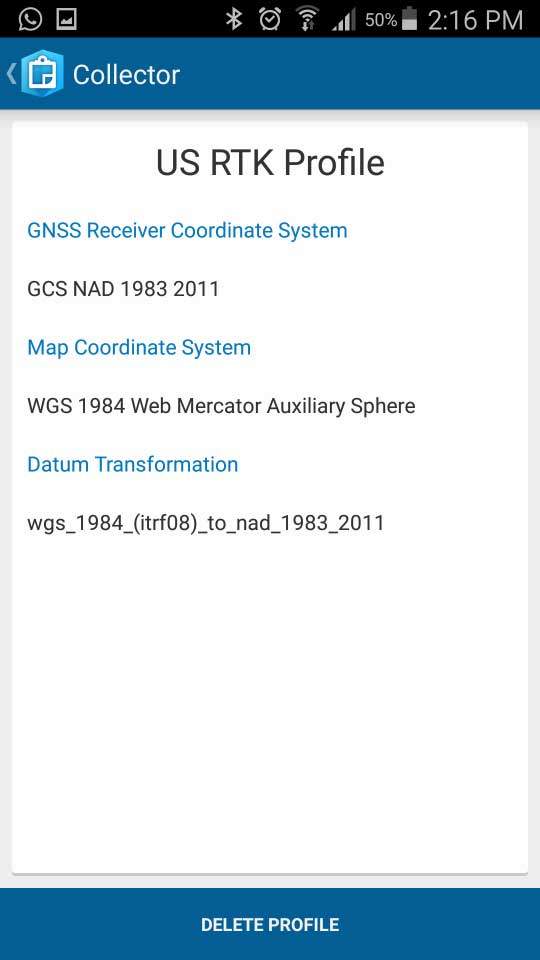
Note: If you are connected to an RTK network, the position output by the Arrow to collector will be in the same datum as the RTK network (for example: NAD 83 2011 usually in the US). Therefore it is important that you ask your RTK network provider for the datum information before creating your profile.
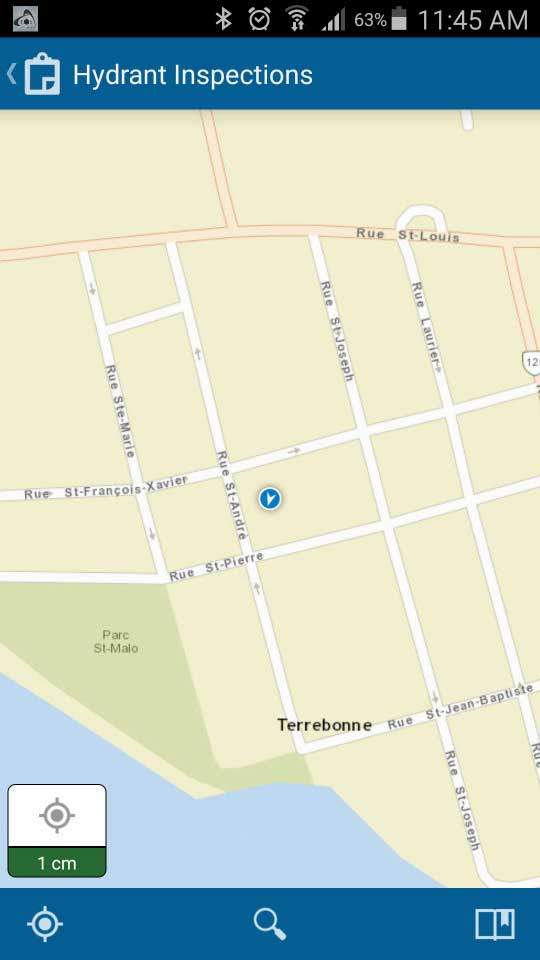
Open the map that you will be using.
By clicking on the Location icon from the Map view (bottom left of the screen), you will see valuable metadata from the Arrow (HRMS, VRMS, Fix Type, Sats used/visible, ect…) in RTK mode.
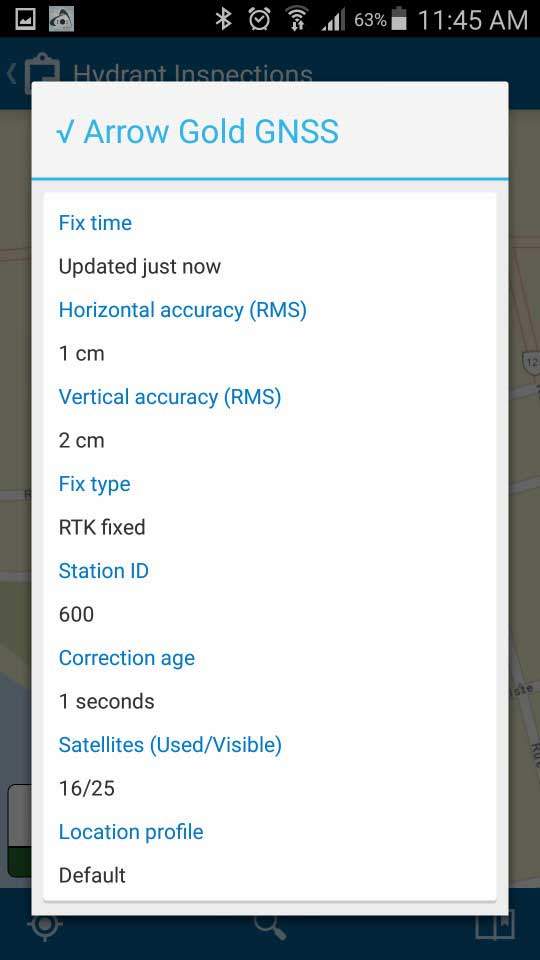
You are now ready to start your data collection with your Arrow in RTK mode!

