Synopsis
Eos Locate™ is a solution based within Eos Tools Pro that allows a field worker to collect georeferenced data of underground assets by using Esri’s ArcGIS Collector. The data collected includes all parameters from a locator device (such as depth below cover and frequency) along with high-accuracy GNSS locations and metadata from your Arrow receiver.
This video series will walk you through the steps required to perform your locate workflow. In this video, we will teach you the setting definitions for configuration on Collector and Eos Locate™, which is an interface within Eos Tools Pro.

Welcome to Eos Locate™ for ArcGIS®. This video series will walk you through the steps required to perform your locate workflow. In this video, we will teach you the setting definitions for configuration on Collector and Eos Locate, which is an interface within Eos Tools Pro.
Please note that the Eos Locate™ solution is currently available only on iOS® with ArcGIS Collector.
As an important note: Since the Eos Locate™ interface can only be activated by Collector, the Eos Locate™ settings will have to be configured once Collector requests a locate measurement for the first time. We will first configure Collector and then call Eos Locate™ from Collector to do the initial settings.
In ArcGIS Collector, Select your Maps and tap on the Locate Layer you created. If you haven’t created your layer, please refer back to our website or YouTube channel for the video on how to do so. This will automatically launch the Eos Locate™ interface.
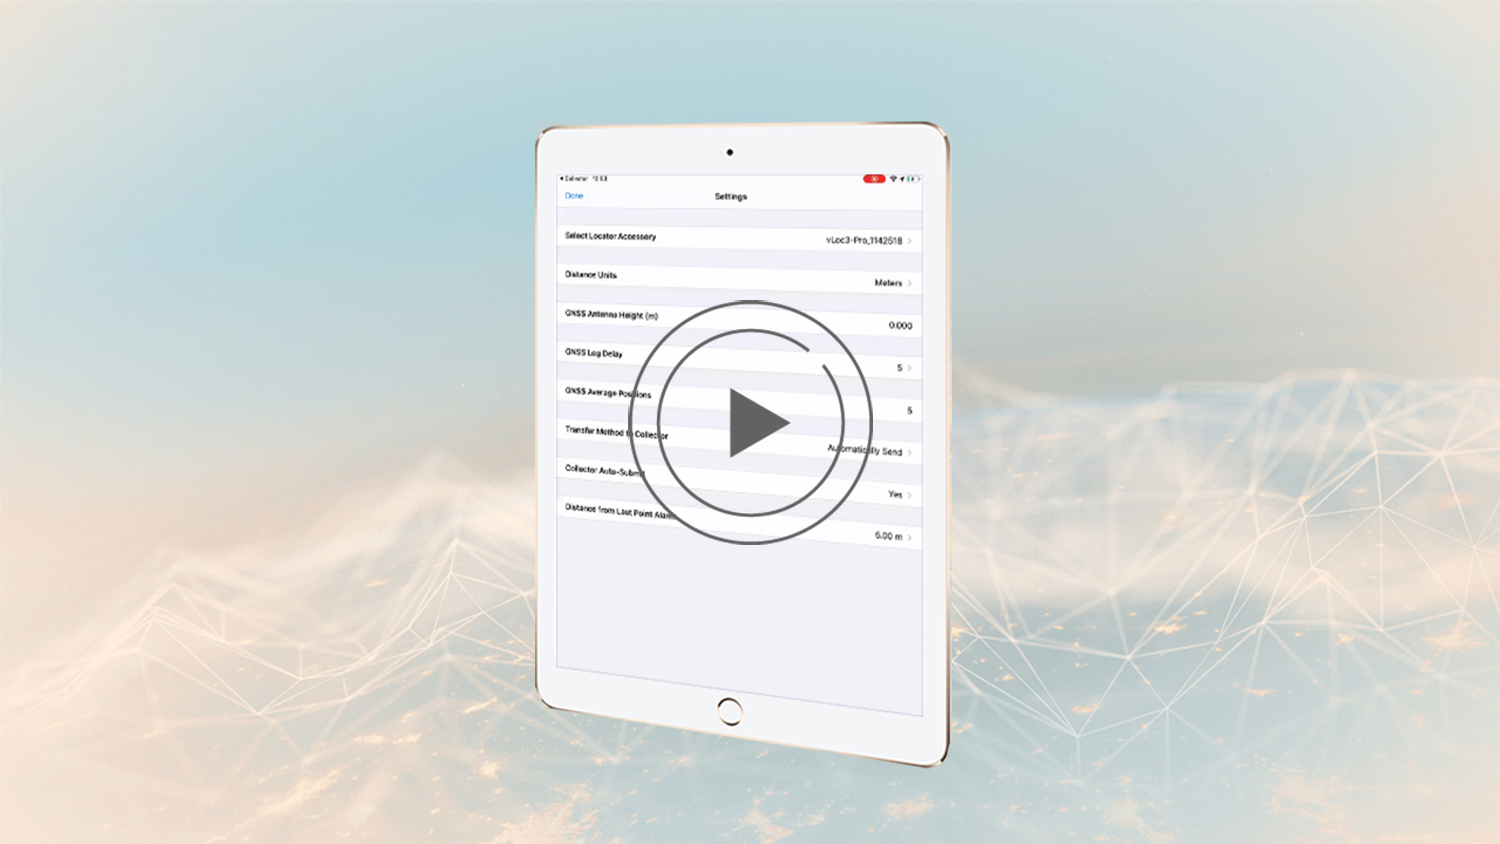
Start on the Eos Locate™ page within Eos Tools Pro. In the Eos Locator Measurement section, tap the “Settings” tab. The Settings tab is represented by a crossed wrench-and-screwdriver icon. We will go through each of these settings to explain their meanings.
The default parameter values allow for a fully automated process, which is triggered by the single push of a button on the vLoc3-Pro
Now, we will go through the setting definitions:
- Locator Accessory: This setting is used to select the locator device you want to use. This information is saved within the app. Your locator must be Bluetooth®-paired to your iOS device for it to appear in the list.
As a default: The most recently used locator will automatically be selected next time you use the software.
- Distance Units: This setting is used to configure the unit of measurement used to measure the distance from the user’s current GNSS position to his last locate point. You can select meters or feet.
The default unit is “meters”.
- GNSS Antenna Height (m): This is the total height of the Arrow antenna above ground. If accurate elevation is required, this height should be measured. The default value is 0 meters.
As an important Note: When using Eos Locate™, the antenna height entered in Collector is not used; therefore, this value must be set in Eos Locate™ if precise elevation is required.
- GNSS Log Delay: This setting configures when the GNSS point should be acquired by Eos Locate™ after the locate measurement is received. Possible choices are Manual or Automatic (with an optional delay).
This Automatic setting is the default, with a default 5 second delay.
- GNSS Average Positions: This sets the number of positions (from 1 to 60) that will be averaged for the GNSS point.
The default is 5 positions.
- Transfer Method to Collector: This setting allows you to define how the measurements are transferred to Collector after the locate and the GNSS measurements are both acquired. The choices are: “Manually” or “Automatically Send” (with an optional delay).
- Send Manually: When you select “Send Manually”, you will have to tap the “Send” button to transfer the locate measurement to Collector.
- Automatically Send: When you select “Automatically Send” our measurements will automatically be transferred to Collector once the GNSS point has been recorded.
Automatically Send is the default setting.
- Automatically Send Delay: This is an optional delay (in seconds) before the measurement is automatically transferred to Collector. This delay can be useful if you wish to take a quick look at your measurements before is it automatically sent to Collector.
The default delay is 3 seconds.
- Collector Auto-Submit: This feature instructs Collector on how to submit (sync) the locate point to ArcGIS Online once it is received from Eos Locate™. Possible values are “Yes” or “No”.
The default is set to “Yes”.
- If you select “Yes”, Collector auto-submits the point.
- If you select “No”, you will have to tap on the “Submit” button in Collector to manually submit the point.
In both cases, Collector relaunches Eos Locate™ for subsequent measurements once the point is submitted.
- Distance from Last Point Alarm: This setting is useful when you want to perform a locate measurement at regular distance intervals (e.g., every 25 meters). You may set both a range threshold and a threshold audible alarm.
Here’s how it works: The range between the field worker’s current GNSS location and the previous locate point is constantly monitored by Eos Locate™. In addition, this value is constantly displayed in the “Distance from Last Log” field of the main Eos Locate™ menu. Once the user exceeds a distance threshold that you configure (for example, every 25 meters), the distance will turn from black to red, and an audible alarm (if set) will sound. Both stimuli indicate that the field worker should stop and collect another point in order to comply with your desired data-collection workflow. To configure this parameter, set up the following fields:
- Range 0.00 to 99.99: This represents the distance (in meters or feet, based on the “Distance Units” setting) for the alarm.
The default range value is 0: disabled.
- Possible values for the audible alarm settings are:
- No sound. This is the default setting.
- Continuous: A audible tone of your choice every second.
- Beep once: A single audible tone at the moment the distance threshold is exceeded.
- A selection of tones is available for the “Continuous” and “Beep Once” modes.
Nice job! You’ve made it through all of the settings. In the next video, you will learn how to locate an underground asset and perform your very first locate measurement.
You will find a complete manual on how to setup Eos Locate™ with your kit. If you have any additional questions, please contact technical support on the Eos website.
If you have any additional questions, please contact Eos technical support.
Explore Related Knowledge Base Items

Eos Locate™: How to Set Up ArcGIS Pro with the Eos Toolbox
Follow these steps to learn how to set up ArcGIS Pro with the Eos Locate™ Toolbox. This is the first video tutorial for Eos Locate (underground asset mapping)

Eos Locate™: How to Pair Your vLoc Utility Locator to iOS® via Bluetooth®
In the third Eos Locate video tutorial, you’ll go through the steps of pairing your vLoc Locator to iOS via Bluetooth for use with underground mapping.