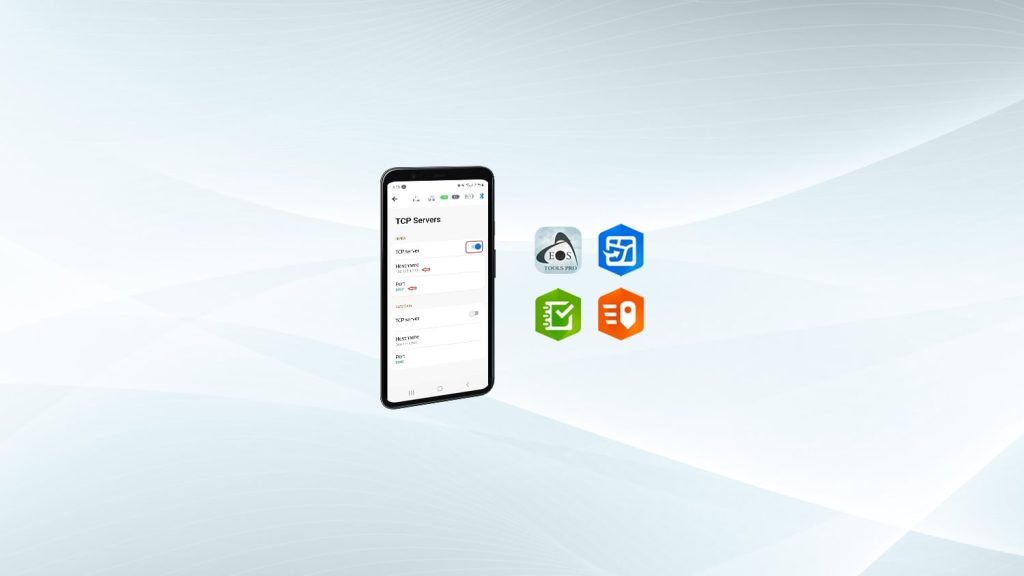
To acquire RTK corrections with your Eos GNSS receiver, you need an app capable of receiving and transmitting RTK corrections. RTK corrections are received via the Internet, and they are transmitted to the receiver via Bluetooth®.
Eos Tools Pro includes both a Networked Transport of RTK via Internet Protocol (NTRIP) and Direct Internet Protocol (DIP) client that allows you to connect directly to an RTK network or base station by entering your credentials (i.e., IP address, IP port number, username, and password).
In this tutorial, we will show you how to connect your Eos GNSS receiver to Eos Tools Pro on Android and then configure the Differential menu to connect to your RTK network or base station
Initial Location Settings
1. Make sure Eos Tools Pro is already installed on your Android device. If you need to download the app, please visit the Google Play Store or use the following link:
https://play.google.com/store/apps/details?id=com.eos_gnss.eostoolspro
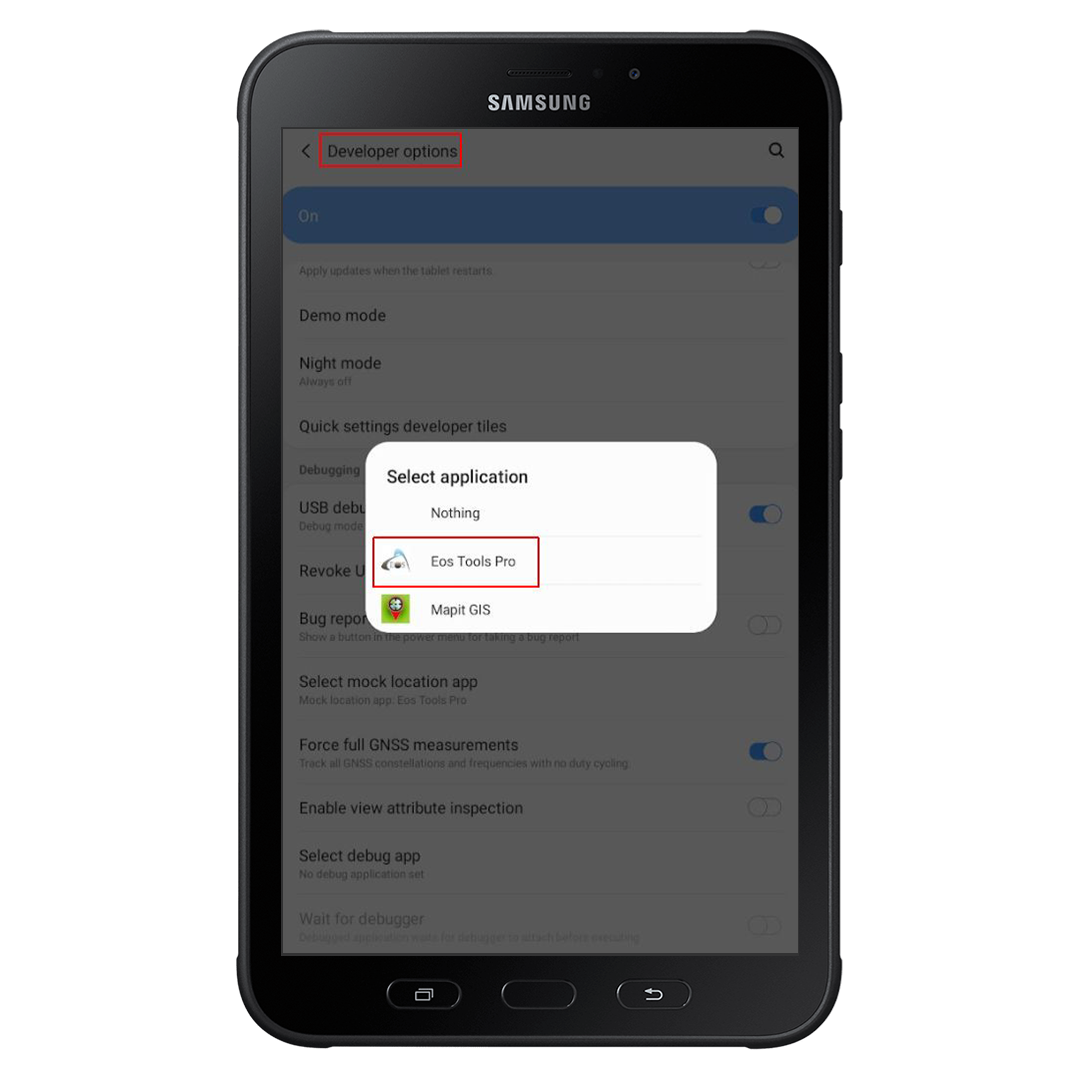
2. Make sure that the Developer Options on your Android device are activated, and that Eos Tools Pro is set up as the mock location app.
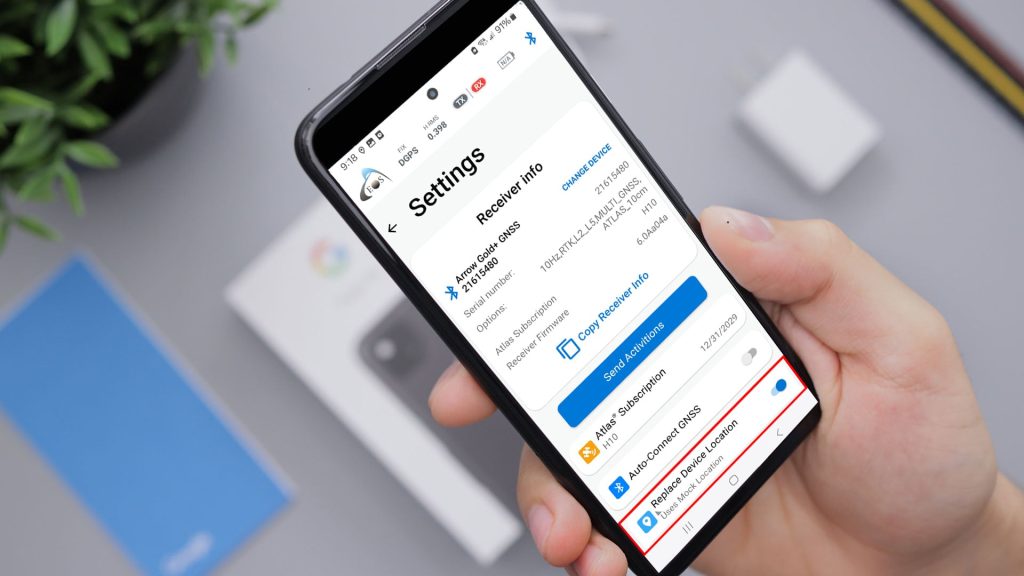
3. Activate the Replace Device Location switch in the Eos Tools Pro settings. This will allow your data collection app (e.g., ArcGIS Field Maps, ArcGIS Survey123, tMap) to acquire the location from your Eos receiver.
For a more detailed step-by-step guide on how to perform these preliminary settings, please visit the following link:
https://eos-gnss.com/knowledge-base/articles/mock-location-android-eos-tool-pro
Entering Your RTK Credentials on Eos Tools Pro
There are three different ways to connect to an RTK network/base station using the following options in Eos Tools Pro:
- NTRIP (Networked Transport of RTCM via Internet Protocol)
- DIP (Direct IP protocol)
- Radio/UHF*
*Note: For radio communication configuration, please contact our tech support.
Connecting to Your RTK Network/Base Station Using the NTRIP Protocol
1. Connect your Eos receiver to Eos Tools Pro.
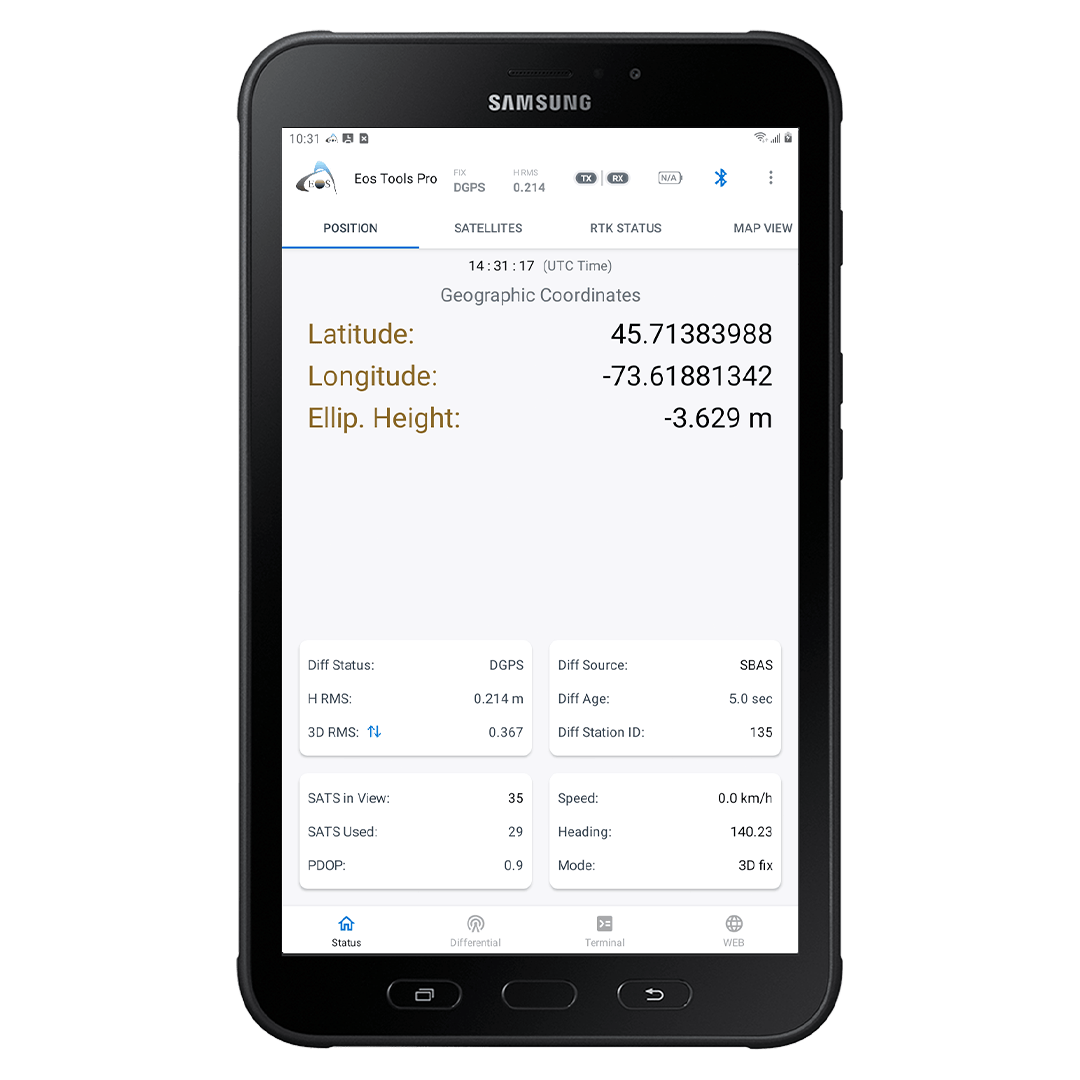
2. Confirm that you have a valid position (at least GPS Diff Status) displayed in the Position menu:
Connecting to Your RTK Base Station Using the DIP Protocol
1. Connect your Eos receiver to Eos Tools Pro.
2. Confirm that you have a valid position (at least GPS Diff Status) displayed in the Position menu:
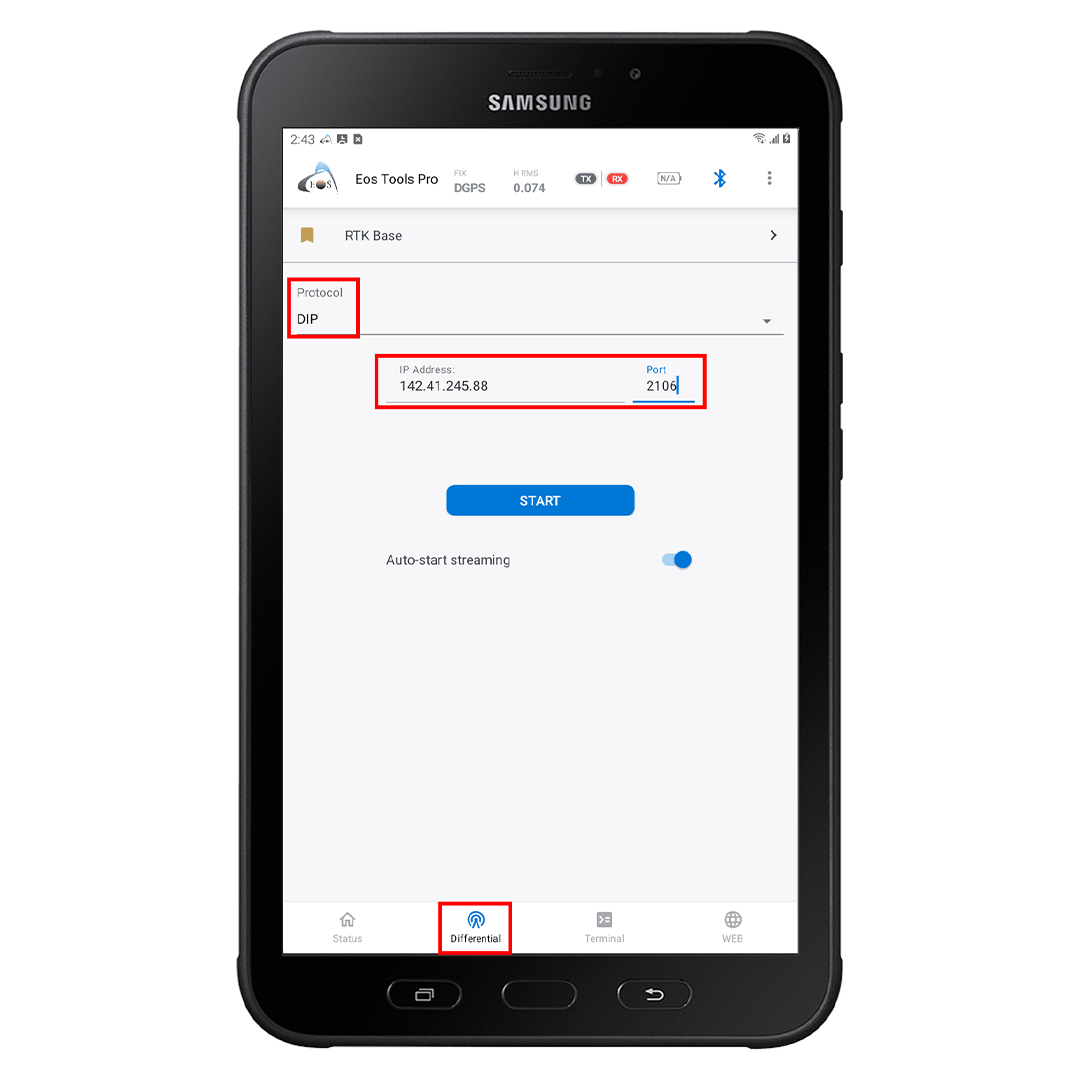
3. Tap on the Differential tab and select the DIP tab.
Enter your IP and Port. It will look like this:
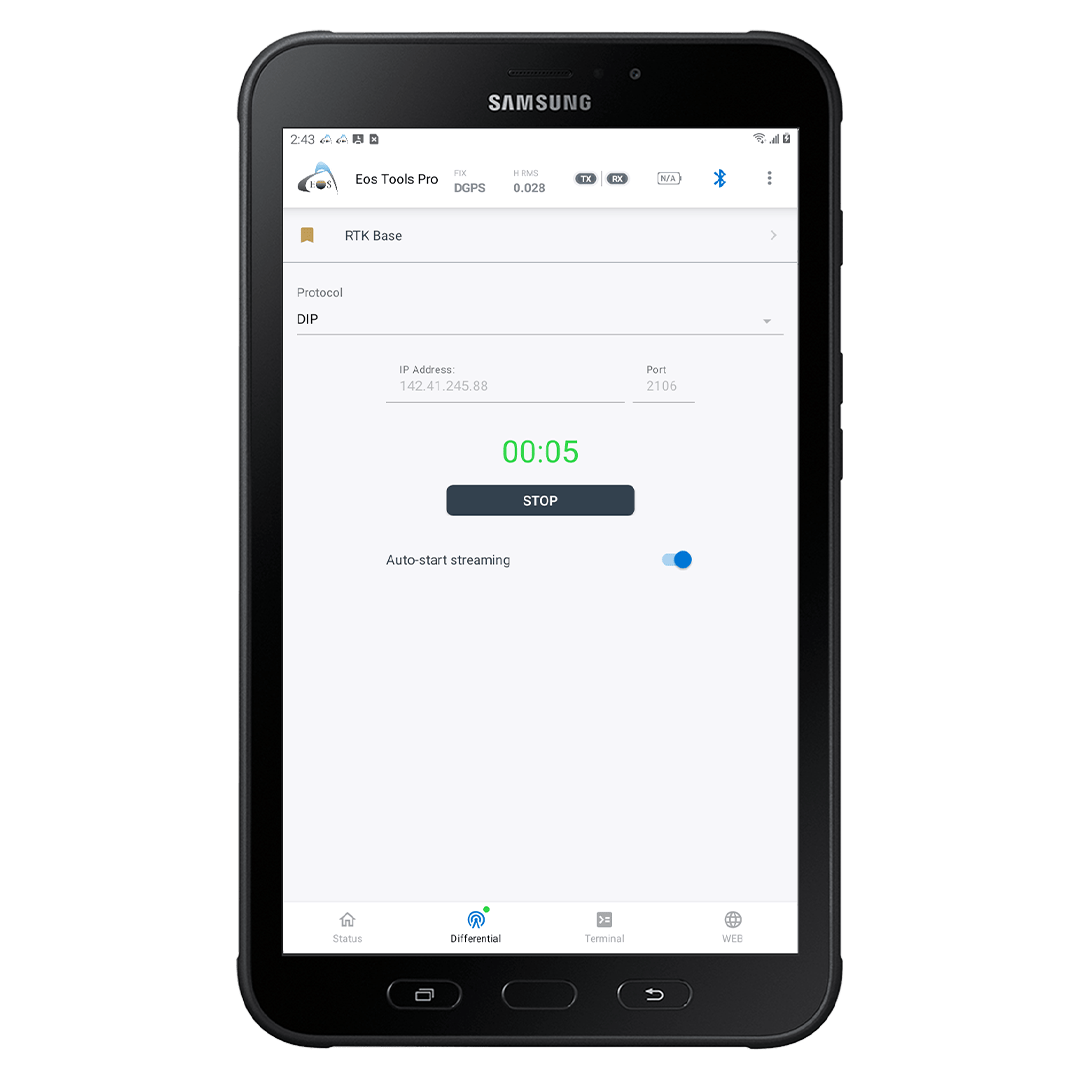
A timer will start, and the Tx LED on the top of the app will start blinking green every time RTK corrections are received.
Connecting to Your RTK Base Station Using a Bluetooth® Radio
1. Pair your Bluetooth® radio to your Android device using the Android Bluetooth® connection settings. In this example, we will use the Satel Compact-4BT radio.
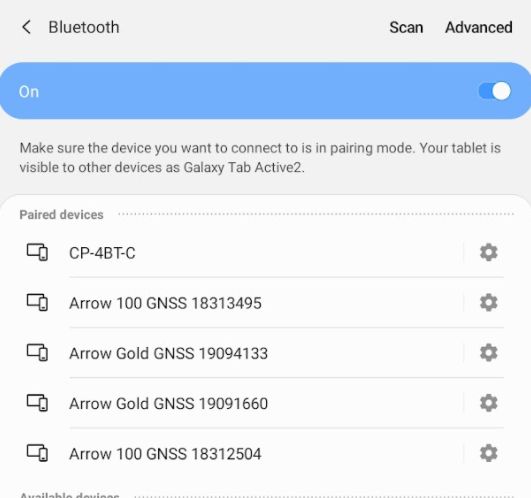
The radio will then appear under the Paired Devices list.
2. Open Eos Tools Pro and connect to your Eos receiver.
3. Make sure you have a valid GPS position displayed in the Position menu.
4. Tap on the Differential tab and from the Radio menu, select the previously paired radio from the Paired Devices List.
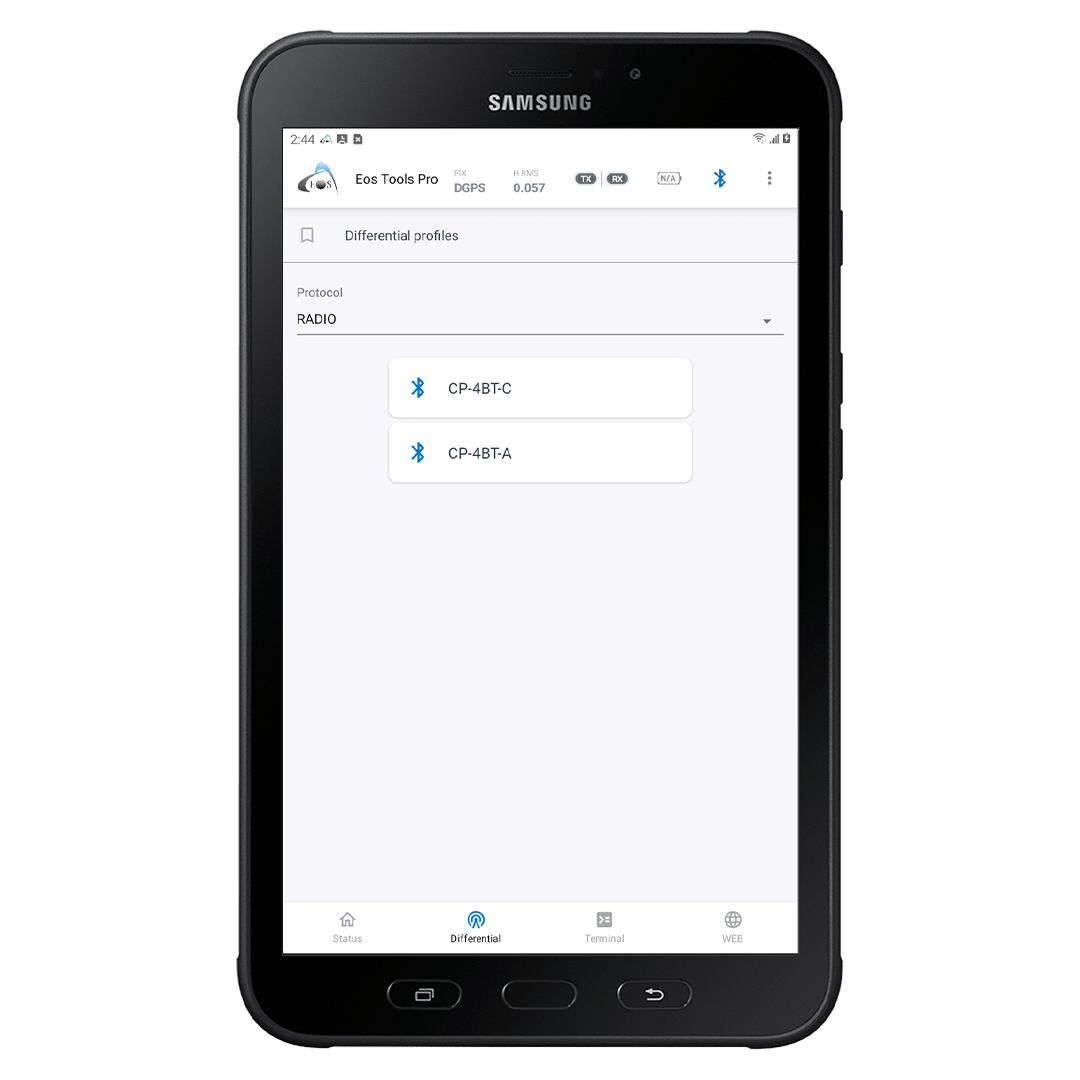
Eos Tools Pro will connect to your Bluetooth® radio to receive RTK corrections and send these to your Eos GNSS receiver to then compute an RTK fixed position.
Note: Make sure you have previously configured both radios (rover and base) with the radios’ software or by using their front interface before connecting with Eos Tools Pro.
For more information concerning the radio setup, we suggest you contact your radio provider for technical support.
Saving Your RTK Credentials
If desired, you can also save your RTK network/base station information and connection credentials within Eos Tools Pro.
This would save you time if you are planning to switch from one RTK network to another.
Here’s how to proceed …
Saving RTK Credentials for NTRIP and DIP Protocols
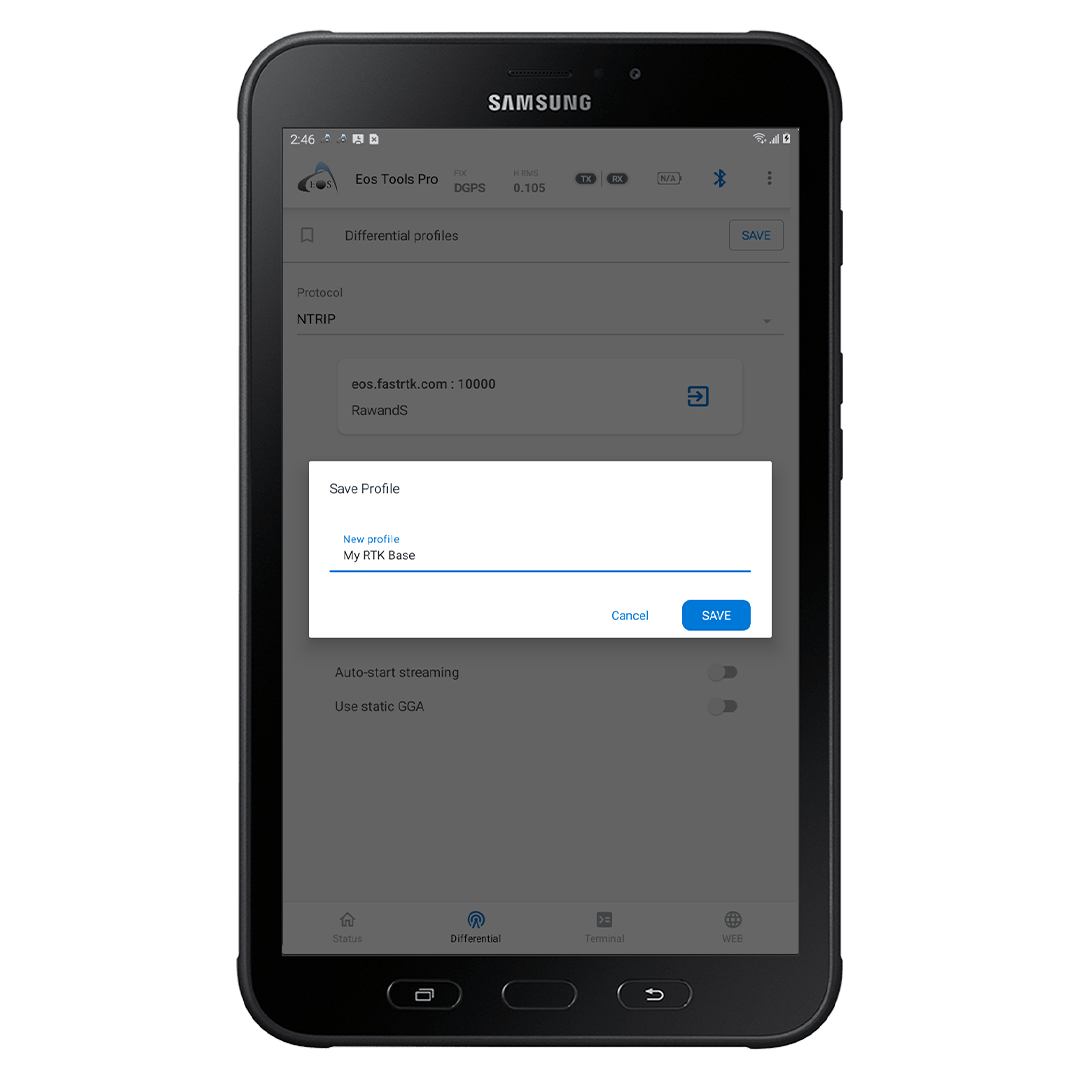
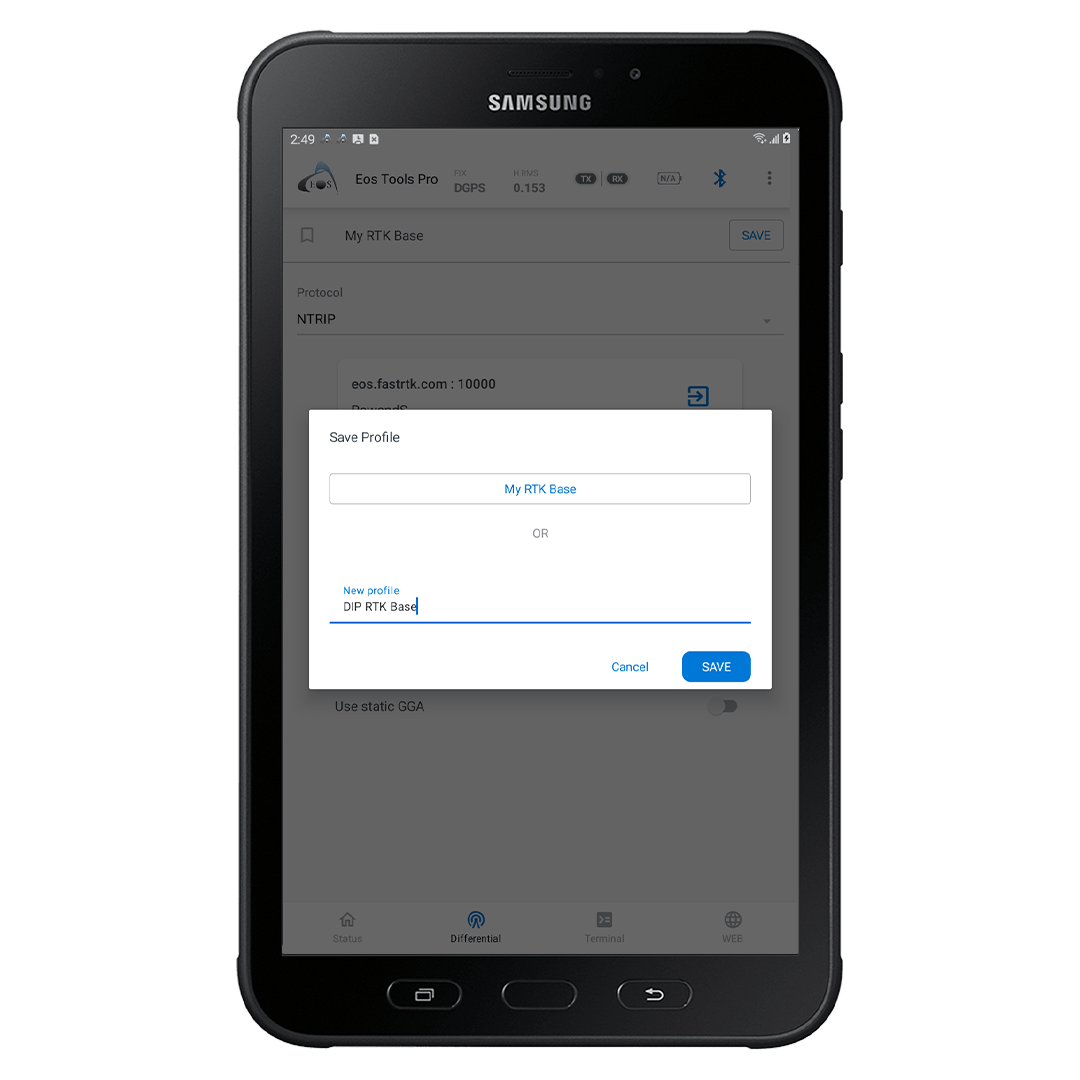
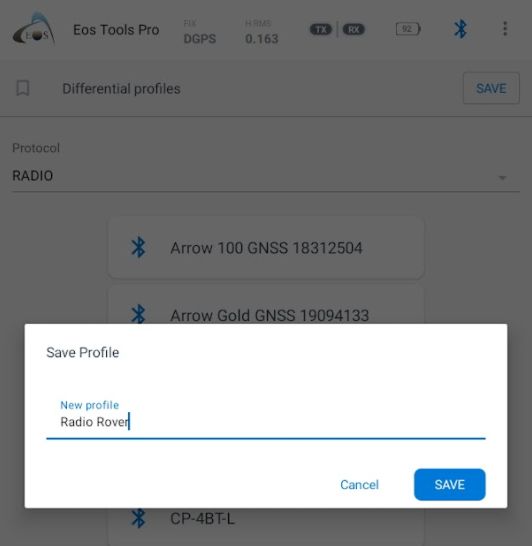
After entering your relevant credentials (e.g., IP, port, username, and password) in the previous steps and selecting your mountpoint (NTRIP only), you can tap on the Save button to store any NTRIP or DIP connection information in a profile. Simply give a name to your connection to access it later. See the example pictured below.
Once you save them, you will be able to choose these RTK base credentials in the future by tapping on “Differential Profiles” at the top of the menu and selecting your saved credentials.
Saving RTK Credentials via Radio
Select your radio from the Bluetooth® Paired Devices and then click on Save.
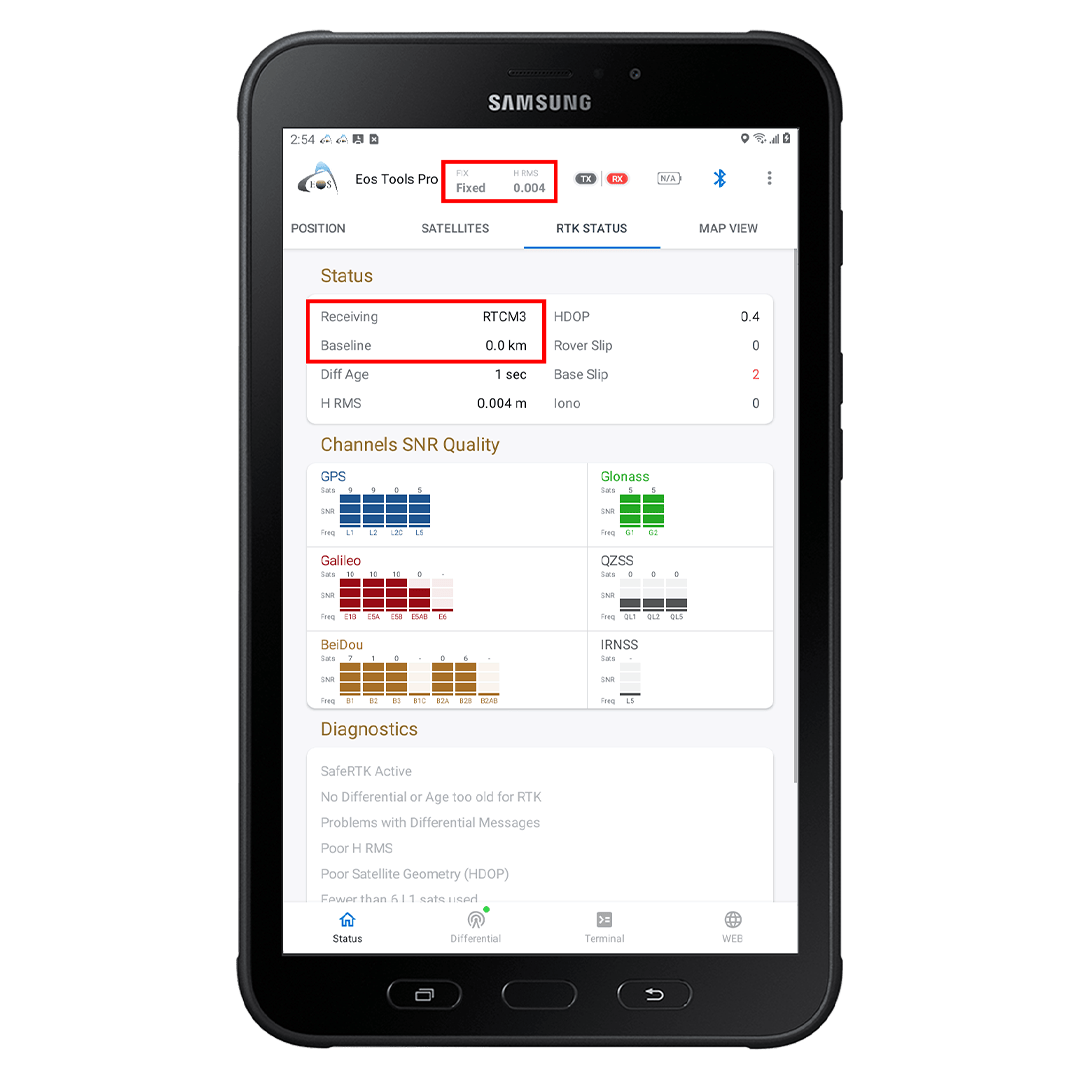
Validating You Are Receiving RTK Corrections
To confirm that your receiver is receiving RTK corrections, go to the Position menu and verify the following:
- The Diff Status has changed from GPS/DGPS to RTK Fixed or Float.
- The HRMS value has changed to lower numbers (e.g., a few centimeters or better) when in RTK Fixed.
- The Diff Station ID has changed to the ID of your base station or RTK network mountpoint (3 or 4 digits).
- The Diff Age (age of the corrections received) is now around 1-2 seconds.
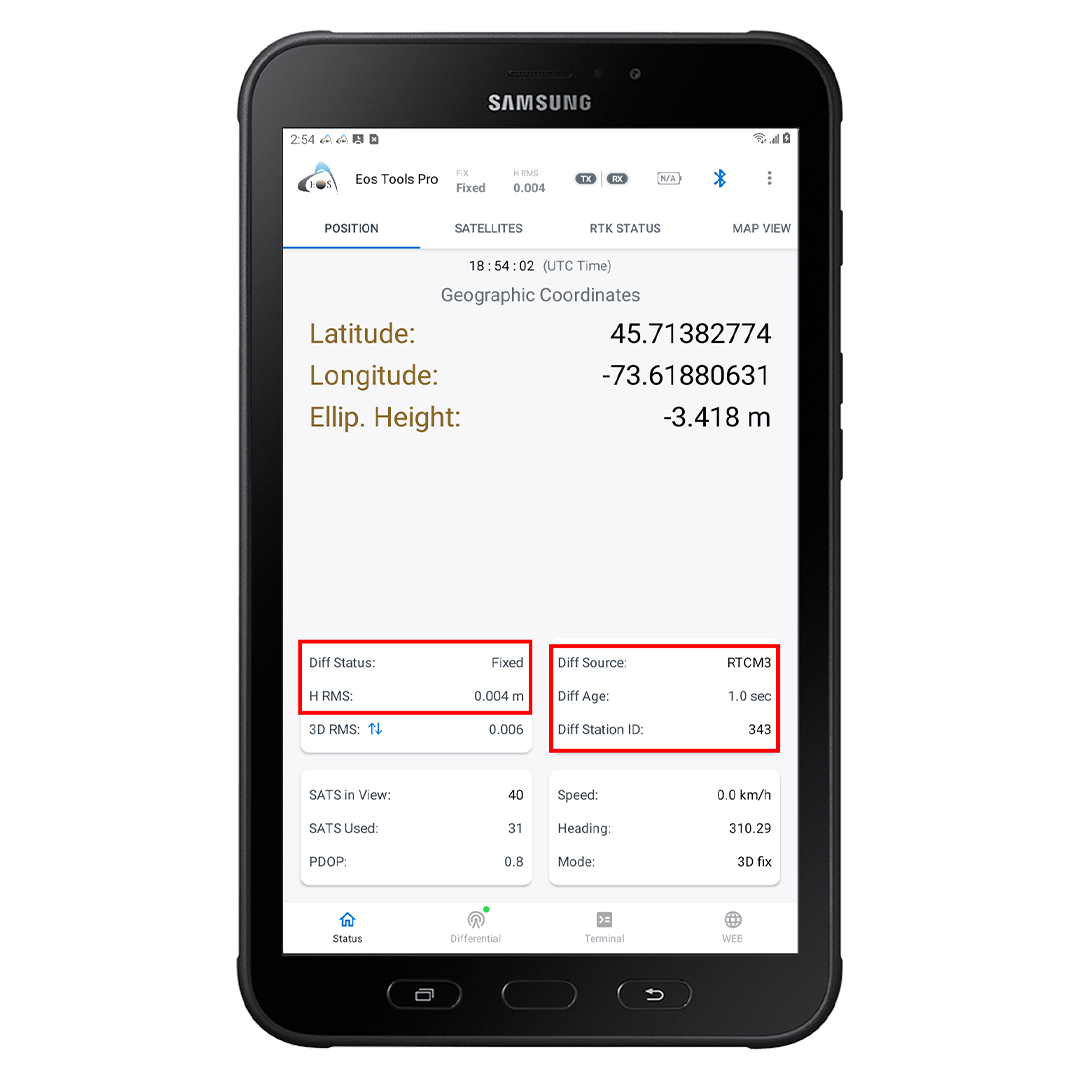
You can also check the RTK Status tab for the same values. You will also see the type of corrections received and the baseline length (i.e., distance from rover to the base station).
