Are you using an iOS® device with Esri’s ArcGIS® Field Maps and an Eos Arrow Series® GNSS receiver to collect high-accuracy GIS data? Do you sometimes notice that your high-accuracy GNSS positions appear out of sync with your existing maps? This is a situation our customers sometimes encounter. Thankfully, the resolution is simple. In this short guide, we will visit the world of coordinate systems and datum transformations. In doing so, we will shed some light on how to properly configure ArcGIS Field Maps (Field Maps) so that your Arrow GNSS data is not just highly accurate, but also highly precise in your GIS. Get ready for a step-by-step guide to configuring an important aspect of Field Maps, known as “location profiles.” Make sure to have your iOS device with Field Maps and your Arrow receiver ready!
At the time of writing this tutorial (autumn 2022) we are using the following app, firmware, and operating system versions from Eos Positioning Systems, Esri, and Apple:
- Eos Tools Pro: 2.3 build 139
- Eos Arrow Gold® GNSS: Receiver firmware v6.1Aa01 / Bluetooth® firmware 2.2.1187
- ArcGIS Field Maps for iOS: App version 22.3.0 build 791
- iPad® 9th Generation: iOS version 15.5
Before we begin, note that we have already paired and connected our Arrow Gold GNSS receiver and the iPad using Bluetooth. If you need help Bluetooth-pairing your Arrow receiver to an iOS device visit this Eos Knowledge base article.
If your receiver and mobile device are already paired, continue following the next steps …
1. Set Field Maps Location Provider to your Eos Arrow GNSS
First, we’re going to make sure we have the location provider properly set up in Esri’s ArcGIS Field Maps. This ensures Field Maps receives location data from the Arrow receiver instead of the Apple device’s integrated GPS receiver or any other iOS internal location source (such as wifi, cellular, etc.).
First, launch Field Maps on the iOS device (our screenshots use iPad but the same steps can be taken on iPhone). From the top left corner select the circular blue profile icon:
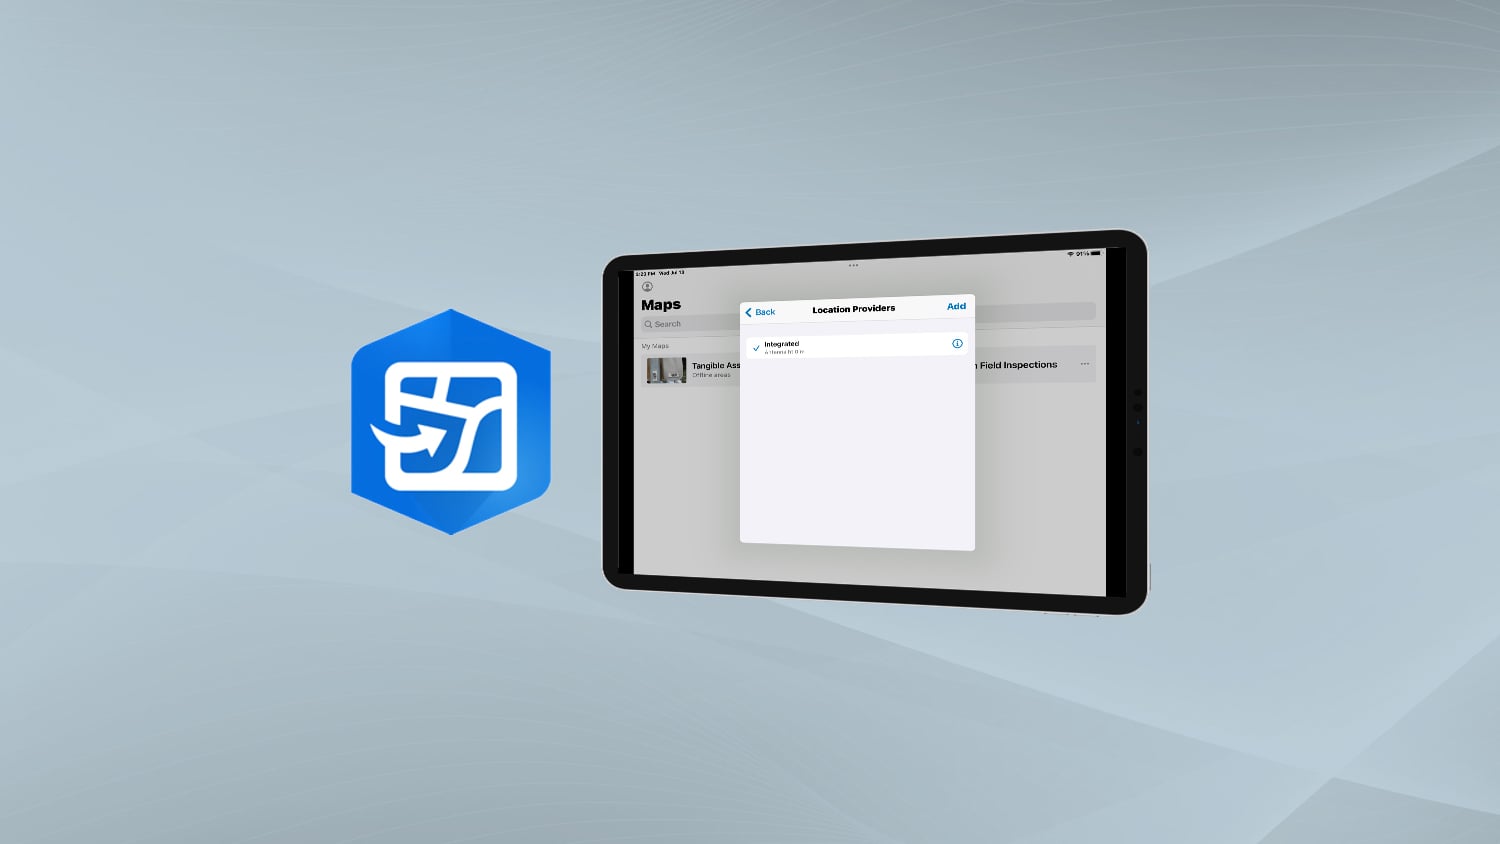
a. Under the “LOCATION” profile settings, tap “Provider,” which as a default should show “Integrated.”

b. Choose “Add” in the top right corner:

c. Because you have already paired your Arrow receiver to your mobile device, it will show up here. The receiver will be listed as “Eos Positioning Systems #SERIALNUMBER.” Tap “Add” again.

d. If you are using RTK, make sure to enter the proper antenna height, in meters. To find your antenna height, follow the steps in this article. Then tap “Done” in the upper right corner.

e. You have now configured your Arrow GNSS receiver as a location provider to Field Maps. But note: you still need to select this receiver as your location provider. So before tapping “Back” in the top left corner, it’s important to select (by tapping) the Arrow receiver you just added. You will see a blue checkmark appear next to the Arrow. If you have this checkmark, you can tap “Back.”

2. Configuring Location Profiles in ArcGIS Field Maps
Now that your Arrow is set as your location provider, you’re ready to configure location profiles. There are two types of location profiles you can configure in Field Maps:
- SBAS/Atlas® Location Profile: Follow these steps if you’re going to be using SBAS or Atlas as your source of differential corrections.
- RTK Location Profile: Follow these steps if you’re going to be receiving corrections from an RTK base station or RTK Network.
2.1 Configure an SBAS/Atlas Location Profile
a. Back in the Field Maps profile menu, again in the “LOCATION” group, tap “Profile,” which should be currently set to “Default.”

b. In the top right corner, tap “Add.”

c. In the search bar type “GCS ITRF 2008” and select either option: WKID 8999 or WKID 104257. (Both will work equally.) Click “Next” in the top right corner.

d. The next parameter you’ll be asked to configure is the map coordinate system, which in this case you’ll want the Field Maps default projection: WGS 1984. To choose this, type “Web Mercator” in the search field. Select the “WGS 1984 Web Mercator Auxiliary Sphere” (WKID 3857)” option and tap “Next.”

e. Now you’ll be prompted to set your map extent. Zoom in to your desired map extent. In this example, we’ll choose North America as our map extent. Your map extent will be based on where your field work will occur.

f. Next, you’ll be prompted to select the proper datum transformation. In this case, and as an example for the United States, you will want to select the first option:
“ITRF_2008_To_NAD_1983_2011 + ~WGS_1984_(ITRF08)_To_NAD_1983_2011”
Now tap “Done” in the top right corner.

g. The very last step is to give the location profile you just created a name. Let’s call this one “SBAS” then tap “Save.”

Your new location profile is ready to be used whenever you are using SBAS, Atlas or any other differential correction source referenced to an ITRF datum.
Note: At any time, you may review the parameters that were used in the making of this location profile by tapping the “i” icon.
h. Tap “Done” to go back to the location profiles list.

i. To use the new location profile you just configured, make sure to select it. You’ll know it’s selected if the blue check mark appears next to it.

Congratulations, you have created your first location profile! You can now use this with any Eos Arrow GNSS receiver when you’re receiving SBAS or Atlas corrections
Let’s take a look at what this would look like in the field.
In this Eos Tools Pro screenshot, we’re connected to an Arrow 100® that is receiving free SBAS corrections (in this case WAAS).

You can also verify that you’re using your “SBAS” location profile by checking the GPS details settings within Field Maps. Here’s an example of where our “SBAS” location profile is displayed in Field Maps.

Now, let’s address how to create a location profile for use with corrections from an RTK base station or RTK Network (RTN).
2.2 Configure an RTK Location Profile
a. If you are not still in the location profiles list, you’ll want to navigate there. Go to the Field Maps profile menu and tap “Profile” under the “LOCATION” settings group.

b. Tap “Add.”

Again, the first parameter you need to enter is the” GNSS Coordinate System”. Recall that the GNSS datum is assumed from the correction source, in this case the RTK base station or RTN. In the United States for example, RTK corrections are usually broadcast in reference to the NAD 83 (2011) datum, so for demonstration purposes we’ll stick with this datum.
NOTE: It is critical that you verify this parameter from your differential correction provider before proceeding.
c. In the search bar enter “GCS NAD 1983.” This will return a long list of NAD83 options, from which we will select epoch 2011 (WKID 6318).

d. The next parameter you’ll be prompted to set is the “Map Coordinate System.” This is defined by your web map in ArcGIS Field Maps, and we assume they are in the default WGS84 datum. In the “Search” field at the top of the prompt box, type “Web Mercator” and select “WGS 1984 Web Mercator Auxiliary Sphere (WKID 3857)” from the choices that show up.

e. Next you’ll be prompted to set your “Map Extent.” Simply zoom in to your desired extent, for example North America.

f. The last step is to select the proper datum transformation. Select the first option that appears, which is this:
~WGS_1984_(ITFR08)_To_NAD_1983_2011
Then tap “Done” in the top right corner.

g. You will now be prompted to give your location profile a name. Type a name you will remember into the “Profile Name” popup field. We’ll call this one “RTK” then tap “Save.”

h. Your new location profile is ready to be used whenever you are using an RTK base station or RTN as your differential correction source.
i. If at any point you wish to review the parameters that were used in the making of a location profile, tap the “i” icon to the right side of that location profile.
j. Tap “Done” in the top right corner; this will take you back to the location profiles list.

k. To use the new location profile you just created, make sure to select it. You will know it is selected if the blue check mark appears next to it.

Now that your RTK location profile is configured, let’s review what this would look like in the field in Eos Tools Pro. The Position menu in ETP shows that the position is fixed with a horizontal accuracy (HRMS) of 8mm.

An RTK-configured location profile like the one we just created together can be used with any Arrow GNSS receivers that is receiving differential corrections from a base station or RTK Network.
In Field Maps, you can see that our location profile, under the “GPS Details” settings, is set to the RTK location profile we just created, that the Fix Type is “RTK Fixed,” and that the estimated Horizontal Accuracy (RMS) reported is also indicating centimeter level accuracy. We now know that our GNSS position is precisely accurate in relation to our GIS data!

You have now learned how to set location profiles for both SBAS/Atlas and RTK applications in Field Maps. Let’s recap the key takeaways we covered …
3. Takeaways for Configuring Location Provider and Profiles
To summarize, there are three parameters you must define in order to create a useful location profile for GNSS data collection:
- GNSS Coordinate System – This is always defined by the differential correction source being used (e.g., SBAS, Atlas, or RTN).
- Map Coordinate System – This is defined by the web map coordinate system or the default web map in ArcGIS Field Maps.
- Datum Transformation – This is chosen by you in Field Maps from a list of transformations based on the two previous parameters.
Once you have identified each these parameters and completed the steps outlined above, your Arrow GNSS positions will be precisely accurate on your maps and will perfectly relate to the rest of your GIS data.
Stay Updated with Future Articles
Sign up for the monthly Eos newsletter to follow the Eos Knowledge Base for more helpful tips and resources.
Explore Related Knowledge Base Items

4 Free GPS Training Workshops: Start-to-Finish Training
Eos Positioning Systems was pleased to offer 4 live GPS training workshops for various ArcGIS apps. Contact Eos to request a recording.

How to Test the Accuracy of Your GNSS Receiver with a Survey Monument: Video Demonstration
Learn how to verify your GNSS receiver’s performance by using a survey monument in this video.